Your wedding reception deserves a sweet touch that leaves guests talking long after the last dance. From elegant cakes to fun dessert bars, there’s a world of delicious options that can elevate your celebration. Check out these 30 decadent dessert ideas that will not only satisfy your guests’ sweet tooth but also add a memorable flair to your big day!
Heavenly Cheesecake Bites
Cheesecake bites are delightful little desserts that bring a burst of creamy flavor in every bite. These treats offer a perfect balance of sweet and tangy, making them an irresistible addition to any wedding reception. Not only are they delicious, but they are also quite easy to prepare, ensuring that you can spend more time celebrating with your guests and less time in the kitchen.
Ideal for those looking for a fun twist on traditional cheesecake, these bite-sized delights can be customized with various toppings and flavors. From fruity to chocolatey, they cater to every palate, making them a fantastic choice among the 30 decadent dessert ideas for a memorable wedding reception.
Ingredients
- 1 cup graham cracker crumbs
- 1/4 cup granulated sugar
- 1/2 cup unsalted butter, melted
- 16 oz cream cheese, softened
- 1 cup powdered sugar
- 1 teaspoon vanilla extract
- 1/4 cup sour cream
- 1/4 cup fruit puree or chocolate for flavoring (optional)
- Fresh fruit, chocolate drizzle, or whipped cream for topping
Instructions
- Prepare the Crust: In a medium bowl, combine the graham cracker crumbs, granulated sugar, and melted butter. Mix until the crumbs are evenly coated. Press the mixture into the bottom of mini muffin tins to form the crust.
- Make the Cheesecake Filling: In a large bowl, beat the softened cream cheese until smooth. Gradually add the powdered sugar, mixing until combined. Stir in the vanilla extract and sour cream. If desired, blend in fruit puree or melted chocolate for added flavor.
- Fill the Crusts: Spoon the cheesecake mixture on top of the prepared crusts in the muffin tins, filling them about three-quarters full.
- Chill: Cover the muffin tins with plastic wrap and refrigerate for at least 4 hours or until set.
- Serve: Once set, carefully remove the cheesecake bites from the tins. Top with fresh fruit, chocolate drizzle, or whipped cream before serving.
Rich Tiramisu Parfaits
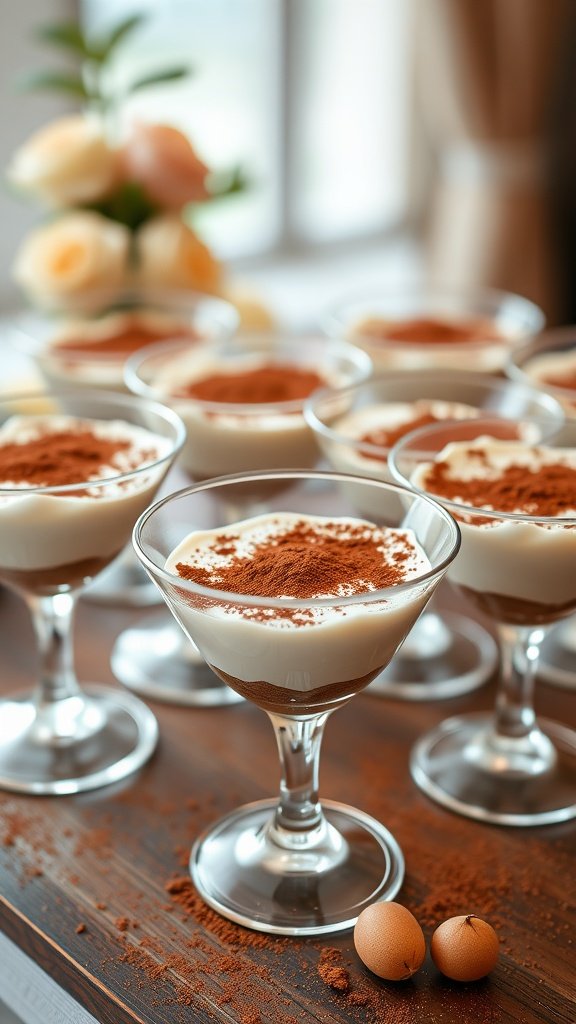
Rich tiramisu parfaits are a delightful treat for any wedding reception. This layered dessert combines the classic flavors of coffee-soaked ladyfingers with a creamy mascarpone filling, providing a perfect balance of sweetness and richness.
Not only do these parfaits taste amazing, but they are also simple to prepare. They can be assembled ahead of time, making them an excellent choice for a stress-free dessert option during your memorable celebration.
Ingredients
- 1 cup strong brewed coffee, cooled
- 1/2 cup coffee liqueur (optional)
- 1 package ladyfingers (about 24)
- 1 cup heavy whipping cream
- 8 oz mascarpone cheese, softened
- 1/2 cup powdered sugar
- 1 teaspoon vanilla extract
- Cocoa powder for dusting
Instructions
- Prepare the Coffee Mixture: In a shallow dish, combine the cooled coffee and coffee liqueur (if using).
- Soak the Ladyfingers: Quickly dip each ladyfinger into the coffee mixture, allowing them to soak for just a few seconds. Avoid soaking them for too long to keep them from becoming soggy.
- Make the Cream Mixture: In a mixing bowl, whip the heavy cream until soft peaks form. In another bowl, mix the mascarpone cheese, powdered sugar, and vanilla extract until smooth. Gently fold the whipped cream into the mascarpone mixture until combined.
- Layer the Parfaits: In serving glasses, layer the soaked ladyfingers and mascarpone cream. Start with a layer of ladyfingers, followed by a layer of cream, and repeat until the glasses are filled.
- Chill and Serve: Refrigerate the parfaits for at least 2 hours to let the flavors meld. Just before serving, dust the tops with cocoa powder for an elegant finish.
Charming Cupcake Bar
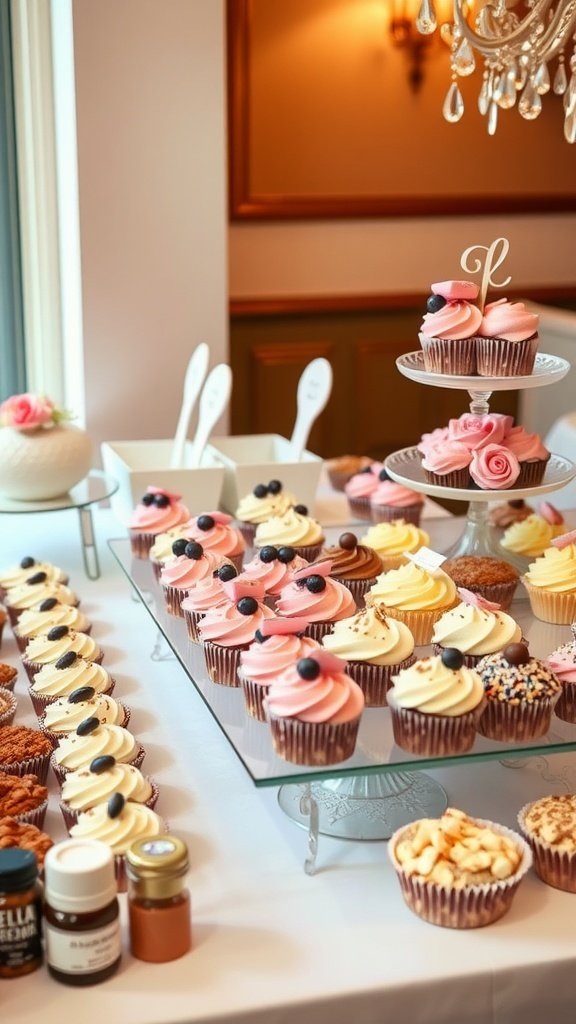
A cupcake bar is a delightful addition to any wedding reception, allowing guests to customize their sweet treats just the way they like. With a variety of flavors and toppings, each cupcake can become a personal masterpiece. The soft, moist cake paired with luscious frosting creates a treat that’s hard to resist. Plus, building a cupcake bar is quite straightforward, making it a fun and interactive dessert option for everyone.
Imagine the joy of guests selecting their favorite flavors, from classic vanilla to rich chocolate, and choosing from an array of toppings like sprinkles, fresh fruits, and decadent drizzles. This interactive experience adds a touch of charm to your reception while satisfying every sweet tooth in attendance. Here’s a simple recipe to create your delicious cupcakes:
Ingredients
- 1 ½ cups all-purpose flour
- 1 cup granulated sugar
- ½ cup unsalted butter, softened
- 2 large eggs
- ½ cup milk
- 2 teaspoons baking powder
- 1 teaspoon vanilla extract
- ½ teaspoon salt
Instructions
- Preheat the oven to 350°F (175°C) and line a muffin tin with cupcake liners.
- In a large bowl, cream together the softened butter and sugar until light and fluffy.
- Add the eggs, one at a time, mixing well after each addition. Stir in the vanilla extract.
- In another bowl, mix the flour, baking powder, and salt. Gradually add this dry mixture to the wet ingredients, alternating with the milk. Mix until just combined.
- Fill each cupcake liner about two-thirds full with the batter and bake for 18-20 minutes, or until a toothpick inserted in the center comes out clean.
- Let the cupcakes cool completely before frosting and decorating as desired.
Delicious Fresh Fruit Tartlets
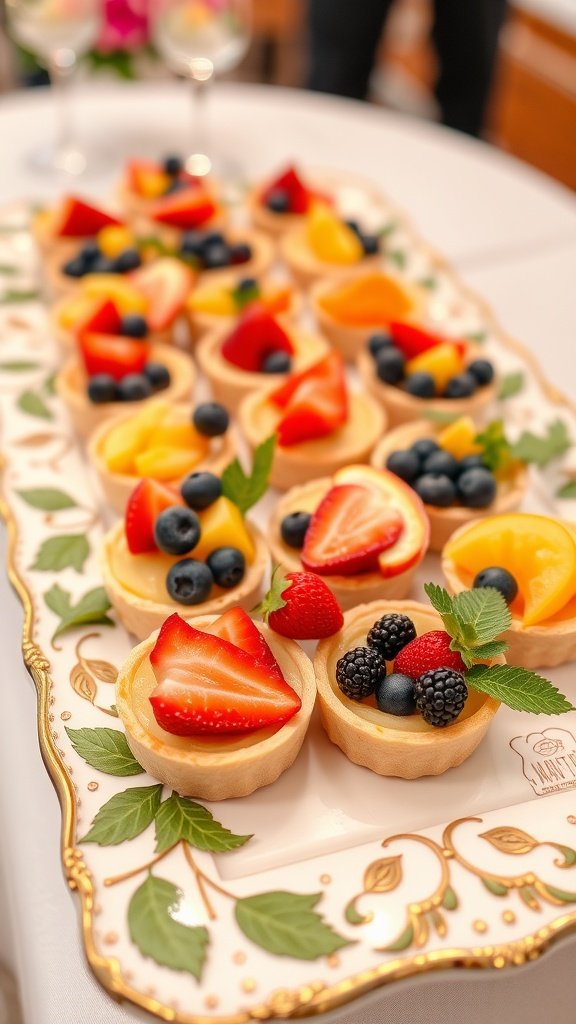
Fresh fruit tartlets are a delightful addition to any wedding reception, offering a burst of color and flavor that perfectly complements the celebration. These mini desserts feature a buttery pastry shell filled with creamy custard and topped with a variety of fresh fruits. With their sweet and tangy taste, each bite is refreshingly light, making them a crowd favorite.
These tartlets are surprisingly simple to make, allowing you to impress your guests without spending all day in the kitchen. The combination of textures and flavors—crisp shell, smooth custard, and juicy fruit—makes them a treat worth sharing. If you’re looking for a sweet yet elegant dessert to include in your list of 30 decadent dessert ideas for a memorable wedding reception, these fruit tartlets are sure to shine.
Ingredients
- 1 ½ cups all-purpose flour
- ½ cup unsalted butter, softened
- ¼ cup granulated sugar
- 1 large egg yolk
- 2-3 tablespoons cold water
- 1 cup pastry cream (store-bought or homemade)
- Assorted fresh fruits (such as strawberries, blueberries, kiwi, and peaches)
- Mint leaves for garnish (optional)
Instructions
- Make the Pastry Dough: In a mixing bowl, combine flour and sugar. Add the softened butter and mix until crumbly. Stir in the egg yolk and add cold water one tablespoon at a time until the dough comes together.
- Chill the Dough: Form the dough into a ball, wrap in plastic wrap, and refrigerate for at least 30 minutes.
- Preheat the Oven: Preheat your oven to 350°F (175°C).
- Shape the Tartlet Shells: Roll out the chilled dough on a floured surface to about ¼ inch thick. Cut into circles and press them into mini tartlet pans. Prick the bottoms with a fork to prevent bubbling.
- Bake the Shells: Bake for 10-12 minutes, or until lightly golden. Let them cool completely.
- Fill the Tartlets: Spoon the pastry cream evenly into the cooled tartlet shells.
- Top with Fruit: Arrange the fresh fruits on top of the pastry cream as desired. Garnish with mint leaves if you like.
- Serve: Enjoy the tartlets immediately, or refrigerate for a short time before serving.
Exquisite Macaron Tower
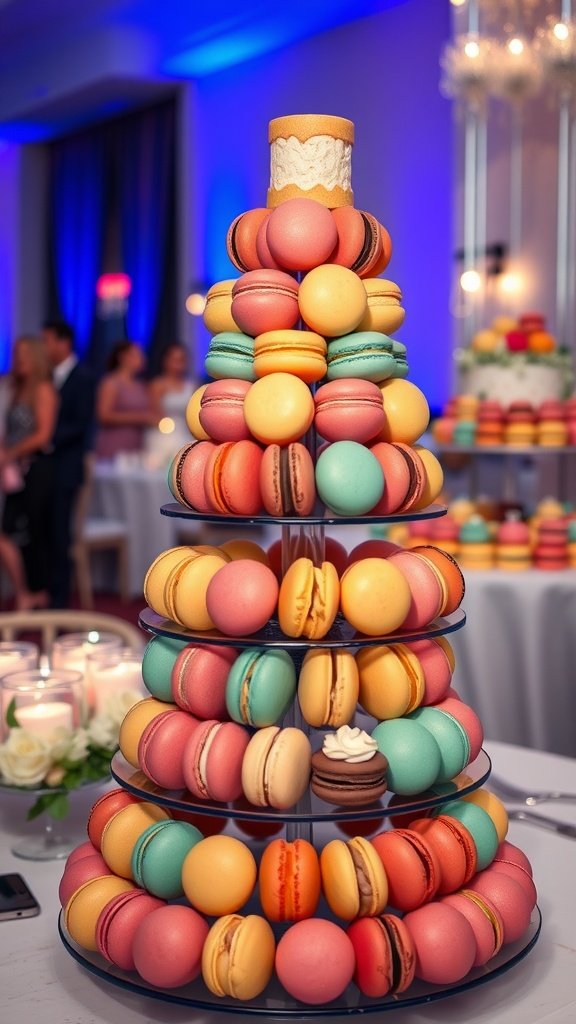
Macarons are elegant little treats that not only taste delightful but also look stunning, making them a popular choice for wedding receptions. These delicate cookies have a crisp shell and a chewy interior, filled with a variety of flavorful fillings like buttercream, ganache, or fruit preserves. Creating a macaron tower is a fun way to showcase these colorful confections, adding a touch of sophistication to your dessert table.
While macarons may seem tricky to make, with a little practice, you can master them. The process involves whipping egg whites to create a meringue, folding in almond flour and powdered sugar, and piping the mixture into uniform circles. Once baked, you can assemble them in a delightful tower that will enchant your guests. Here’s a simple recipe to get you started on your macaron journey!
Ingredients
- 1 cup almond flour
- 1 3/4 cups powdered sugar
- 3 large egg whites, at room temperature
- 1/4 cup granulated sugar
- 1 teaspoon vanilla extract
- 2-3 drops food coloring (optional)
- 1 cup butter, softened
- 2 cups powdered sugar (for filling)
- 1 teaspoon vanilla extract (for filling)
Instructions
- Prep the Baking Sheets: Preheat your oven to 300°F (150°C). Line two baking sheets with parchment paper.
- Make the Macaron Batter: In a bowl, sift together almond flour and powdered sugar. In a separate bowl, whip egg whites until foamy. Gradually add granulated sugar and continue whipping until stiff peaks form. Fold the dry mixture into the meringue, adding food coloring if using, until well combined.
- Pipe the Macarons: Transfer the batter into a piping bag fitted with a round tip. Pipe small circles onto the prepared baking sheets, leaving space in between. Tap the sheets gently to release air bubbles and let them sit for 30-60 minutes until they form a skin.
- Bake the Macarons: Bake in the preheated oven for 15-20 minutes, or until they easily lift from the parchment. Let them cool completely before removing.
- Prepare the Filling: Beat together butter, powdered sugar, and vanilla extract until smooth. Use this mixture to fill half of the macaron shells and top with the other half.
Lavish Chocolate Fondue Fountain
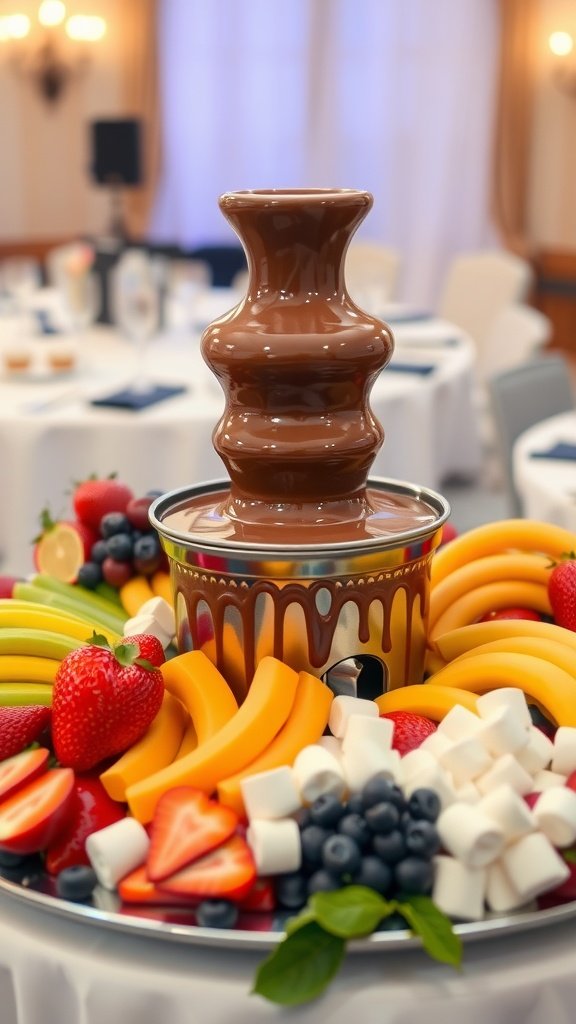
Chocolate fondue fountains bring a touch of elegance to any wedding reception. This delightful display allows guests to dip an array of treats into warm, flowing chocolate, making it a fun and interactive dessert experience. The rich, velvety chocolate pairs perfectly with fresh fruits, marshmallows, and other sweet treats, creating a delightful mix of flavors and textures.
Making a chocolate fondue fountain is quite simple and requires minimal effort. Just melt quality chocolate, pour it into the fountain, and let the fun begin! Guests will love selecting their favorite dippables, making it a memorable highlight of your event. Here’s a straightforward recipe to get you started on this indulgent treat.
Ingredients
- 2 cups semi-sweet chocolate chips
- 1/2 cup heavy cream
- 1 teaspoon vanilla extract
- Fresh strawberries
- Banana slices
- Marshmallows
- Mini pretzels
- Rice Krispies treats
Instructions
- Prepare the Chocolate: In a microwave-safe bowl, combine the chocolate chips and heavy cream. Microwave in 30-second intervals, stirring in between, until melted and smooth. Add vanilla extract and mix well.
- Set Up the Fountain: Pour the melted chocolate into the base of the fondue fountain, ensuring it reaches the minimum fill line.
- Prepare Dippables: Arrange fresh strawberries, banana slices, marshmallows, mini pretzels, and Rice Krispies treats on a large platter around the fountain.
- Start the Fountain: Turn on the fountain and watch the chocolate flow! Let guests dip their chosen treats into the warm chocolate.
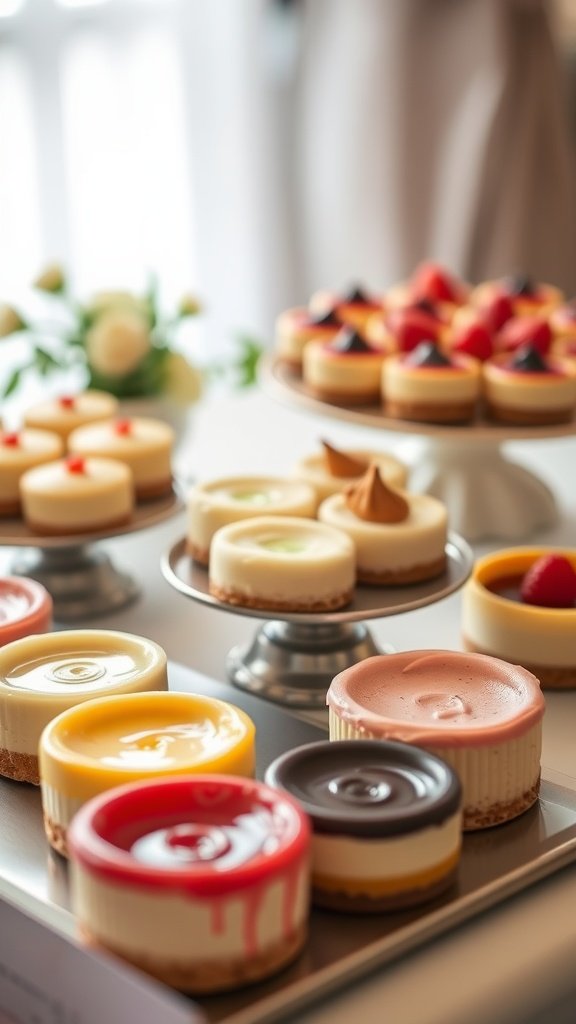
Elegant Miniature Wedding Cakes
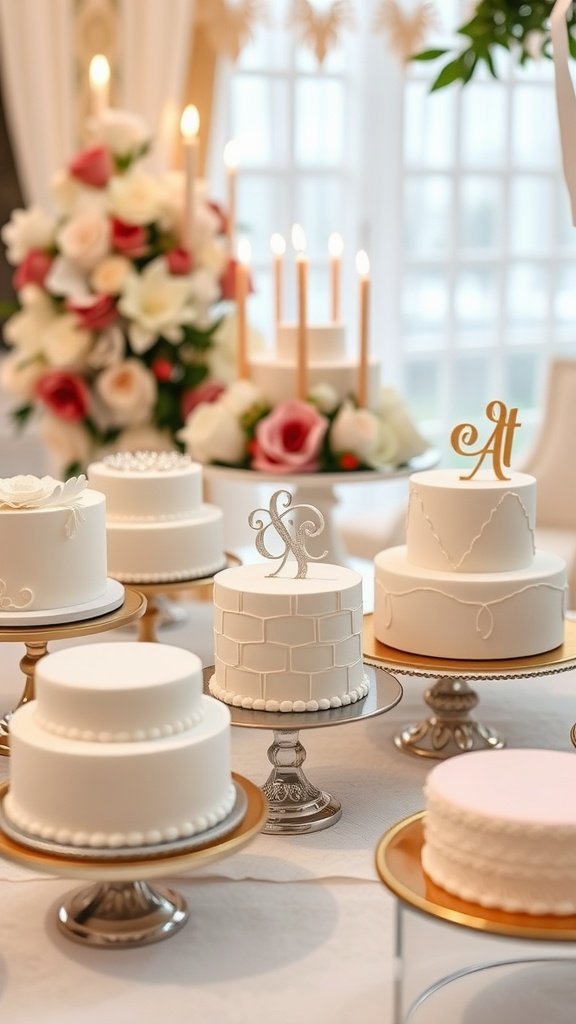
Miniature wedding cakes are a delightful way to add elegance and charm to any wedding reception. These small, beautifully decorated cakes not only provide a touch of sophistication but are also a treat for guests to enjoy. With a variety of flavors and designs, they can be customized to match the wedding theme or couple’s personal taste, making them a fun addition to the dessert table.
Making miniature wedding cakes is simpler than you might think! They often require basic cake and frosting recipes but can be dressed up with intricate decorations that elevate their appearance. Whether you’re a baking novice or an experienced home chef, these little cakes are both manageable and enjoyable to create.
Ingredients
- 1 cup all-purpose flour
- 1 cup granulated sugar
- 1/2 cup unsalted butter, softened
- 2 large eggs
- 1/2 cup milk
- 1 teaspoon vanilla extract
- 1 teaspoon baking powder
- 1/4 teaspoon salt
- 2 cups buttercream frosting (prepared)
- Fondant for decoration (optional)
- Fresh flowers or edible decorations (for garnish)
Instructions
- Preheat the oven to 350°F (175°C) and prepare a miniature cake pan or muffin tin with baking spray.
- In a mixing bowl, cream together the softened butter and sugar until light and fluffy. Add the eggs, milk, and vanilla extract, mixing until well combined.
- In another bowl, whisk together the flour, baking powder, and salt. Gradually add the dry ingredients to the wet mixture, combining until just incorporated.
- Pour the batter into the prepared pans, filling each about two-thirds full. Bake for 15-20 minutes, or until a toothpick inserted in the center comes out clean.
- Allow the cakes to cool completely before frosting. Once cooled, use a spatula to spread buttercream frosting on each cake. For a polished look, cover with fondant and add decorative elements like fresh flowers or intricate designs.
Decadent Chocolate Mousse Cups
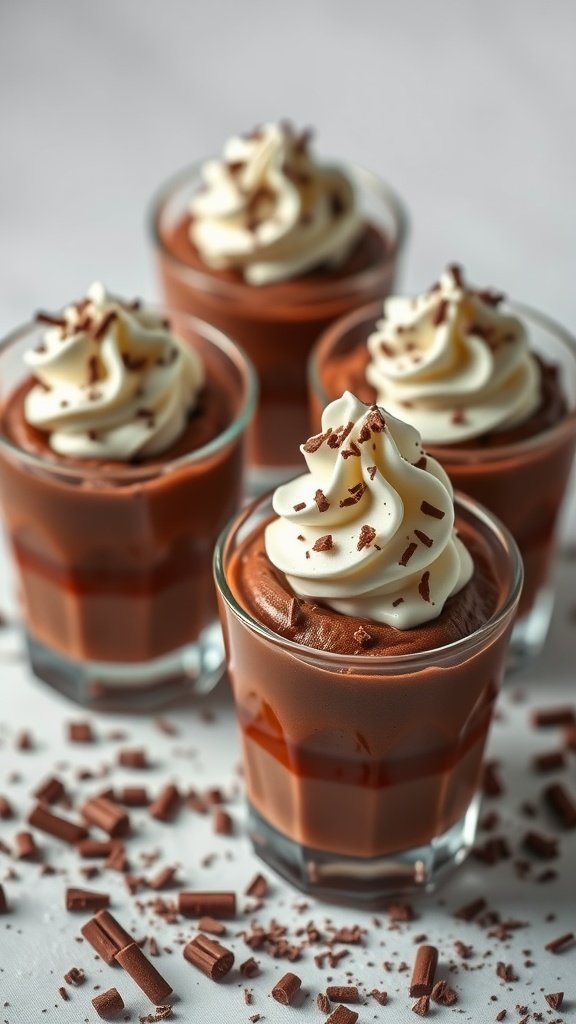
Chocolate mousse cups are a delightful way to indulge your guests with a rich and creamy dessert. Each spoonful is a blend of smooth chocolate and airy texture that melts in your mouth, offering a luxurious treat that’s perfect for a wedding reception. Not only do they taste divine, but they are also simple to prepare, allowing you to focus on enjoying your special day.
The versatility of chocolate mousse cups makes them a standout choice among the 30 decadent dessert ideas for a memorable wedding reception. You can dress them up with various toppings, such as whipped cream and chocolate shavings, to match your wedding theme. Plus, they can be made ahead of time, which is a bonus when planning your big event!
Ingredients
- 1 cup heavy cream
- 4 ounces semisweet chocolate, chopped
- 2 tablespoons granulated sugar
- 1 teaspoon vanilla extract
- 2 large eggs
- 1/4 teaspoon salt
- Extra whipped cream and chocolate shavings for garnish
Instructions
- Prepare the Chocolate: In a microwave-safe bowl, melt the chopped chocolate in 30-second intervals until smooth. Let it cool slightly.
- Whip the Cream: In a separate bowl, whip the heavy cream with sugar and vanilla until soft peaks form. Set aside.
- Whisk Eggs: In another bowl, whisk the eggs and salt until light and frothy. Gradually fold in the melted chocolate until well combined.
- Combine Mixtures: Gently fold the whipped cream into the chocolate mixture until no streaks remain, being careful not to deflate the mousse.
- Chill: Spoon the mousse into serving cups and refrigerate for at least 2 hours until set.
- Serve: Top with additional whipped cream and chocolate shavings before serving to your guests.
Romantic Raspberry Rose Panna Cotta
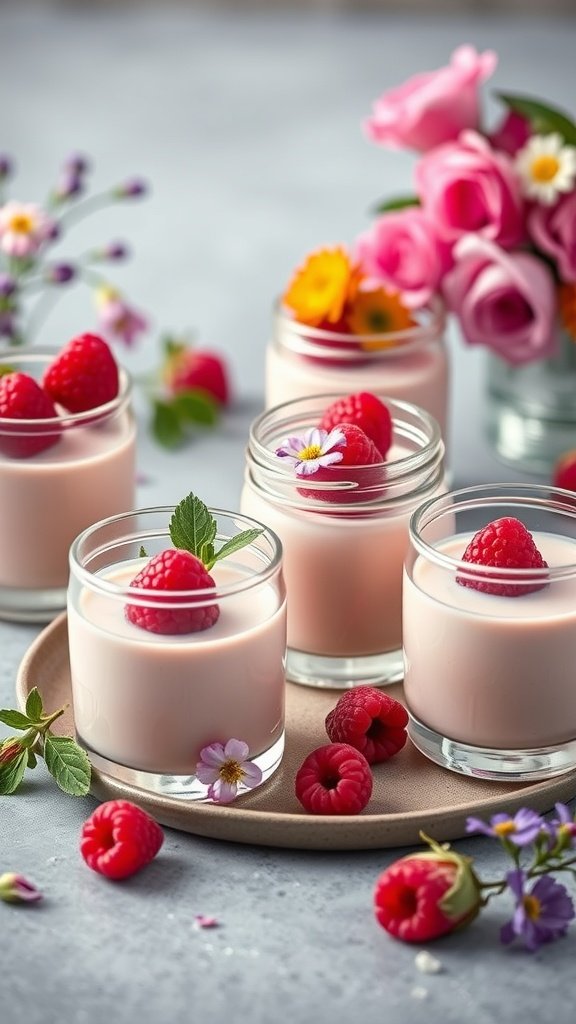
Raspberry Rose Panna Cotta is a delightful dessert that beautifully combines the floral essence of rose with the tangy sweetness of raspberries. This creamy treat is not only delicious but is also surprisingly simple to make, making it a perfect addition to your list of 30 Decadent Dessert Ideas for a Memorable Wedding Reception.
Each spoonful is a smooth, velvety delight that melts in your mouth, thanks to the luscious cream and the fragrant rosewater. It’s light yet indulgent, making it an ideal way to end a romantic meal. Plus, its elegant presentation adds a touch of sophistication to your celebration.
Ingredients
- 1 cup heavy cream
- 1 cup whole milk
- 1/2 cup granulated sugar
- 2 teaspoons unflavored gelatin
- 2 tablespoons water
- 2 tablespoons rosewater
- 1 cup fresh raspberries
- Fresh mint leaves for garnish
Instructions
- Prepare the Gelatin: In a small bowl, sprinkle gelatin over water and let it bloom for about 5 minutes.
- Heat the Cream: In a saucepan, combine heavy cream, milk, and sugar. Heat over medium heat until the sugar dissolves, and the mixture is warm but not boiling.
- Add Gelatin: Remove from heat and stir in the bloomed gelatin until fully dissolved. Then, mix in the rosewater.
- Pour into Jars: Divide the mixture into small jars and refrigerate for at least 4 hours or until set.
- Top and Serve: Before serving, top the panna cotta with fresh raspberries and garnish with mint leaves.
Gourmet S’mores Station
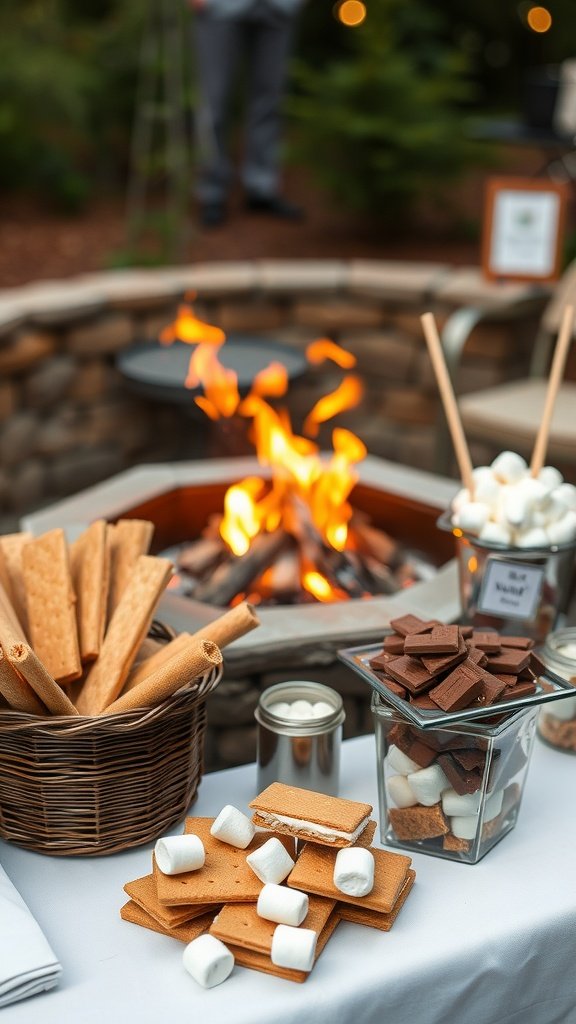
Setting up a gourmet s’mores station at your wedding reception adds a fun and interactive twist to a classic dessert. Guests can customize their treats with a variety of chocolates, flavored marshmallows, and specialty graham crackers, creating a delightful experience that taps into nostalgia. The combination of warm, gooey marshmallows and rich chocolate sandwiched between crispy graham crackers is sure to satisfy any sweet tooth.
This station is not only easy to set up but also allows for creativity and personalization, making it a memorable addition to your celebration. It’s the perfect way to engage guests, encouraging them to mix and match flavors for their own unique s’mores experience, contributing to the festive atmosphere of your special day.
Ingredients
- Graham crackers, broken in half
- Marshmallows (regular and flavored)
- Chocolate bars (milk, dark, and white)
- Peanut butter cups
- Caramel squares
- Mini chocolate chips
- Skewers for roasting
- Optional toppings: crushed nuts, sprinkles, and sea salt
Instructions
- Set up a fire pit or tabletop burner to roast the marshmallows safely.
- Arrange the graham crackers, marshmallows, and chocolates on a table for guests to access easily.
- Provide skewers for roasting marshmallows over the fire and encourage guests to toast them to their liking.
- Once the marshmallows are toasted, have guests layer their s’mores with their chosen ingredients, using the graham crackers as a base.
- Serve and enjoy the delicious, customizable s’mores!
Savory Chocolate-Dipped Strawberries
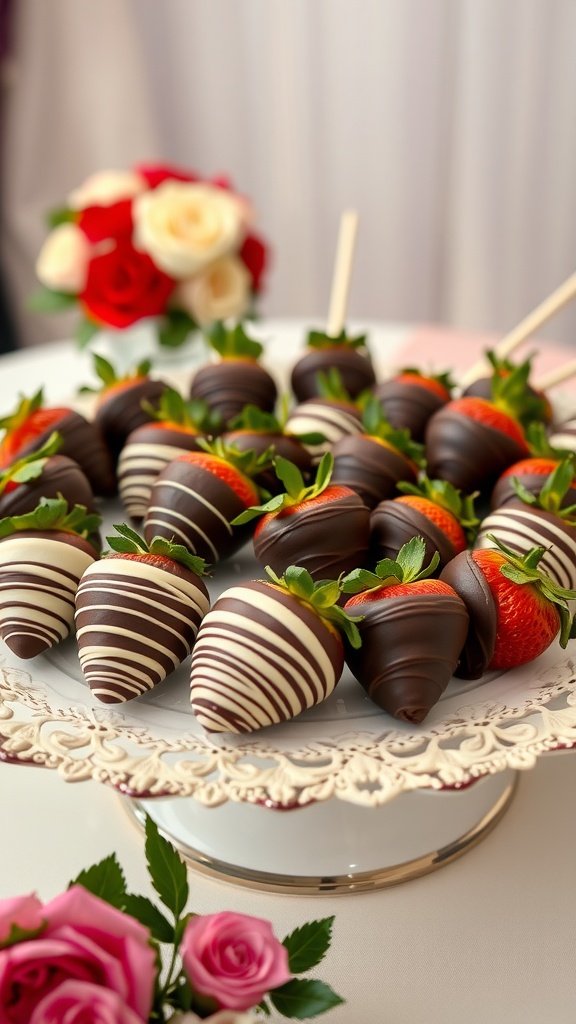
Chocolate-dipped strawberries are a delightful treat that combine the freshness of ripe strawberries with the rich sweetness of chocolate. They’re not only visually appealing but also incredibly tasty, making them a fantastic addition to any wedding dessert table. Plus, they’re surprisingly easy to make, so you can impress your guests without spending all day in the kitchen!
These strawberries offer a wonderful balance of flavors and textures, with the crisp outer chocolate coating giving way to the juicy fruit inside. Whether you choose to dip them in dark, milk, or white chocolate, you can easily customize them to fit your wedding theme. With just a few ingredients and simple steps, they can be ready in no time!
Ingredients
- 1 pound fresh strawberries, rinsed and dried
- 8 ounces dark chocolate, chopped
- 4 ounces milk chocolate, chopped
- 4 ounces white chocolate, chopped
- Sprinkles or crushed nuts (optional, for decoration)
Instructions
- Melt the Chocolate: In separate heatproof bowls, melt the dark, milk, and white chocolate using a microwave or a double boiler. Stir until smooth.
- Dip the Strawberries: Hold each strawberry by the stem and dip it into the melted chocolate, allowing any excess to drip off. For added flair, you can drizzle a different chocolate over the top.
- Decorate: If desired, sprinkle with nuts or colorful sprinkles while the chocolate is still wet.
- Set: Place the dipped strawberries on a parchment-lined baking sheet and let them set in the refrigerator for about 30 minutes until the chocolate hardens.
- Serve: Arrange the strawberries on a beautiful platter and enjoy them at your wedding reception!
Lavender Lemonade Sorbet
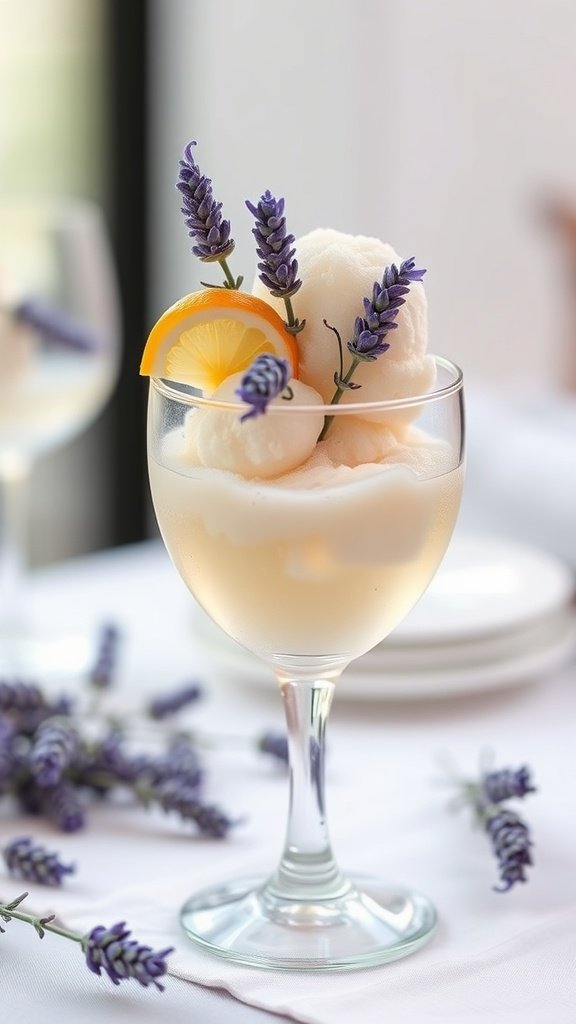
Lavender Lemonade Sorbet is a refreshing and aromatic dessert that perfectly balances the tang of lemon with the floral notes of lavender. It’s a delightful palate cleanser, making it a lovely addition to any wedding reception. Not only does it taste wonderful, but it’s also surprisingly simple to whip up.
This sorbet can be made ahead of time, allowing you to focus on other details of your special day. Its light and invigorating flavor is sure to impress your guests, bringing a touch of elegance to your dessert table. Plus, the beautiful presentation with lavender sprigs makes it not only tasty but visually appealing too.
Ingredients
- 2 cups water
- 1 cup granulated sugar
- 2 tablespoons dried culinary lavender
- 1 cup freshly squeezed lemon juice
- 1 tablespoon lemon zest
- 1/4 teaspoon salt
Instructions
- Prepare the Lavender Syrup: In a saucepan, combine water, sugar, and dried lavender. Bring to a boil, then reduce heat and simmer for 5 minutes. Remove from heat and let it steep for 30 minutes.
- Strain the Syrup: Strain the lavender syrup through a fine mesh sieve into a bowl, discarding the lavender flowers. Let it cool to room temperature.
- Mix the Ingredients: Once the syrup is cool, add the lemon juice, lemon zest, and salt. Stir until well combined.
- Chill the Mixture: Refrigerate the mixture for at least 2 hours until it’s very cold.
- Freeze the Sorbet: Pour the chilled mixture into an ice cream maker and churn according to the manufacturer’s instructions. Once it reaches a soft-serve consistency, transfer it to an airtight container and freeze for at least 4 hours until firm.
- Serve: Scoop the sorbet into bowls or glasses, and garnish with fresh lavender sprigs or lemon slices for a beautiful presentation.
Classic Red Velvet Cake

Classic Red Velvet Cake is a beautiful dessert that brings a touch of elegance to any wedding reception. With its striking red color and rich, tangy flavor, this cake is not only visually appealing but also delightful to taste. It features a soft, moist texture that pairs perfectly with a creamy frosting, making every bite a treat.
This recipe is simple enough for bakers of all skill levels, ensuring that you can create a memorable dessert with minimal fuss. It’s a lovely addition to our list of 30 Decadent Dessert Ideas for a Memorable Wedding Reception, sure to impress your guests.
Ingredients
- 2 1/2 cups all-purpose flour
- 1 1/2 cups granulated sugar
- 1 teaspoon baking soda
- 1 teaspoon salt
- 1 teaspoon cocoa powder
- 1 cup vegetable oil
- 1 cup buttermilk, room temperature
- 2 large eggs
- 2 tablespoons red food coloring
- 1 teaspoon vanilla extract
- 1 teaspoon white vinegar
- 1 cup cream cheese, softened
- 1/2 cup unsalted butter, softened
- 4 cups powdered sugar
- 1 teaspoon vanilla extract
Instructions
- Preheat the oven to 350°F (175°C). Grease and flour two 9-inch round cake pans.
- In a large bowl, sift together flour, sugar, baking soda, salt, and cocoa powder.
- In another bowl, whisk together oil, buttermilk, eggs, food coloring, vanilla extract, and vinegar.
- Gradually add the wet ingredients to the dry ingredients, mixing until just combined.
- Divide the batter evenly between the prepared pans and smooth the tops.
- Bake for 25-30 minutes or until a toothpick inserted in the center comes out clean. Let the cakes cool in the pans for 10 minutes, then transfer to wire racks to cool completely.
- For the frosting, beat together cream cheese and butter until smooth. Gradually add powdered sugar and vanilla extract, mixing until creamy.
- Once the cakes are completely cooled, place one layer on a serving plate. Spread a layer of frosting on top, then place the second layer on top and frost the top and sides of the cake.
- Decorate as desired and serve at your wedding reception.
Charming Cookie Table
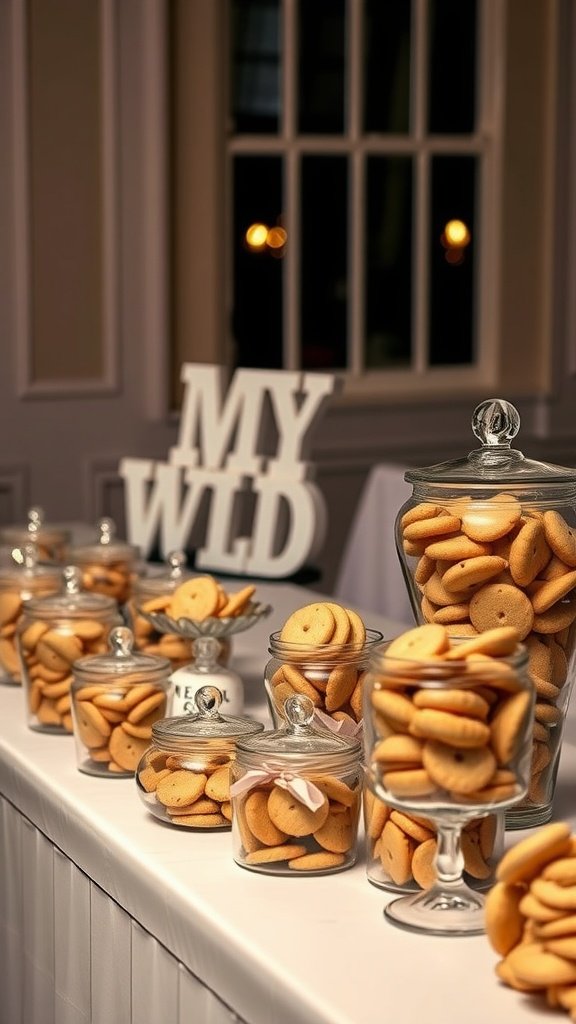
A charming cookie table can add a sweet touch to your wedding reception, showcasing an array of delightful treats that cater to every taste. Cookies offer a variety of flavors and textures, making them perfect for guests to nibble on throughout the celebration. Plus, they are usually simple to prepare, allowing you to focus on other wedding details.
Consider baking classic favorites like chocolate chip, snickerdoodle, and oatmeal raisin. You can also mix in some unique flavors like lavender or salted caramel for a fun twist. Displaying these treats in glass jars adds a charming visual element that makes it easy for guests to grab their favorites.
Ingredients
- 2 3/4 cups all-purpose flour
- 1 teaspoon baking soda
- 1 teaspoon salt
- 1 cup unsalted butter, softened
- 3/4 cup granulated sugar
- 3/4 cup brown sugar, packed
- 1 teaspoon vanilla extract
- 2 large eggs
- 2 cups semi-sweet chocolate chips
Instructions
- Preheat the Oven: Preheat your oven to 375°F (190°C) and line baking sheets with parchment paper.
- Mix Dry Ingredients: In a bowl, combine flour, baking soda, and salt. Set aside.
- Cream Butter and Sugars: In a large mixing bowl, cream together the softened butter, granulated sugar, and brown sugar until smooth. Add vanilla extract and mix well.
- Add Eggs: Beat in the eggs one at a time, ensuring each is fully incorporated before adding the next.
- Combine Mixtures: Gradually add the dry ingredients to the wet mixture, stirring just until combined. Fold in the chocolate chips.
- Shape and Bake: Drop rounded tablespoons of dough onto the prepared baking sheets. Bake for 9-11 minutes, or until the edges are golden brown. Let them cool on the sheets for a few minutes before transferring to wire racks.
Decadent Brownie Sundae Bar
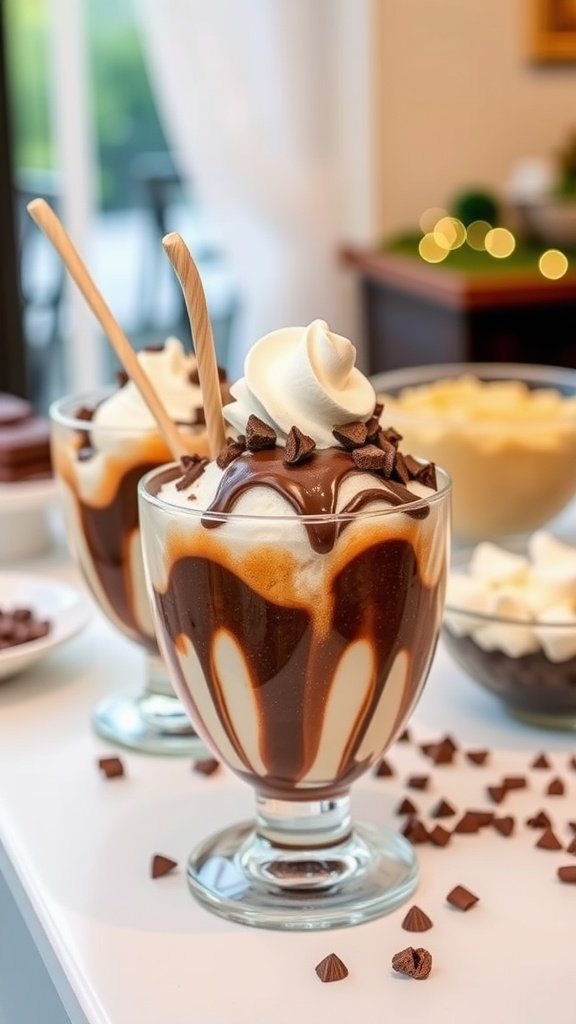
Imagine a dessert that combines the rich, fudgy goodness of brownies with the creamy indulgence of ice cream. A Brownie Sundae Bar is a delightful way to satisfy your sweet tooth at any wedding reception. Attendees can customize their sundaes with a variety of toppings, creating a fun experience that’s sure to please everyone.
This dessert idea not only tastes incredible, but it’s also simple to set up. All you need are freshly baked brownies, assorted ice creams, and a range of toppings like whipped cream, nuts, chocolate sauce, and cherries. It’s a sweet treat that will create lasting memories for you and your guests!
Ingredients
- 1 cup unsalted butter
- 2 cups granulated sugar
- 4 large eggs
- 1 teaspoon vanilla extract
- 1 cup all-purpose flour
- 1 cup unsweetened cocoa powder
- 1/2 teaspoon salt
- 1 cup semi-sweet chocolate chips
- Assorted ice creams (vanilla, chocolate, mint chip)
- Whipped cream
- Chocolate sauce
- Chopped nuts
- Maraschino cherries
- Sprinkles
Instructions
- Preheat your oven to 350°F (175°C) and grease a 9×13-inch baking pan.
- In a saucepan, melt the butter over medium heat. Once melted, remove it from heat and stir in the sugar until well combined.
- Add the eggs one at a time, mixing well after each addition. Then stir in the vanilla extract.
- In a separate bowl, whisk together the flour, cocoa powder, and salt. Gradually add this mixture to the wet ingredients until just combined. Fold in the chocolate chips.
- Pour the batter into the prepared baking pan and bake for 25-30 minutes or until a toothpick inserted in the center comes out with a few moist crumbs.
- Allow the brownies to cool completely before cutting them into squares.
- To set up your sundae bar, arrange the brownies on a platter, place scoops of ice cream in bowls, and set out toppings in separate containers for guests to build their perfect sundaes.
Delightful Cake Pops
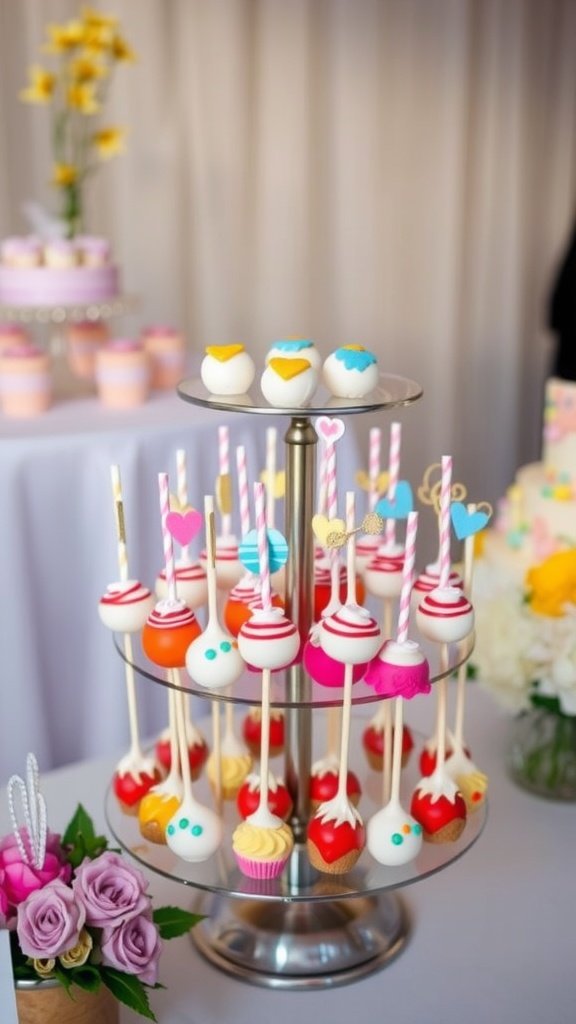
Cake pops are a delightful blend of cake and frosting, coated in chocolate and served on a stick. These bite-sized treats are not only delicious but also visually appealing, making them a perfect addition to any wedding reception. With their fun designs and rich flavors, cake pops are sure to be a hit among guests of all ages.
The beauty of cake pops lies in their simplicity. They are easy to make and can be customized to fit any wedding theme or color scheme. Whether you’re opting for classic chocolate or vibrant colors that match your décor, these cake pops are a fun and sweet way to celebrate love on your special day.
Ingredients
- 1 box of cake mix (any flavor)
- 1 can of frosting (matching flavor)
- 1 pound of candy coating or chocolate melts
- Cake pop sticks
- Sprinkles or decorative toppings
Instructions
- Bake the Cake: Prepare the cake mix according to package instructions and bake in a 9×13 inch pan. Allow it to cool completely.
- Crumb the Cake: Once cool, crumble the cake into a large bowl, ensuring there are no large pieces.
- Add the Frosting: Mix in the frosting a little at a time until the mixture is moist but not overly sticky. Roll the mixture into small balls, about 1 inch in diameter.
- Chill the Balls: Place the cake balls on a baking sheet lined with parchment paper and refrigerate for at least 30 minutes to firm up.
- Melt the Coating: In a microwave-safe bowl, melt the candy coating or chocolate according to package instructions until smooth.
- Assemble the Pops: Dip the end of each cake pop stick into the melted coating before inserting it into a cake ball. This helps the stick stay in place.
- Coat the Pops: Dip each cake pop into the melted coating until fully covered. Allow excess coating to drip off before placing them upright in a foam block or a cake pop stand.
- Decorate: Add sprinkles or any desired decorations before the coating sets.
- Serve: Once the coating has hardened, serve the cake pops on a decorative platter at your wedding reception.
Divine Fruit and Cheese Platter
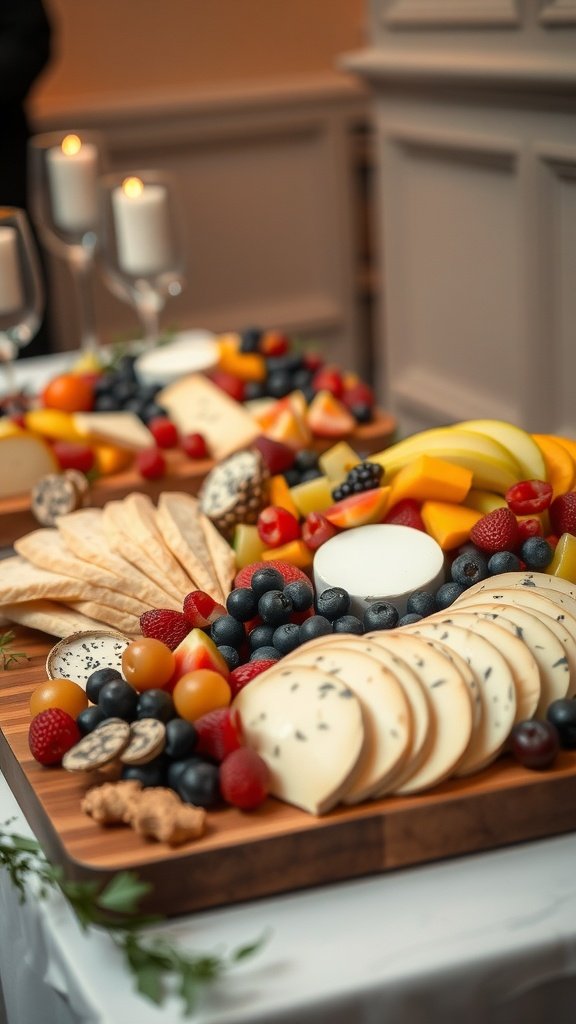
A fruit and cheese platter is a delightful addition to any wedding reception, combining the creamy richness of cheese with the sweet brightness of fresh fruits. This simple yet elegant dish is sure to please a variety of palates, making it a perfect choice for your special day. The contrasting flavors and textures create a harmonious experience that invites guests to indulge and mingle.
Creating a fruit and cheese platter is as easy as selecting your favorite cheeses and fruits, then arranging them beautifully on a serving board. It’s not only visually appealing but also requires minimal prep time, allowing you to spend more moments enjoying the celebration. Let’s dive into a quick recipe to help you assemble a stunning platter for your wedding reception!
Ingredients
- 2 cups assorted cheese (cheddar, brie, gouda)
- 2 cups assorted fresh fruits (grapes, strawberries, blueberries, figs)
- 1 cup mixed nuts (almonds, walnuts)
- 1 cup crackers or breadsticks
- Honey or fig jam for drizzling
- Fresh herbs for garnish (like rosemary or mint)
Instructions
- Prepare the Cheese: Cut the cheese into bite-sized pieces or wedges and arrange them on a large wooden board or platter.
- Arrange the Fruits: Wash and dry the fruits, then place them around the cheese in a visually appealing manner.
- Add Nuts and Crackers: Fill in any gaps with mixed nuts and crackers, creating a colorful and inviting display.
- Drizzle with Honey: Lightly drizzle honey or fig jam over the cheese and fruits for an extra touch of sweetness.
- Garnish: Finish off the platter with fresh herbs for added color and fragrance.
Sophisticated Chocolate Ganache Tart

If you’re looking for a dessert that whispers elegance, a chocolate ganache tart is a delightful choice. This dessert features a rich chocolate filling with a smooth, creamy texture that melts in your mouth. It strikes a perfect balance between sweetness and the deep, robust flavor of chocolate, making it a crowd-pleaser for any wedding reception.
Not only does this tart taste divine, but it’s also relatively simple to prepare. With a buttery crust and a luscious ganache topping, it can be made ahead of time, allowing you to focus on other wedding details. Serve it with fresh berries or a dollop of whipped cream for a touch of sophistication.
Ingredients
- 1 1/2 cups graham cracker crumbs
- 1/2 cup unsalted butter, melted
- 1/4 cup granulated sugar
- 1 cup heavy cream
- 8 ounces dark chocolate, chopped
- 1 teaspoon vanilla extract
- Pinch of salt
Instructions
- Prepare the Crust: Preheat your oven to 350°F (175°C). In a bowl, combine graham cracker crumbs, melted butter, and sugar. Press the mixture firmly into the bottom and sides of a tart pan. Bake for 8-10 minutes until golden. Let it cool.
- Make the Ganache: In a small saucepan, heat the heavy cream over medium heat until it just begins to simmer. Remove from heat, and add the chopped chocolate, stirring until completely melted and smooth. Mix in the vanilla extract and a pinch of salt.
- Assemble the Tart: Pour the ganache into the cooled crust, smoothing the top with a spatula. Refrigerate for at least 2 hours until set.
- Serve: Once set, slice the tart and serve with fresh berries or whipped cream if desired.
Delicate Almond Joy Cake
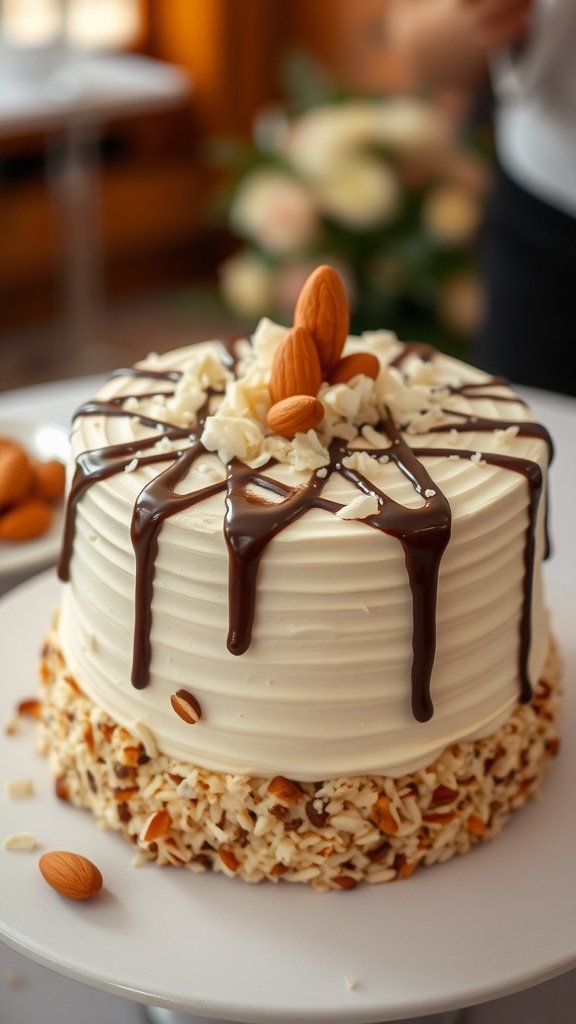
The Delicate Almond Joy Cake is a delightful fusion of flavors that evokes the beloved candy bar. This cake features layers of moist almond-flavored sponge, creamy coconut frosting, and rich chocolate ganache, making it a true treat for any dessert lover. The nutty flavor of almonds pairs beautifully with the sweetness of coconut and the richness of chocolate, creating a harmonious balance that will leave your guests wanting more.
This recipe is relatively simple to make, perfect for those who want to impress at a wedding reception without spending all day in the kitchen. With just a few steps, you can create a stunning cake that adds a touch of elegance to your celebration.
Ingredients
- 1 ½ cups all-purpose flour
- 1 ½ teaspoons baking powder
- ½ teaspoon salt
- ½ cup unsalted butter, softened
- 1 cup granulated sugar
- 3 large eggs
- 1 teaspoon almond extract
- ½ cup milk
- 1 cup shredded coconut
- 1 cup heavy cream
- 1 cup semi-sweet chocolate chips
- ½ cup sliced almonds for garnish
Instructions
- Preheat your oven to 350°F (175°C). Grease and flour two 9-inch round cake pans.
- In a bowl, mix the flour, baking powder, and salt. In another large bowl, cream together the butter and sugar until light and fluffy. Beat in the eggs, one at a time, then stir in the almond extract.
- Gradually add the dry ingredients to the butter mixture, alternating with the milk. Mix until just combined. Fold in the shredded coconut.
- Divide the batter evenly between the prepared pans and bake for 25-30 minutes, or until a toothpick inserted into the center comes out clean. Allow to cool completely.
- For the ganache, heat the heavy cream in a saucepan until just simmering. Remove from heat and stir in the chocolate chips until melted and smooth.
- Once the cakes are cool, spread a layer of coconut frosting between them and frost the top and sides with the ganache. Garnish with sliced almonds before serving.
Luscious Key Lime Pie Shots
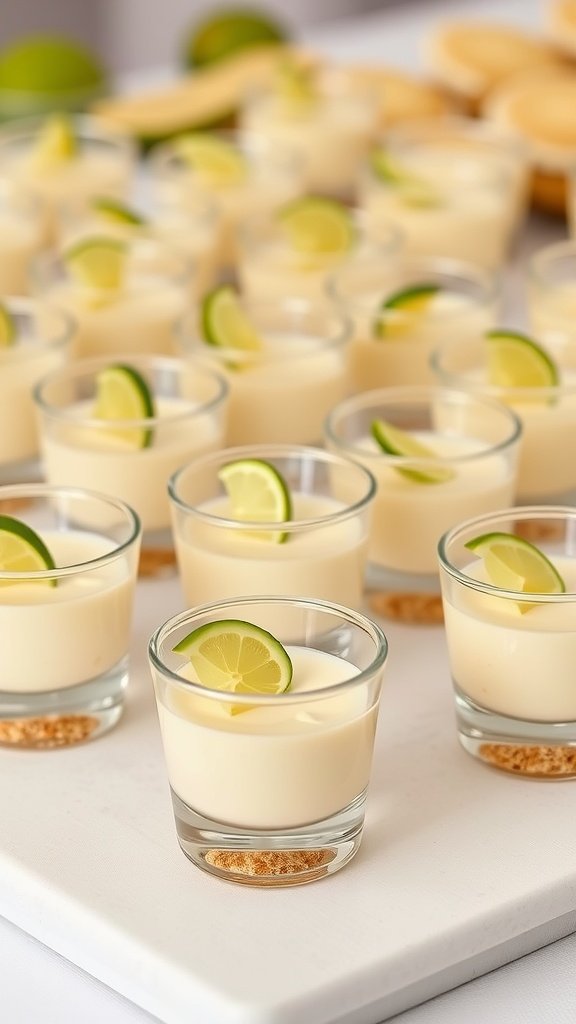
Key lime pie shots are a delightful twist on the classic dessert, offering a creamy and zesty treat that’s perfect for any wedding reception. These mini indulgences combine the tartness of key limes with the sweetness of creamy filling, all nestled on a crunchy graham cracker crust. They’re simple to make and serve, making them an ideal choice for hosting.
The shot glass presentation adds a fun element, allowing guests to enjoy this beloved dessert in a new way. With just the right balance of sweetness and tart flavor, these shots are sure to be a hit at your celebration. Plus, they are a great addition to our collection of 30 decadent dessert ideas for a memorable wedding reception!
Ingredients
- 1 cup graham cracker crumbs
- 1/4 cup unsalted butter, melted
- 1/4 cup granulated sugar
- 1 cup sweetened condensed milk
- 1/2 cup key lime juice
- 1 cup heavy whipping cream
- 2 tablespoons powdered sugar
- Key lime slices for garnish
Instructions
- Prepare the Crust: In a bowl, mix together graham cracker crumbs, melted butter, and granulated sugar until well combined. Spoon a small amount into the bottom of each shot glass and press down gently.
- Make the Filling: In another bowl, whisk together sweetened condensed milk and key lime juice until smooth. Set aside.
- Whip the Cream: In a separate bowl, beat the heavy whipping cream and powdered sugar until soft peaks form. Gently fold the whipped cream into the lime mixture until fully combined.
- Assemble the Shots: Spoon or pipe the lime filling over the graham cracker crust in each shot glass. Refrigerate for at least 2 hours to set.
- Garnish and Serve: Just before serving, add a small slice of key lime on top of each shot for a decorative touch. Enjoy!
Chic Pistachio and Rose Cake
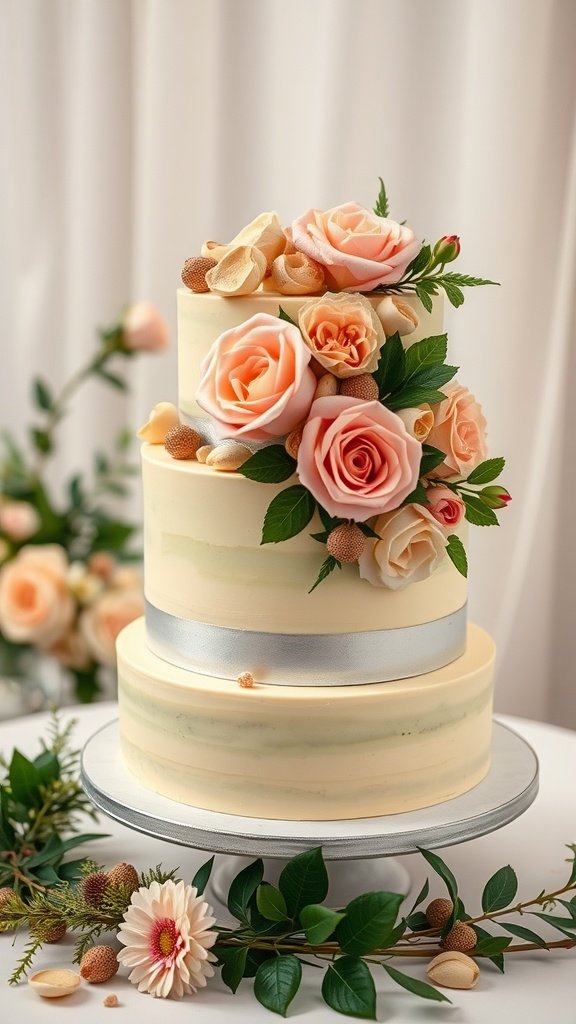
The Chic Pistachio and Rose Cake is a delightful blend of flavors that brings a touch of elegance to any wedding reception. With its light and nutty pistachio layers complemented by the floral notes of rose, this cake is as stunning as it is delicious. Plus, it’s not overly complicated to make, making it a perfect choice for both novice and experienced bakers.
This cake offers a unique taste experience, balancing sweetness with a hint of earthiness from the pistachios and a fragrant twist from the rose essence. It’s sure to impress your guests and add a memorable touch to your celebration among the 30 decadent dessert ideas for a memorable wedding reception.
Ingredients
- 2 cups all-purpose flour
- 1 cup ground pistachios
- 1 1/2 cups granulated sugar
- 1 tablespoon baking powder
- 1/2 teaspoon salt
- 1 cup unsalted butter, softened
- 4 large eggs
- 1 teaspoon vanilla extract
- 1 teaspoon rose water
- 1 cup milk
- 2 cups powdered sugar
- 1/4 cup heavy cream
- Fresh roses for decoration (optional)
Instructions
- Preheat the oven to 350°F (175°C) and grease two 9-inch round cake pans.
- In a bowl, combine flour, ground pistachios, baking powder, and salt.
- In another large bowl, beat the softened butter and granulated sugar until fluffy. Add the eggs one at a time, mixing well after each addition. Then stir in the vanilla and rose water.
- Gradually add the dry mixture to the wet ingredients, alternating with milk until combined.
- Divide the batter between the prepared pans and smooth the tops. Bake for 25-30 minutes or until a toothpick comes out clean. Allow to cool in the pans for 10 minutes before transferring to a wire rack.
- For the frosting, whip the heavy cream until soft peaks form, then gradually add powdered sugar until smooth. Frost the cooled cakes and decorate with fresh roses if desired.
Gourmet Donut Wall
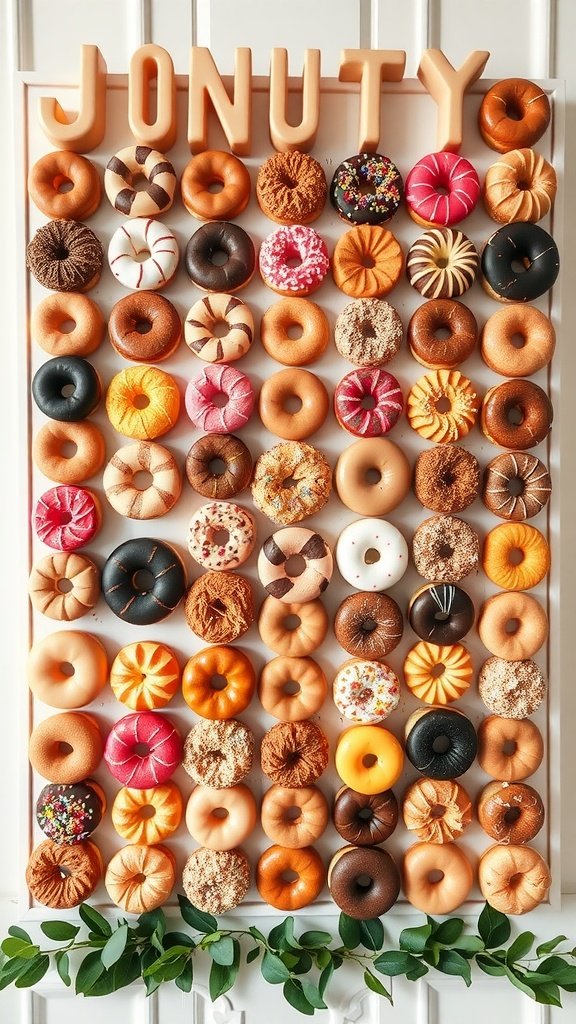
When it comes to dessert options for your wedding reception, a gourmet donut wall is a delightful treat that everyone will love. Not only do these donuts come in various flavors and designs, but they also bring a playful and interactive element to your celebration. Guests can enjoy picking their favorite flavors while mingling, creating a fun atmosphere.
Creating a donut wall is surprisingly simple. You can either make your donuts from scratch or order them from a local bakery. The key is to display them beautifully; a tiered or vertical stand makes for an eye-catching centerpiece. Combine classic options like glazed and chocolate with unique flavors like maple bacon or raspberry lemonade for an enticing spread.
Fancy Fruit Skewers
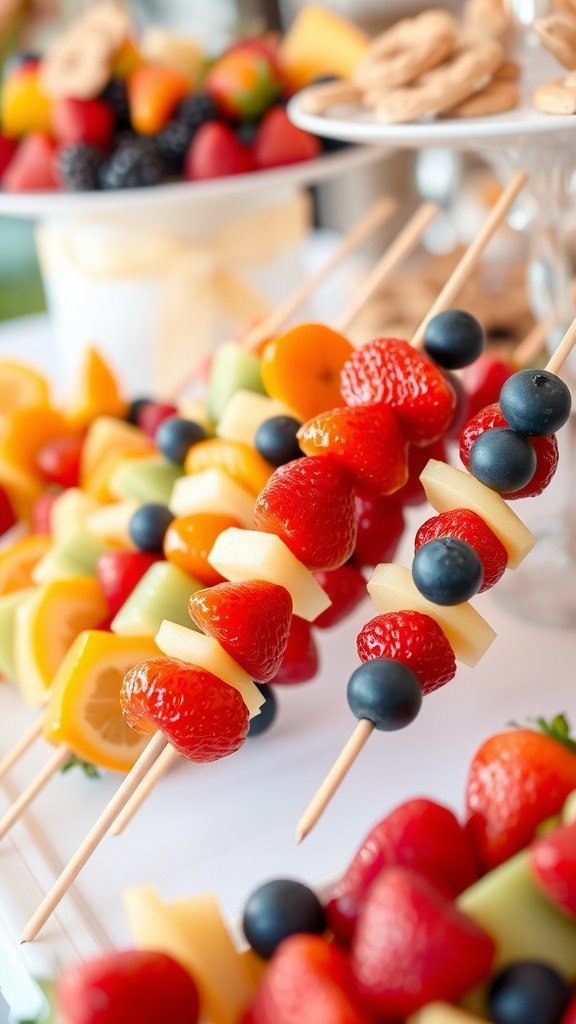
Fancy fruit skewers offer a vibrant and refreshing option for your wedding reception. They are sweet, juicy, and add a touch of elegance to your dessert table. These skewers are incredibly simple to make, allowing you to mix and match your favorite fruits for a colorful display.
Not only do these skewers look delightful, but they also provide a light and healthy treat for your guests. They are perfect for those who might want a fruity alternative to heavier desserts. Simply assemble your chosen fruits on skewers, and you have a beautiful, bite-sized treat ready to impress!
Ingredients
- 1 cup strawberries, hulled
- 1 cup blueberries
- 1 cup pineapple, cubed
- 1 cup melons (honeydew or cantaloupe), cubed
- 1 cup orange segments
- Wooden skewers
- Mint leaves for garnish (optional)
Instructions
- Prepare the Fruits: Wash and cut all the fruits into bite-sized pieces. Ensure that the strawberries are hulled and the melons are cubed.
- Assemble the Skewers: Take a wooden skewer and start threading the fruits, alternating between different types for a colorful display. You can add a mint leaf at the end for a nice touch.
- Chill and Serve: Once all the skewers are assembled, place them in the refrigerator for at least 30 minutes before serving. This will keep them refreshing and cool.
Artisan Gelato Station
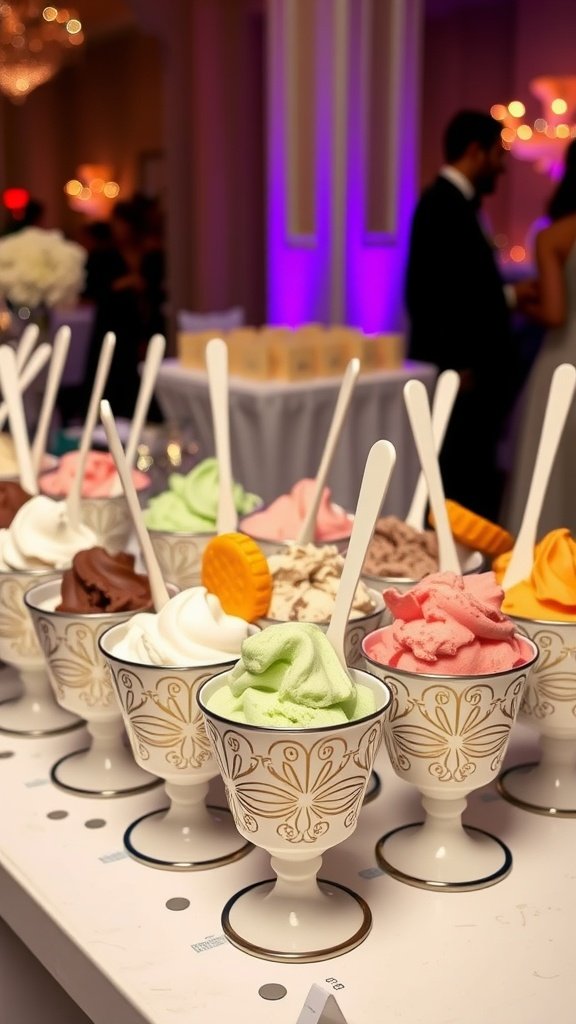
Creating an artisan gelato station is a delightful way to elevate your wedding reception. This sweet setup offers a variety of flavors that cater to all palates, from classic vanilla to fruity sorbets. Not only is it visually appealing, but the creamy texture and rich taste of gelato make it a refreshing treat for guests.
Setting up this station is quite simple. You can either make the gelato yourself or order from a local artisan. Provide fun toppings like fresh fruits, chocolate chips, and nuts for guests to customize their desserts. Everyone will have a blast creating their own unique sundae and enjoying a moment of indulgence!
Ingredients
- 2 cups whole milk
- 1 cup heavy cream
- 3/4 cup granulated sugar
- 1 tablespoon pure vanilla extract
- 1/4 teaspoon salt
- 1 tablespoon corn syrup
- Your choice of flavorings (e.g., chocolate, fruit puree, coffee)
Instructions
- In a medium saucepan, combine the milk, heavy cream, sugar, and salt. Heat over medium heat until the mixture is warm, stirring until the sugar dissolves.
- Remove from heat and stir in the vanilla extract and corn syrup. If you’re adding additional flavoring, mix it in at this point.
- Chill the mixture in the refrigerator for at least 4 hours or overnight to enhance the flavors.
- Once chilled, pour the mixture into your ice cream maker and churn according to the manufacturer’s instructions until it reaches a soft-serve consistency.
- Transfer the gelato to an airtight container and freeze for at least 2 hours before serving.
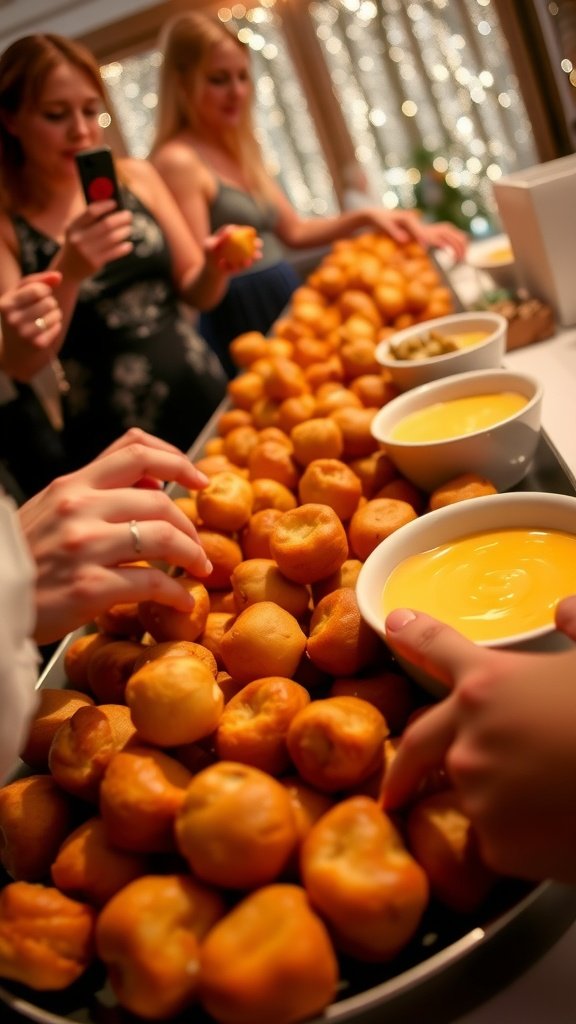
Classic Italian Zeppole
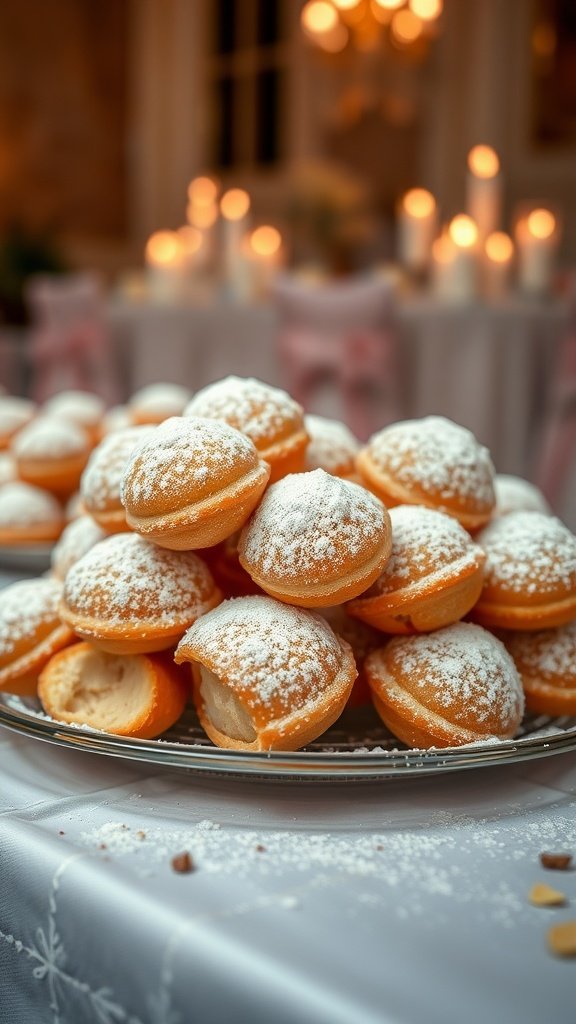
Classic Italian Zeppole are delightful, airy pastries that are sure to impress your guests at any wedding reception. These sweet treats are typically filled with creamy custard or whipped cream and dusted with powdered sugar, offering a delicious combination of flavors and textures. They’re not only a treat for the taste buds but also easy to make, making them a fantastic addition to your dessert table.
Whether you’re planning a grand celebration or an intimate gathering, these zeppole will leave a lasting impression. Their light, fluffy nature pairs perfectly with a rich filling, satisfying any sweet tooth. Plus, they can be made ahead of time, allowing you to focus on other wedding details!
Ingredients
- 1 cup water
- 1/4 cup unsalted butter
- 1 cup all-purpose flour
- 1/4 teaspoon salt
- 4 large eggs
- 1 teaspoon vanilla extract
- 1 cup pastry cream or whipped cream, for filling
- Powdered sugar, for dusting
Instructions
- Prepare the Dough: In a medium saucepan, combine water and butter. Bring to a boil over medium heat. Stir in flour and salt until the mixture forms a ball. Remove from heat and let cool slightly.
- Add Eggs: Beat in the eggs one at a time, mixing well after each addition. Stir in the vanilla extract until smooth.
- Shape the Zeppole: Preheat the oven to 400°F (200°C). Use a piping bag to pipe the dough into rings on a parchment-lined baking sheet.
- Bake: Bake for 20-25 minutes or until golden brown and puffed. Remove from the oven and let cool.
- Fill and Serve: Once cooled, fill each zeppole with pastry cream or whipped cream. Dust with powdered sugar before serving.
Sublime Chocolate Chip Cookie Stack
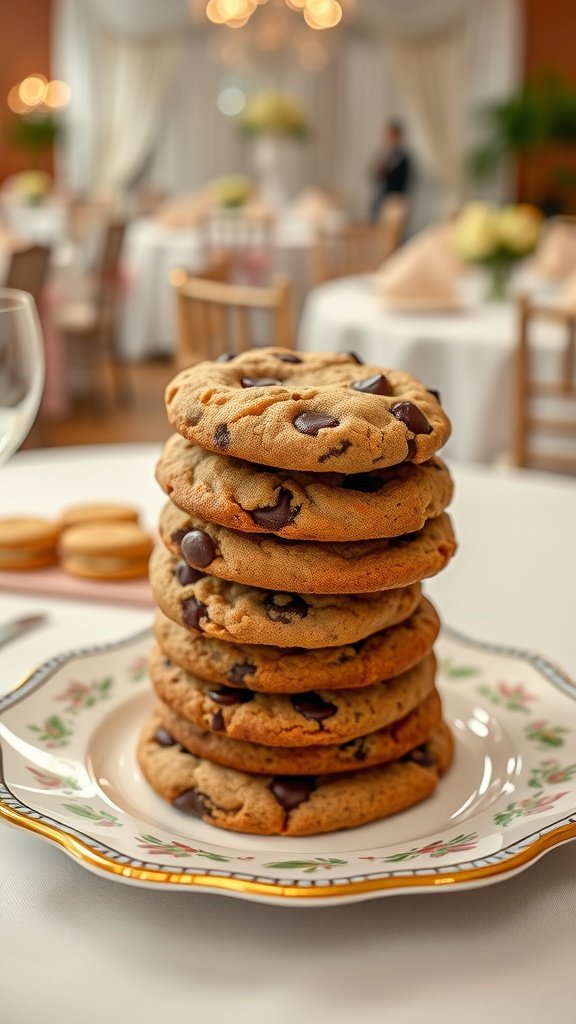
For a delightful twist on a classic favorite, the Sublime Chocolate Chip Cookie Stack is a perfect addition to any wedding reception. These cookies are soft, chewy, and packed with rich chocolate chips, making each bite a sweet celebration. Not only do they taste fantastic, but they are also simple to whip up, allowing you to focus on other aspects of your special day.
Layering these cookies creates a fun and visually appealing dessert that guests can enjoy at their leisure. Whether served alongside a scoop of ice cream or simply on their own, this cookie stack is a charming way to bring a touch of homemade warmth to your celebration.
Ingredients
- 2 1/4 cups all-purpose flour
- 1 teaspoon baking soda
- 1 teaspoon salt
- 1 cup unsalted butter, softened
- 3/4 cup granulated sugar
- 3/4 cup packed brown sugar
- 1 teaspoon vanilla extract
- 2 large eggs
- 2 cups semi-sweet chocolate chips
Instructions
- Preheat your oven to 375°F (190°C). In a small bowl, mix the flour, baking soda, and salt together; set aside.
- In a large bowl, cream together the softened butter, granulated sugar, brown sugar, and vanilla extract until smooth. Beat in the eggs one at a time.
- Gradually add the flour mixture to the wet ingredients, mixing until just combined. Fold in the chocolate chips.
- Drop rounded tablespoons of dough onto ungreased baking sheets, spacing them about 2 inches apart.
- Bake for 9-11 minutes, or until the edges are golden brown. Allow the cookies to cool on the baking sheets for a few minutes before transferring them to wire racks to cool completely.
- Once cooled, stack the cookies for serving and enjoy!
Rich Bread Pudding with Bourbon Sauce
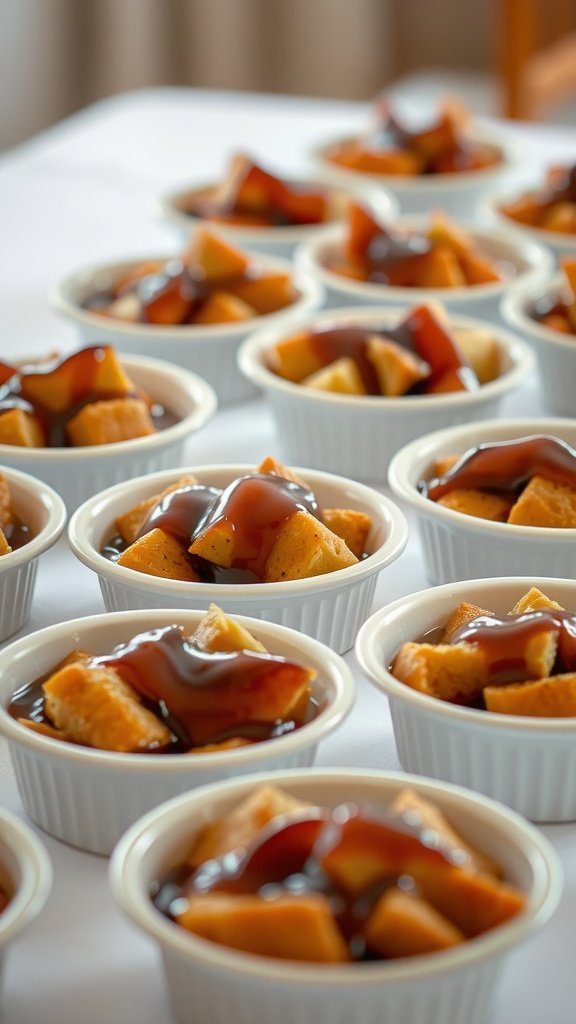
Rich bread pudding is a delightful treat that combines the comforting flavors of custard-soaked bread with a luscious bourbon sauce. This dessert is not only indulgent but also surprisingly simple to prepare, making it a fantastic addition to your wedding reception menu. The warm, soft texture of the pudding pairs beautifully with the sweet, slightly smoky notes of the bourbon sauce, creating a delicious balance that will leave your guests craving more.
When served warm, this bread pudding becomes a cozy highlight of any dessert table, fitting perfectly into our list of 30 Decadent Dessert Ideas for a Memorable Wedding Reception. It’s an excellent way to use day-old bread, and with just a few ingredients, you can create a dish that feels both nostalgic and sophisticated.
Ingredients
- 6 cups of day-old bread, cubed
- 4 large eggs
- 2 cups whole milk
- 1 cup heavy cream
- 3/4 cup granulated sugar
- 1 tablespoon vanilla extract
- 1 teaspoon ground cinnamon
- 1/4 teaspoon ground nutmeg
- 1/2 cup raisins (optional)
Bourbon Sauce Ingredients
- 1/2 cup unsalted butter
- 1 cup brown sugar, packed
- 1/2 cup heavy cream
- 1/4 cup bourbon
- 1 teaspoon vanilla extract
Instructions
- Preheat your oven to 350°F (175°C). Grease a 9×13 inch baking dish.
- In a large bowl, whisk together the eggs, milk, cream, sugar, vanilla, cinnamon, and nutmeg until well combined.
- Add the cubed bread and raisins (if using) to the mixture, gently folding to coat the bread evenly. Let it sit for about 15 minutes to allow the bread to soak up the custard.
- Pour the mixture into the prepared baking dish and bake for 45-55 minutes, or until the pudding is set and the top is lightly golden.
- While the bread pudding is baking, prepare the bourbon sauce. In a saucepan, melt the butter over medium heat. Stir in the brown sugar and cook until it dissolves.
- Slowly add the heavy cream and bourbon, stirring continuously until the sauce thickens slightly. Remove from heat and stir in vanilla.
- Once the bread pudding is done baking, let it cool for a few minutes before serving. Drizzle with warm bourbon sauce before serving for a truly decadent experience.
Dainty Shortcake Biscuits
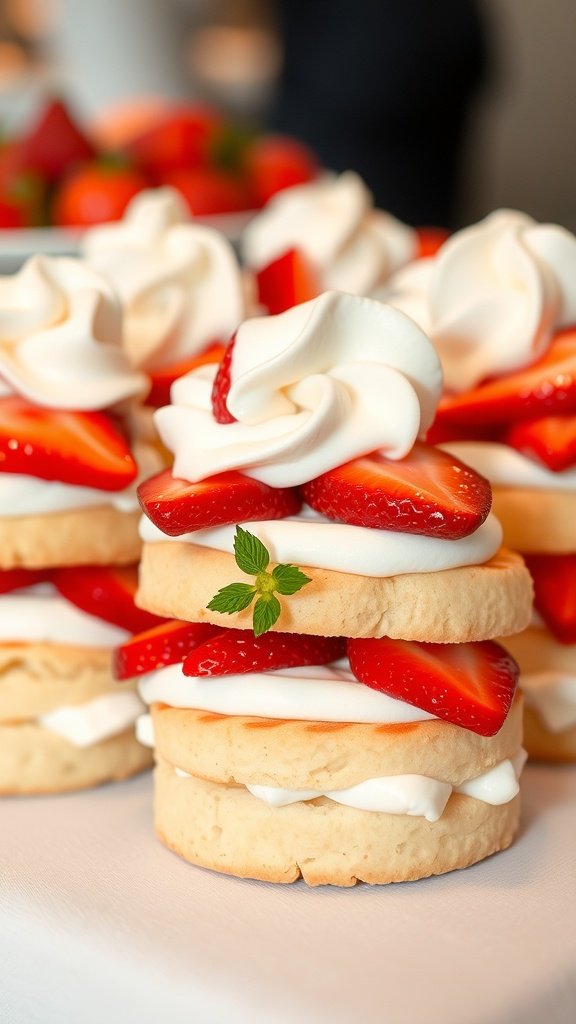
Dainty shortcake biscuits are a delightful treat that perfectly balances lightness and flavor. These fluffy biscuits are tender and buttery, making them an excellent base for a variety of toppings. When layered with fresh strawberries and whipped cream, they transform into a charming dessert that adds a touch of elegance to your wedding reception.
Not only do these shortcake biscuits taste heavenly, but they’re also easy to prepare, making them a stress-free option for your special day. Whether served as individual portions or as a larger cake, they promise a memorable experience for you and your guests. Here’s how to make your own dainty shortcake biscuits:
Ingredients
- 2 cups all-purpose flour
- 1/4 cup granulated sugar
- 1 tablespoon baking powder
- 1/2 teaspoon salt
- 1/2 cup unsalted butter, cold and cubed
- 3/4 cup milk
- 1 teaspoon vanilla extract
- 2 cups fresh strawberries, sliced
- 1 cup heavy cream
- 2 tablespoons powdered sugar
- Fresh mint leaves, for garnish
Instructions
- Preheat the Oven: Start by preheating your oven to 425°F (220°C) and lining a baking sheet with parchment paper.
- Mix Dry Ingredients: In a large bowl, combine the flour, sugar, baking powder, and salt.
- Add Butter: Cut in the cold butter using a pastry cutter or your fingers until the mixture resembles coarse crumbs.
- Add Milk and Vanilla: Pour in the milk and vanilla extract, stirring until just combined. Be careful not to overmix.
- Shape the Biscuits: Turn the dough onto a floured surface and gently knead it a few times. Pat it into a 1-inch thick rectangle, then cut out circles using a biscuit cutter.
- Bake: Place the biscuits on the prepared baking sheet and bake for 12-15 minutes, or until lightly golden.
- Prepare the Whipped Cream: While the biscuits cool, whip the heavy cream with powdered sugar until soft peaks form.
- Assemble: Once the biscuits are cool, slice them in half. Layer with sliced strawberries and whipped cream, then top with the other half and garnish with mint leaves.
Elegant Poached Pears in Red Wine
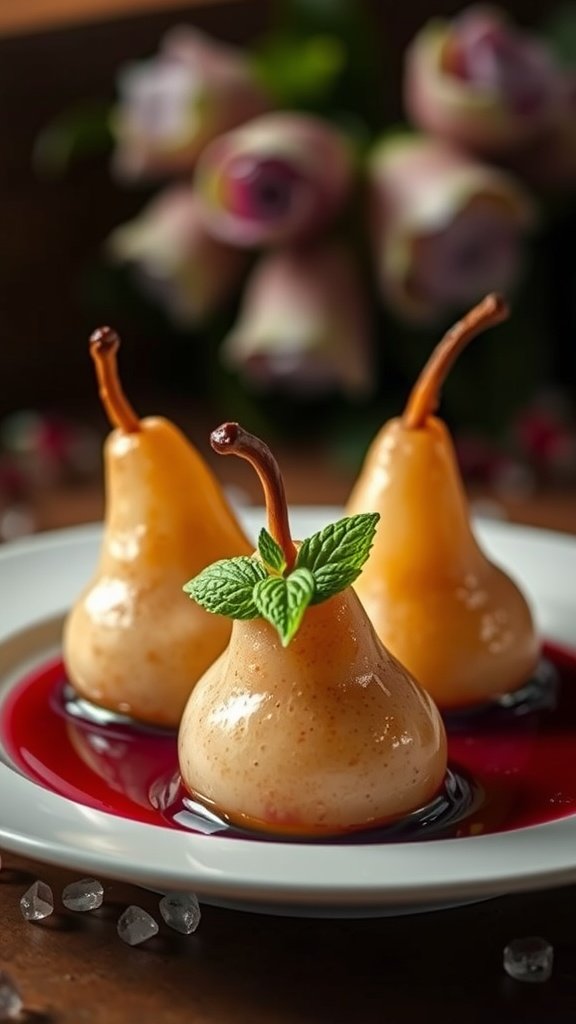
Elegant poached pears in red wine offer a delightful marriage of sweet and tangy flavors, making them a refined choice for your wedding reception. The tender, juicy pears are infused with the rich essence of red wine, complemented by spices like cinnamon and star anise. This dessert strikes a beautiful balance between sophistication and simplicity, ensuring it can be easily prepared even by novice cooks.
These poached pears not only taste divine but also make for an eye-catching centerpiece on your dessert table. The vibrant red hue from the wine creates a stunning visual contrast, while the addition of fresh mint adds a pop of color and freshness. This dessert is an excellent choice when considering the 30 decadent dessert ideas for a memorable wedding reception.
Ingredients
- 4 ripe pears, peeled and cored
- 2 cups red wine
- 1 cup granulated sugar
- 1 cinnamon stick
- 2 star anise pods
- 1 teaspoon vanilla extract
- Juice of 1 lemon
- Fresh mint leaves for garnish
Instructions
- Prepare the Poaching Liquid: In a large saucepan, combine red wine, sugar, cinnamon stick, star anise, vanilla extract, and lemon juice. Stir well and bring to a simmer over medium heat.
- Add the Pears: Once the mixture is simmering, carefully add the peeled pears. Ensure they are submerged in the liquid. Reduce the heat to low and poach the pears for about 20-30 minutes, or until tender.
- Cool and Serve: Remove the pears from the poaching liquid and let them cool slightly. You can reduce the poaching liquid further if desired, creating a syrup to drizzle over the pears. Serve warm or chilled, garnished with fresh mint leaves.
Gorgeous Wedding Dessert Cart
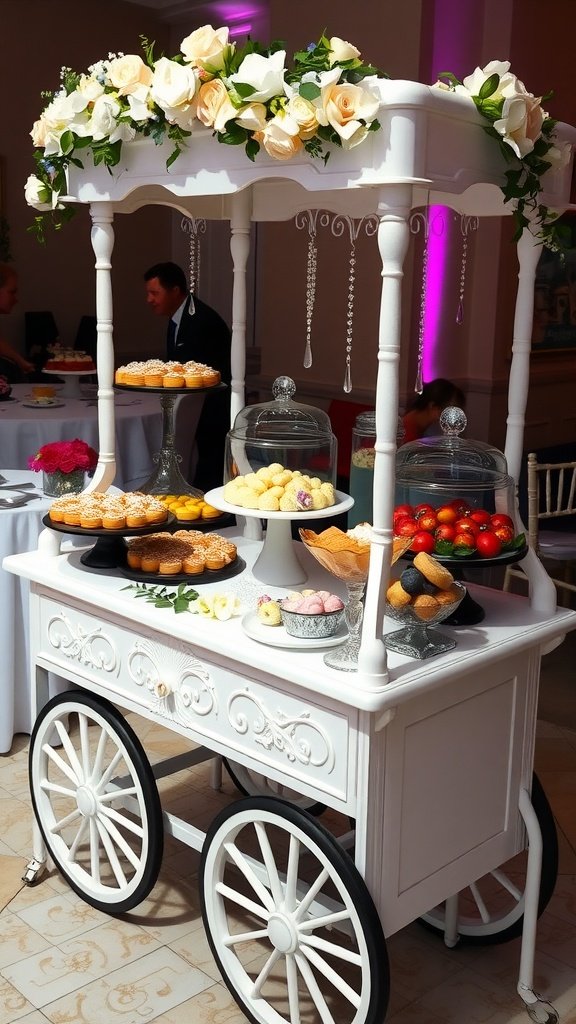
Imagine a delightful display of sweets, each dessert more tempting than the last, perfect for your wedding reception. A dessert cart is not just charming, but it also offers an array of treats that cater to every guest’s taste. Whether it’s light pastries or rich chocolates, this cart creates a sweet oasis that adds a personal touch to your celebration.
The good news is that many of these desserts are simple to prepare, allowing you to focus on the fun parts of planning your wedding. You can mix and match recipes to create a beautiful and varied selection, ensuring that your dessert cart is as memorable as the day itself.
Ingredients
- 1 cup all-purpose flour
- 1/2 cup powdered sugar
- 1/2 cup unsweetened cocoa powder
- 1/4 cup unsalted butter, softened
- 2 large eggs
- 1 teaspoon vanilla extract
- 1/2 teaspoon baking powder
- 1/4 teaspoon salt
- 1 cup chocolate chips
- 1 cup whipped cream
- Fresh berries for garnish

Instructions
- Preheat the oven to 350°F (175°C) and grease a muffin tin.
- In a medium bowl, whisk together the flour, powdered sugar, cocoa powder, baking powder, and salt.
- In another bowl, cream the softened butter and eggs until smooth. Stir in the vanilla extract.
- Gradually add the dry ingredients to the wet mixture until combined. Fold in chocolate chips.
- Divide the batter evenly among the muffin cups and bake for 15-20 minutes or until a toothpick comes out clean.
- Let cool, then top each dessert with a dollop of whipped cream and a few fresh berries before serving.
Charming Chocolate Truffle Assortment
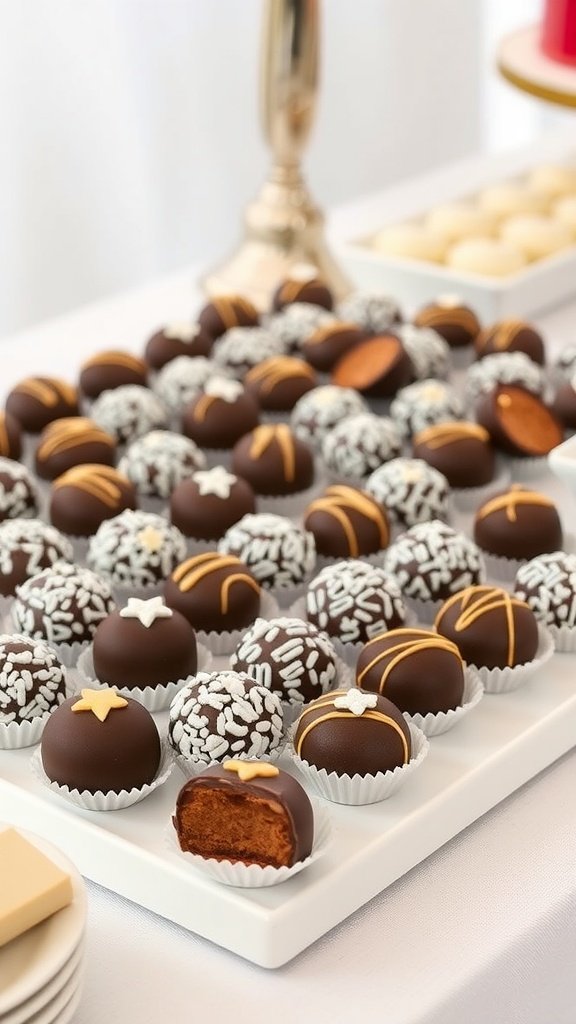
Chocolate truffles are a delightful treat that brings a touch of elegance to any wedding reception. These bite-sized morsels come in various flavors and textures, offering a rich, creamy experience that melts in your mouth. Whether you choose classic chocolate, fruity, or nutty fillings, they are sure to impress your guests with both taste and presentation.
Making chocolate truffles is simpler than you might think. With just a few ingredients and some basic techniques, you can create a variety of truffles that will leave everyone craving more. They’re perfect for a charming dessert table at your wedding, allowing guests to indulge in a selection of decadent flavors. Here’s a simple recipe to get you started on crafting your own delightful chocolate truffles!
Ingredients
- 8 oz semisweet chocolate, chopped
- 1/2 cup heavy cream
- 1 teaspoon vanilla extract
- Cocoa powder, crushed nuts, or coconut flakes for coating
Instructions
- Prepare the Ganache: In a small saucepan over medium heat, bring the heavy cream to a simmer. Remove from heat and pour over the chopped chocolate. Let it sit for a few minutes, then stir until smooth. Add vanilla extract and mix well.
- Chill the Mixture: Cover the ganache with plastic wrap and refrigerate for about 2 hours, or until firm enough to handle.
- Form the Truffles: Once chilled, use a melon baller or your hands to scoop out small portions of the ganache and roll them into balls. This can get a bit messy but is part of the fun!
- Coat the Truffles: Roll each chocolate ball in cocoa powder, crushed nuts, or coconut flakes for a beautiful finish. Place them in mini paper cups for an elegant touch.
- Serve: Arrange the truffles on a platter and serve at room temperature. Enjoy the compliments from your guests!
Glistening Sugar Cookies with Royal Icing
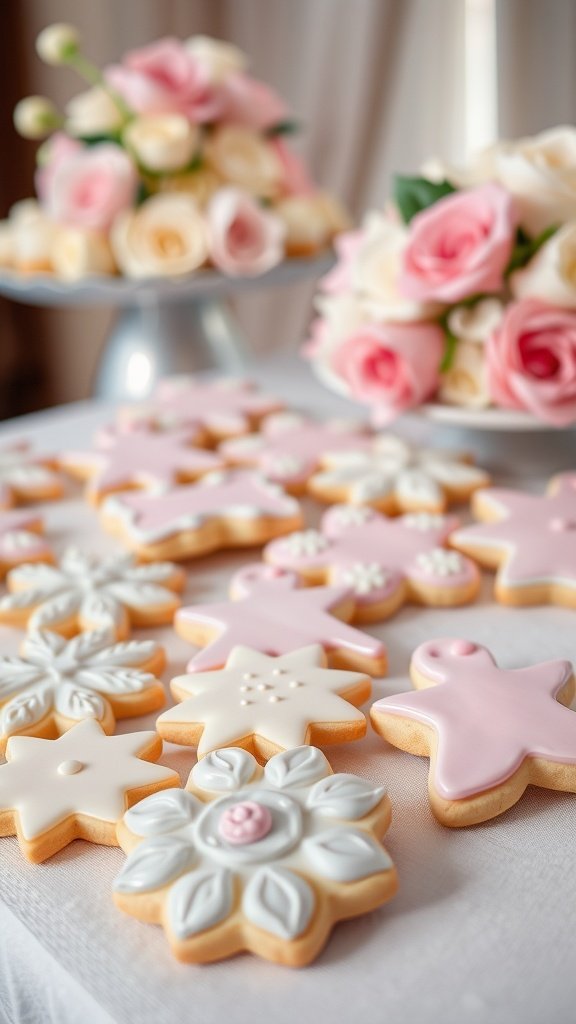
Glistening sugar cookies are a delightful addition to any wedding reception, combining a tender, buttery base with a sweet, glossy royal icing that makes them truly special. These cookies not only taste fantastic but also serve as a beautiful decoration on dessert tables, complementing the wedding theme with their elegant designs.
The beauty of making these cookies lies in their simplicity. Even if you’re a beginner in baking, you can whip up a batch with ease, making them a fun project to tackle. Plus, the customization options are endless, allowing you to create unique designs that guests will love.
Ingredients
- 2 3/4 cups all-purpose flour
- 1 teaspoon baking soda
- 1/2 teaspoon baking powder
- 1 cup unsalted butter, softened
- 1 1/2 cups white sugar
- 1 egg
- 1 teaspoon vanilla extract
- 1/2 teaspoon almond extract
- 3 cups powdered sugar
- 2 tablespoons meringue powder
- 4-6 tablespoons water
- Food coloring (optional)
Instructions
- Prepare the Dough: In a bowl, mix flour, baking soda, and baking powder. In a separate bowl, cream together butter and sugar until smooth. Beat in egg, vanilla, and almond extracts. Gradually blend in the dry ingredients. Chill the dough for at least 1 hour.
- Shape the Cookies: Preheat the oven to 375°F (190°C). Roll out chilled dough on a floured surface to about 1/4-inch thickness. Cut out shapes using cookie cutters and place them on ungreased baking sheets.
- Bake the Cookies: Bake for 8 to 10 minutes, or until golden around the edges. Let them cool on wire racks.
- Make the Royal Icing: In a bowl, mix powdered sugar and meringue powder. Add water gradually until you reach a smooth, piping consistency. If desired, divide and color the icing with food coloring.
- Decorate: Once the cookies are cool, use the royal icing to decorate them. You can outline and flood the cookies for a professional look. Allow the icing to harden for several hours before serving.