If you’re looking to elevate your snack game, these 39 finger foods with a luxurious twist are just what you need. Perfect for parties, gatherings, or just a cozy night in, each recipe is crafted to impress while being simple enough for anyone to try. Get ready to indulge in bites that bring a touch of elegance to your table!
Mini Beef Wellington Bites
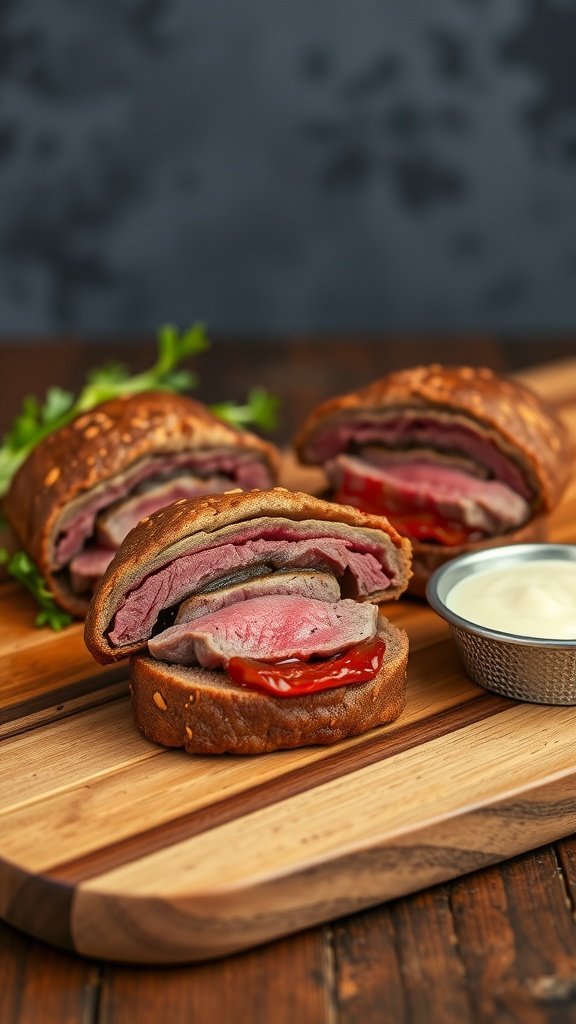
Mini Beef Wellington Bites are a delightful twist on the traditional dish, perfect for entertaining. These little bites pack a savory punch with tender beef wrapped in flaky pastry, offering a satisfying texture and rich flavor in every bite.
They’re surprisingly simple to make, making them a great option for both novice and experienced cooks. With a combination of juicy beef, earthy mushrooms, and aromatic herbs, these bites are sure to impress your guests without requiring hours in the kitchen.
Ingredients
- 1 pound beef tenderloin, trimmed
- 2 tablespoons olive oil
- 1 cup mushrooms, finely chopped
- 1 shallot, minced
- 2 cloves garlic, minced
- 1 tablespoon Dijon mustard
- 1 teaspoon thyme, chopped
- 1 package puff pastry, thawed
- 1 egg, beaten (for egg wash)
- Salt and pepper to taste
Instructions
- Preheat the oven to 400°F (200°C). Season the beef with salt and pepper.
- In a skillet, heat olive oil over medium-high heat and sear the beef on all sides, about 2-3 minutes per side. Remove and let cool.
- In the same skillet, add chopped mushrooms, shallot, and garlic. Sauté until the mushrooms release their moisture and become golden, about 5-7 minutes. Stir in Dijon mustard and thyme, then cool the mixture.
- Roll out the puff pastry on a floured surface and cut into squares. Place a spoonful of the mushroom mixture on each square, followed by slices of the seared beef.
- Fold the pastry over the filling and seal the edges with the beaten egg. Brush the tops with the remaining egg wash.
- Bake for 15-20 minutes until golden brown. Serve warm with your favorite dipping sauce.
Caviar-topped Deviled Eggs

Caviar-topped deviled eggs elevate a classic appetizer into a luxurious treat. The creamy, tangy filling is made with egg yolks, mayonnaise, and a hint of mustard, creating a harmonious blend of flavors. The crowning touch of caviar adds a burst of briny richness that complements the smooth texture of the eggs.
This recipe is simple to make and perfect for any gathering, adding an elegant flair without requiring extensive culinary skills. Your guests will be impressed by this delightful twist on a traditional favorite!
Ingredients
- 6 large eggs
- 1/4 cup mayonnaise
- 1 teaspoon Dijon mustard
- 1 teaspoon lemon juice
- Salt and pepper, to taste
- 2 tablespoons caviar
- Fresh dill, for garnish
Instructions
- Hard-Boil the Eggs: Place eggs in a saucepan and cover with water. Bring to a boil, then remove from heat and cover for 12-15 minutes. Transfer to an ice bath to cool.
- Prepare the Filling: Once cooled, peel the eggs and cut them in half lengthwise. Remove the yolks and place them in a bowl. Mash the yolks with mayonnaise, Dijon mustard, lemon juice, salt, and pepper until smooth.
- Assemble the Eggs: Spoon the yolk mixture back into the egg whites or use a piping bag for a decorative touch.
- Top with Caviar: Gently place a small spoonful of caviar on each filled egg. Garnish with fresh dill before serving.
Honey-glazed Bacon-wrapped Dates
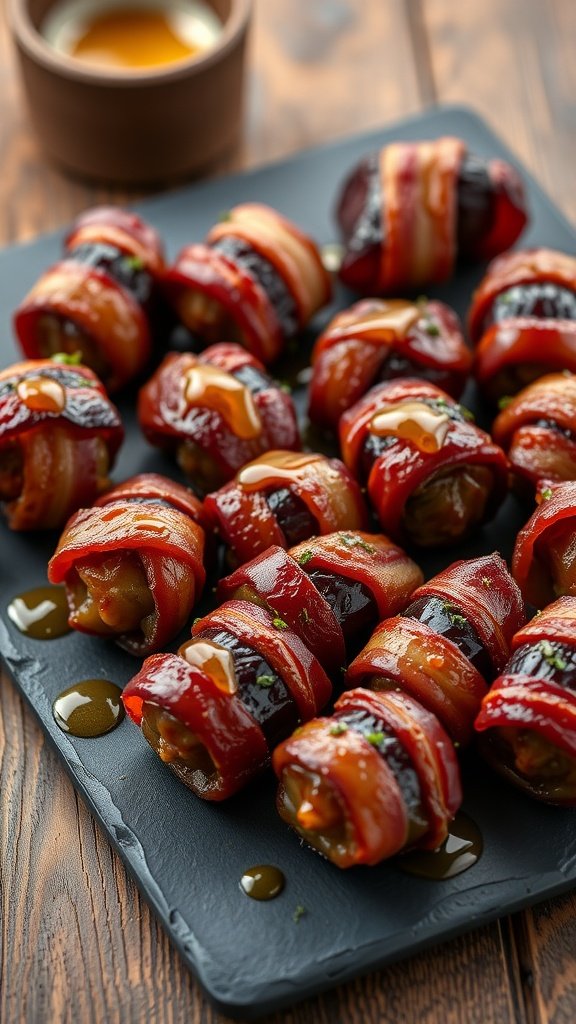
Honey-glazed bacon-wrapped dates are a delightful finger food that perfectly balances sweet and savory flavors. These treats are simple to make and are sure to impress your guests at any gathering. The combination of crispy bacon with the rich sweetness of dates creates a flavor explosion that’s hard to resist.
The best part? They come together quickly, making them ideal for both casual and elegant occasions. Serve them warm for a delicious appetizer or snack that everyone will love!
Ingredients
- 20 large Medjool dates
- 10 slices of bacon, cut in half
- 1/4 cup honey
- 1/4 teaspoon sea salt
- 1/4 teaspoon black pepper
- Fresh parsley, chopped (for garnish)
Instructions
- Preheat the oven to 375°F (190°C) and line a baking sheet with parchment paper.
- Carefully pit each date and stuff it with half of a bacon slice.
- Place the wrapped dates on the prepared baking sheet, seam side down.
- Drizzle honey over the wrapped dates and sprinkle with sea salt and black pepper.
- Bake for about 20-25 minutes, or until the bacon is crispy and caramelized.
- Remove from the oven and let cool slightly before serving. Garnish with chopped parsley for an extra touch.
Prosciutto-wrapped Asparagus Bundles
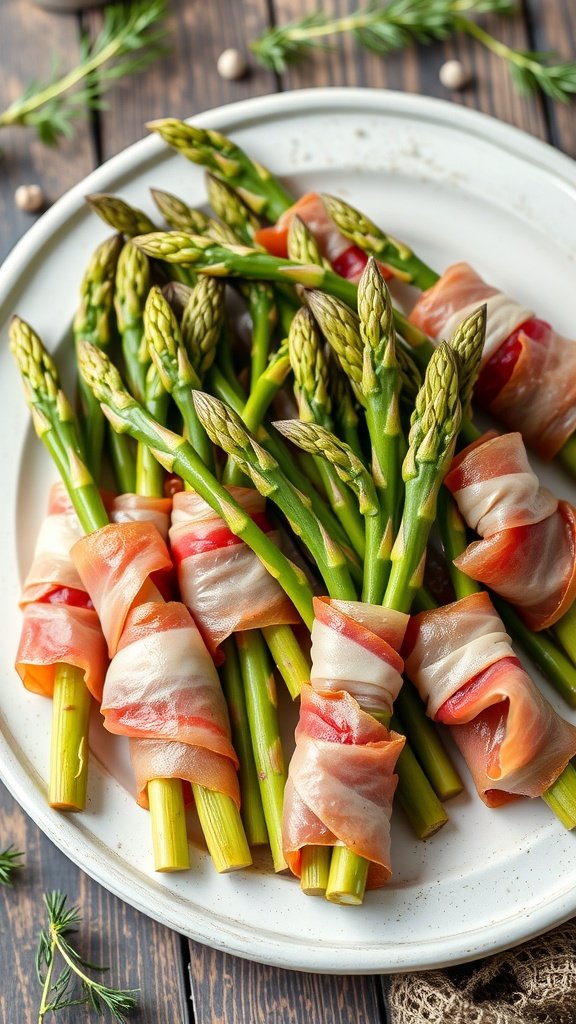
Prosciutto-wrapped asparagus bundles are a delightful finger food that combines the earthy flavor of fresh asparagus with the rich, savory taste of prosciutto. This easy-to-make dish is both elegant and delicious, making it a perfect addition to any gathering.
The crisp texture of asparagus pairs beautifully with the softness of the prosciutto, creating a satisfying bite. Plus, these bundles are quick to prepare, so you can whip them up for an impromptu party or a special occasion without any fuss.
Ingredients
- 1 pound fresh asparagus, trimmed
- 8 ounces prosciutto, thinly sliced
- 2 tablespoons olive oil
- 1 teaspoon garlic powder
- Salt and pepper, to taste
- Parmesan cheese, for garnish (optional)
Instructions
- Preheat the oven to 400°F (200°C).
- In a bowl, toss the asparagus with olive oil, garlic powder, salt, and pepper until evenly coated.
- Take a slice of prosciutto and wrap it around each asparagus spear, starting from the bottom and spiraling up. Place the wrapped spears on a baking sheet.
- Bake for 15-20 minutes, or until the prosciutto is crispy and the asparagus is tender.
- Remove from the oven and let cool slightly. Garnish with grated Parmesan cheese, if desired, before serving.
Brie and Fig Jam Puff Pastry Bites
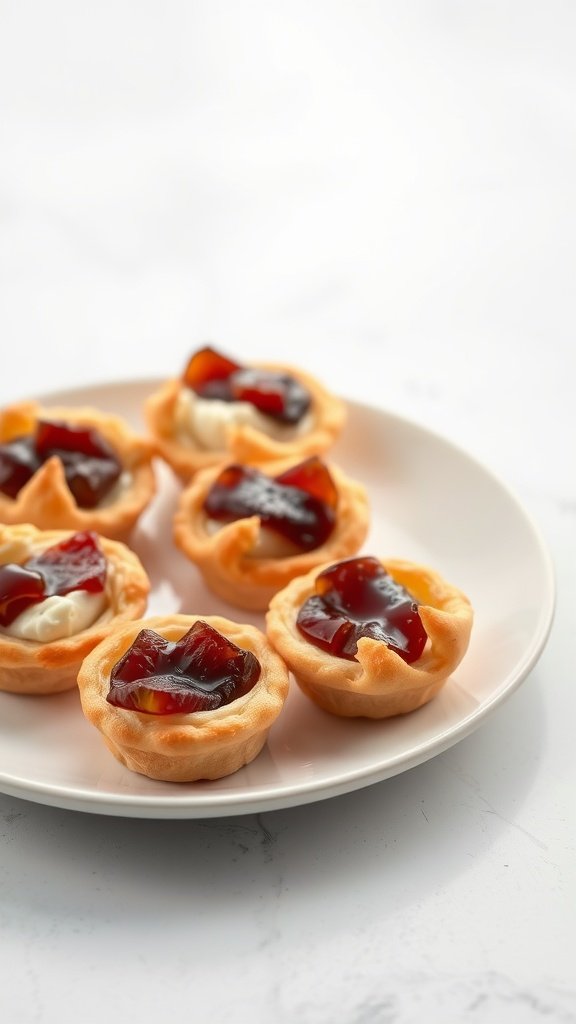
If you’re looking for a simple yet delightful appetizer, Brie and Fig Jam Puff Pastry Bites are just the ticket. These little treats combine the creamy richness of brie cheese with the sweet, fruity flavor of fig jam, all wrapped in a flaky puff pastry. They’re perfect for parties, gatherings, or even just a cozy night in.
Making these bites is a breeze, so don’t worry if you’re not an experienced cook. With minimal ingredients and quick prep time, you’ll have a sophisticated finger food that impresses everyone. They offer a nice balance of sweet and savory, making them a hit with all kinds of palates.
Ingredients
- 1 sheet of puff pastry, thawed
- 8 ounces brie cheese, cut into small pieces
- 1/2 cup fig jam
- 1 egg, beaten (for egg wash)
- Fresh thyme leaves (optional, for garnish)
Instructions
- Preheat your oven to 400°F (200°C) and line a baking sheet with parchment paper.
- Roll out the puff pastry on a lightly floured surface and cut it into squares, about 3 inches each.
- Place a piece of brie in the center of each square and top with a teaspoon of fig jam.
- Fold the corners of the pastry over the filling and pinch to seal, forming a pocket.
- Brush the tops with the beaten egg to give them a golden color when baked.
- Bake for 15-20 minutes, or until puffed and golden brown. Remove from the oven and let cool slightly.
- Garnish with fresh thyme leaves if desired before serving.
Truffle-infused Mushroom Crostini
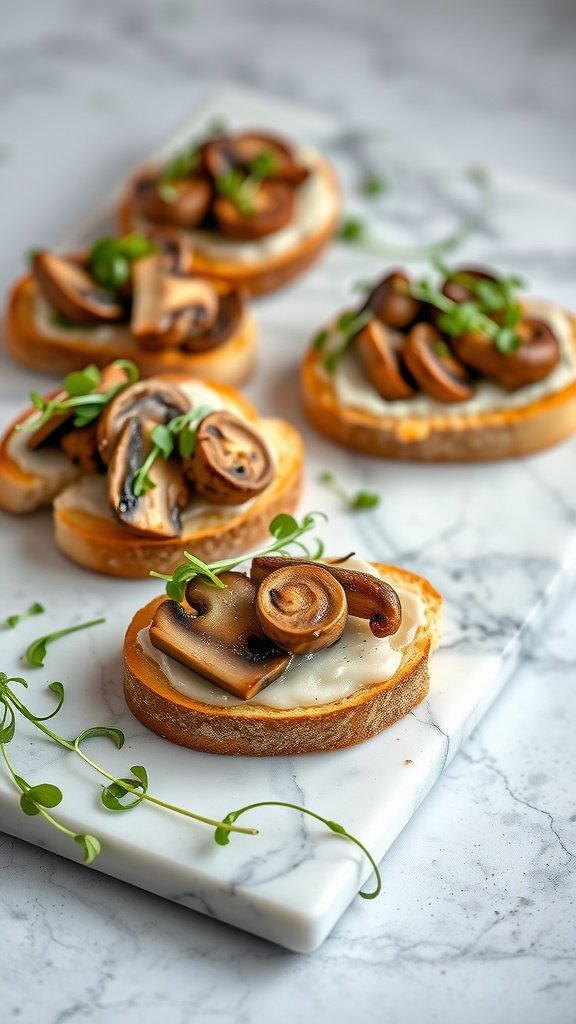
Truffle-infused Mushroom Crostini is a delightful appetizer that brings together earthy flavors and a touch of elegance. The rich taste of truffles combined with sautéed mushrooms creates a luxurious bite that’s perfect for any gathering. Plus, it’s surprisingly simple to whip up, making it a great choice for both novice cooks and seasoned chefs.
The crispy crostini serves as a perfect base for the creamy mushroom topping, creating a satisfying contrast in textures. With just a few ingredients, you can impress your guests with this gourmet treat that feels indulgent but is easy to prepare.
Ingredients
- 1 French baguette, sliced into 1/2-inch pieces
- 2 tablespoons olive oil
- 2 cups mushrooms, sliced (such as cremini or shiitake)
- 1 tablespoon truffle oil
- 1/2 cup cream cheese, softened
- 1/4 cup grated Parmesan cheese
- Salt and pepper to taste
- Fresh herbs for garnish (like chives or parsley)
Instructions
- Preheat your oven to 400°F (200°C). Arrange the baguette slices on a baking sheet and brush with olive oil. Bake for about 10 minutes or until golden brown and crisp.
- In a skillet over medium heat, sauté the sliced mushrooms for about 5-7 minutes until they are tender and slightly caramelized. Stir in truffle oil, salt, and pepper.
- In a small bowl, mix together the cream cheese and Parmesan cheese until smooth. Spread this mixture on each toasted baguette slice.
- Top the cream cheese with the sautéed mushrooms and garnish with fresh herbs.
- Serve warm and enjoy the rich flavors of this delightful crostini!
Crab Cake Sliders with Avocado Aioli

Crab cake sliders with avocado aioli are a delightful twist on classic finger foods. The blend of sweet crab meat and creamy avocado creates a savory bite that’s both rich and refreshing. These sliders are surprisingly simple to make, making them a perfect choice for gatherings or a cozy night in.
The crispy crab cakes are nestled between soft, toasted buns, topped with a smooth avocado aioli that adds a burst of flavor. Each slider is a bite-sized treat that will impress your guests and satisfy your cravings.
Ingredients
- 1 pound lump crab meat
- 1/2 cup breadcrumbs
- 1/4 cup mayonnaise
- 1 large egg
- 2 tablespoons Dijon mustard
- 1 tablespoon Worcestershire sauce
- 1 teaspoon Old Bay seasoning
- Salt and pepper to taste
- 1 avocado
- 1 tablespoon lime juice
- 4 slider buns
- Oil for frying
Instructions
- Prepare the Crab Cakes: In a large bowl, gently mix the crab meat, breadcrumbs, mayonnaise, egg, Dijon mustard, Worcestershire sauce, Old Bay seasoning, salt, and pepper. Form into small patties.
- Cook the Crab Cakes: Heat oil in a skillet over medium heat. Fry the crab cakes for about 4-5 minutes on each side until golden brown. Remove and drain on paper towels.
- Make the Avocado Aioli: In a small bowl, mash the avocado and mix in lime juice, salt, and pepper until smooth.
- Assemble the Sliders: Place a crab cake on the bottom half of each slider bun, top with avocado aioli, and cover with the bun top. Serve immediately.
Lobster Mac and Cheese Bites
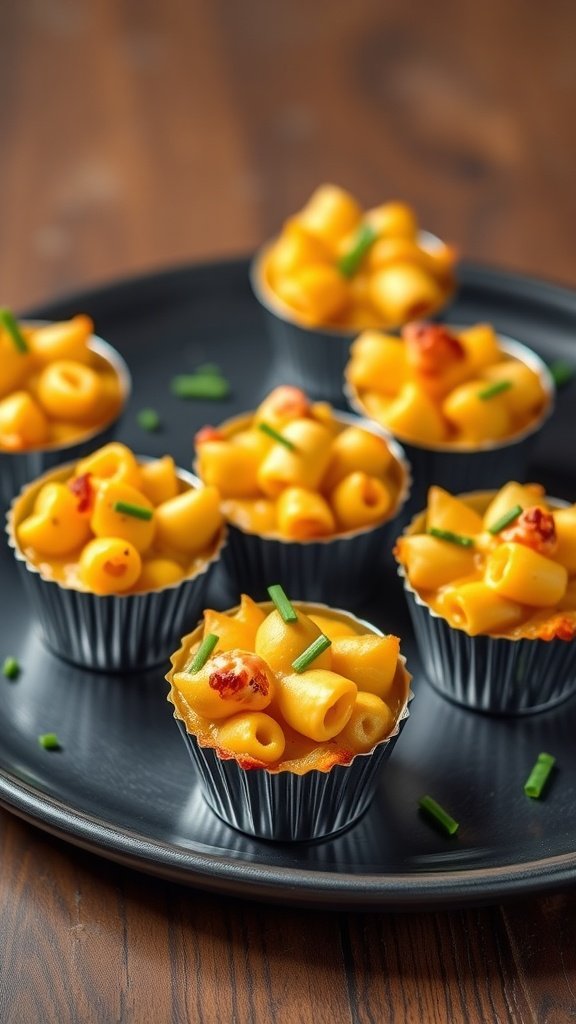
These Lobster Mac and Cheese Bites are a delightful twist on classic comfort food. The creamy, cheesy pasta is elevated with succulent lobster, making each bite a rich and flavorful experience. Perfect for parties or casual gatherings, these bites are as elegant as they are tasty.
While they might sound fancy, making these treats is surprisingly easy! With a few simple steps, you can impress your guests without spending hours in the kitchen. Let’s dive into the recipe!
Ingredients
- 1 cup elbow macaroni
- 2 tablespoons unsalted butter
- 2 tablespoons all-purpose flour
- 1 cup milk
- 1 cup sharp cheddar cheese, shredded
- 1/2 cup Gruyère cheese, shredded
- 1 cup cooked lobster meat, chopped
- 1/4 teaspoon garlic powder
- 1/4 teaspoon paprika
- Salt and pepper to taste
- 1/4 cup breadcrumbs
- Chopped chives for garnish
Instructions
- Cook the Pasta: In a pot of boiling salted water, cook the elbow macaroni until al dente, about 7-8 minutes. Drain and set aside.
- Make the Cheese Sauce: In a saucepan, melt the butter over medium heat. Whisk in the flour and cook for 1 minute. Gradually add the milk, whisking constantly until thickened. Stir in the cheddar and Gruyère until melted and smooth.
- Combine Ingredients: In a large bowl, mix the cooked pasta with the cheese sauce, lobster meat, garlic powder, paprika, salt, and pepper until well combined.
- Prepare for Baking: Preheat the oven to 350°F (175°C). Spoon the mixture into mini muffin tins or small ramekins. Top each with breadcrumbs.
- Bake: Bake for 15-20 minutes until the tops are golden and bubbly.
- Garnish and Serve: Remove from the oven and let cool for a few minutes. Garnish with chopped chives before serving.
Savory Palmiers with Cheese and Herbs

Savory palmiers are a delightful treat that combine flaky pastry with rich cheese and aromatic herbs. These bite-sized delights are perfect for any gathering, offering a delicious blend of textures and flavors that will leave your guests wanting more.
With their crispy edges and creamy center, these palmiers are surprisingly simple to make, making them a go-to choice for both novice and experienced cooks. Serve them warm for the best experience, and watch as they disappear from the platter!
Ingredients
- 1 sheet puff pastry, thawed
- 1 cup grated cheese (such as Gruyère or cheddar)
- 1 tablespoon fresh herbs (like thyme, rosemary, or parsley), chopped
- 1 egg, beaten (for egg wash)
- Salt and pepper to taste
Instructions
- Preheat the oven to 400°F (200°C) and line a baking sheet with parchment paper.
- Roll out the puff pastry on a floured surface until smooth. Spread the grated cheese evenly over the pastry, then sprinkle with the chopped herbs, salt, and pepper.
- Starting from one side, roll the pastry tightly into a log. Once rolled, slice the log into 1/2-inch pieces and lay them flat on the prepared baking sheet.
- Brush the tops with the beaten egg to give them a golden color when baked.
- Bake for 15-20 minutes, or until golden brown and puffed up. Remove from the oven and let cool slightly before serving.
Truffled Popcorn with Parmesan

Truffled popcorn with Parmesan is a delightful twist on a classic snack. This recipe transforms ordinary popcorn into a gourmet treat, combining the earthy richness of truffle oil with the savory depth of freshly grated Parmesan. It’s a simple yet elegant option that’s perfect for movie nights or entertaining guests.
The taste is a harmonious blend of buttery popcorn and luxurious truffle flavor, making it an irresistible finger food. Plus, it’s quick to make, requiring just a few ingredients and minimal effort, allowing you to enjoy a touch of luxury without a lot of fuss.
Ingredients
- 1/2 cup popcorn kernels
- 3 tablespoons vegetable oil
- 2 tablespoons truffle oil
- 1/2 cup freshly grated Parmesan cheese
- Salt to taste
Instructions
- Pop the Popcorn: In a large pot, heat the vegetable oil over medium heat. Add the popcorn kernels and cover the pot. Shake occasionally until the popping slows down, then remove from heat.
- Season: Once the popcorn is ready, transfer it to a large bowl. Drizzle with truffle oil and toss gently to coat evenly.
- Add Cheese: Sprinkle the grated Parmesan over the popcorn while it’s still warm, tossing again to ensure every bite is cheesy and flavorful.
- Finish: Season with salt to taste. Serve immediately and enjoy this luxurious snack!
Whipped Ricotta with Honey and Pistachios
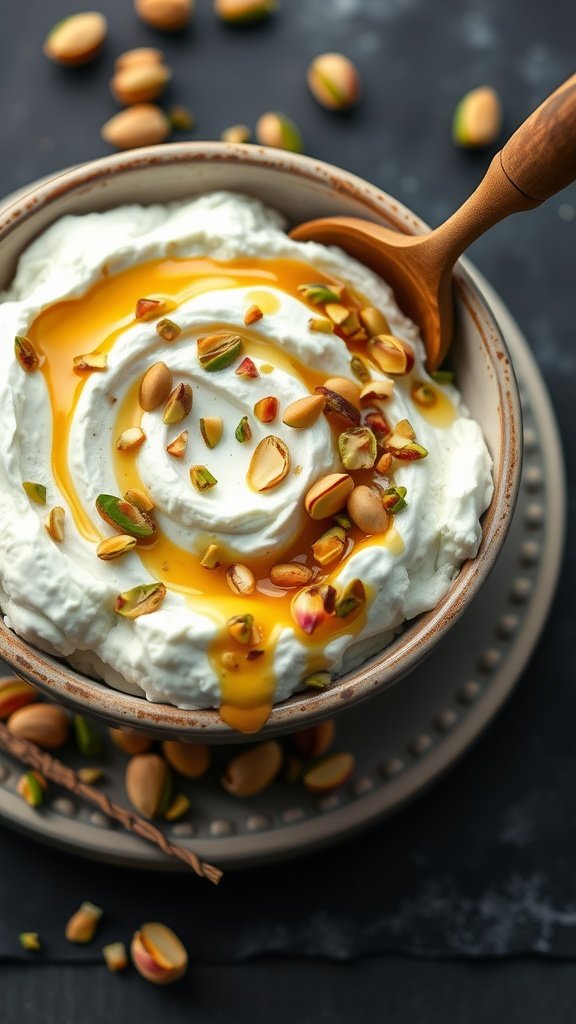
Whipped Ricotta with Honey and Pistachios is a delightful finger food that brings together creamy, sweet, and nutty flavors in every bite. This simple yet elegant dish can be served as a dip or spread, making it perfect for gatherings or cozy nights in. The richness of the ricotta is beautifully complemented by the drizzle of honey and the crunch of pistachios, creating a balance that is both satisfying and indulgent.
The best part? It’s incredibly easy to whip up! Just blend the ricotta until smooth, mix in the honey, and top it with chopped pistachios. Whether you’re entertaining guests or treating yourself, this luxurious twist on a classic dip is sure to impress.
Ingredients
- 1 cup fresh ricotta cheese
- 2 tablespoons honey, plus extra for drizzling
- 1/4 teaspoon vanilla extract
- 1/4 cup shelled pistachios, chopped
- Pinch of salt
Instructions
- In a mixing bowl, combine the ricotta cheese, honey, vanilla extract, and a pinch of salt. Blend until smooth and creamy.
- Transfer the whipped ricotta to a serving dish and smooth the top with a spatula.
- Sprinkle the chopped pistachios over the ricotta, then drizzle with additional honey for an extra touch of sweetness.
- Serve immediately with fresh fruit, crackers, or sliced bread for dipping.
Goat Cheese Stuffed Peppadews
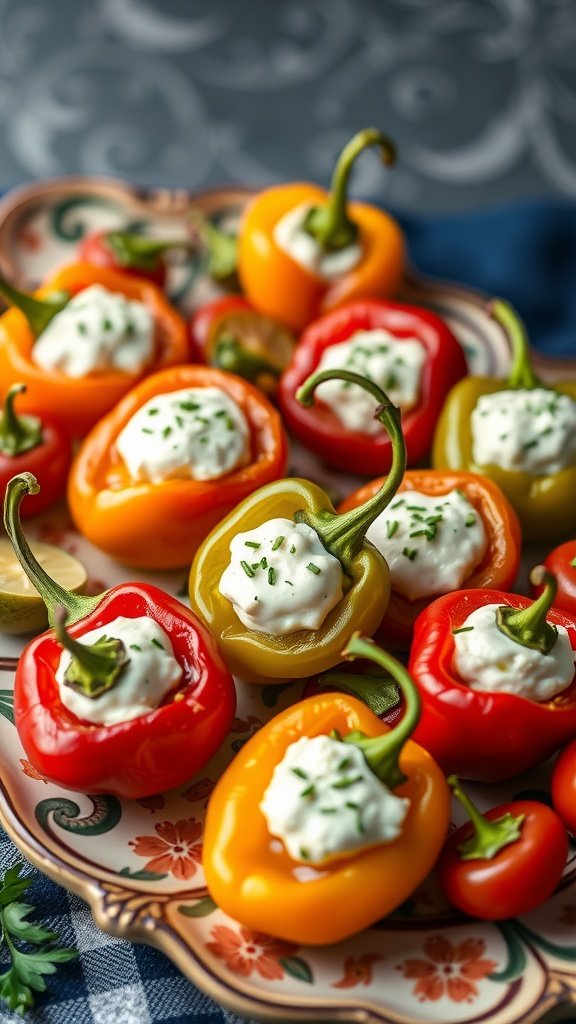
Goat cheese stuffed peppadews are a delightful finger food that combines sweetness and tanginess in one bite. The peppadews, with their vibrant colors, add a pop of personality to any gathering while the creamy goat cheese filling offers a rich, decadent flavor. These little bites are not only visually appealing but also incredibly simple to prepare, making them a perfect choice for entertaining.
The slightly spicy kick from the peppadews contrasts beautifully with the smooth goat cheese, creating a balanced taste that guests will love. Enjoy them as a pre-dinner appetizer or as part of a larger spread; they’re sure to be a hit!
Ingredients
- 1 jar peppadew peppers, drained
- 8 oz goat cheese, softened
- 1/4 cup cream cheese, softened
- 1 tablespoon fresh chives, chopped
- 1 tablespoon fresh parsley, chopped
- 1 teaspoon honey (optional)
- Salt and pepper to taste
Instructions
- Prepare the Cheese Filling: In a mixing bowl, combine the softened goat cheese and cream cheese. Blend until smooth and creamy.
- Add Fresh Herbs: Stir in the chopped chives and parsley, along with honey if you prefer a touch of sweetness. Season with salt and pepper to taste.
- Stuff the Peppadews: Using a small spoon or piping bag, carefully fill each peppadew with the cheese mixture, making sure to fill them generously.
- Chill and Serve: Arrange the stuffed peppadews on a platter. For the best flavor, chill them in the refrigerator for at least 30 minutes before serving.
Ahi Poke Nachos
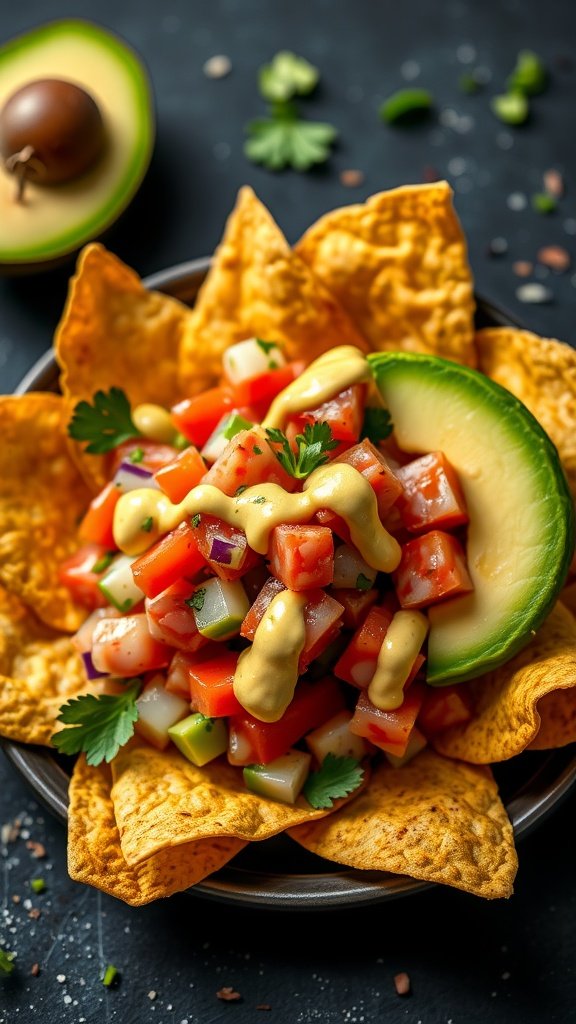
Ahi Poke Nachos are a delightful fusion of traditional Hawaiian flavors and classic snack food. This dish features crispy tortilla chips topped with fresh ahi tuna, marinated with soy sauce, sesame oil, and a hint of lime. The combination of textures and flavors makes every bite a treat, blending the savory essence of poke with the satisfying crunch of nachos.
Easy to prepare, Ahi Poke Nachos are perfect for gatherings or a casual night in. Whether you’re entertaining friends or just treating yourself, this recipe brings a luxurious twist to finger foods, elevating your snacking experience.
Ingredients
- 1 pound fresh ahi tuna, diced
- 1/4 cup soy sauce
- 1 tablespoon sesame oil
- 1 teaspoon lime juice
- 1 avocado, sliced
- 1 cup diced tomatoes
- 1/4 cup red onion, finely chopped
- 1 jalapeño, seeded and diced
- 1 cup crispy tortilla chips
- Fresh cilantro, for garnish
- Sriracha or spicy mayo, for drizzling
Instructions
- Prepare the Ahi: In a bowl, combine diced ahi tuna with soy sauce, sesame oil, and lime juice. Mix gently to coat and let it marinate in the fridge for about 15-20 minutes.
- Assemble the Nachos: On a serving platter, layer the crispy tortilla chips. Top with the marinated ahi poke, diced tomatoes, red onion, jalapeño, and avocado slices.
- Add Garnish: Sprinkle fresh cilantro over the top and drizzle with Sriracha or spicy mayo for an added kick.
- Serve Immediately: Enjoy your Ahi Poke Nachos right away for the best crunch and flavor!
Spicy Tuna Tartare on Crispy Wontons
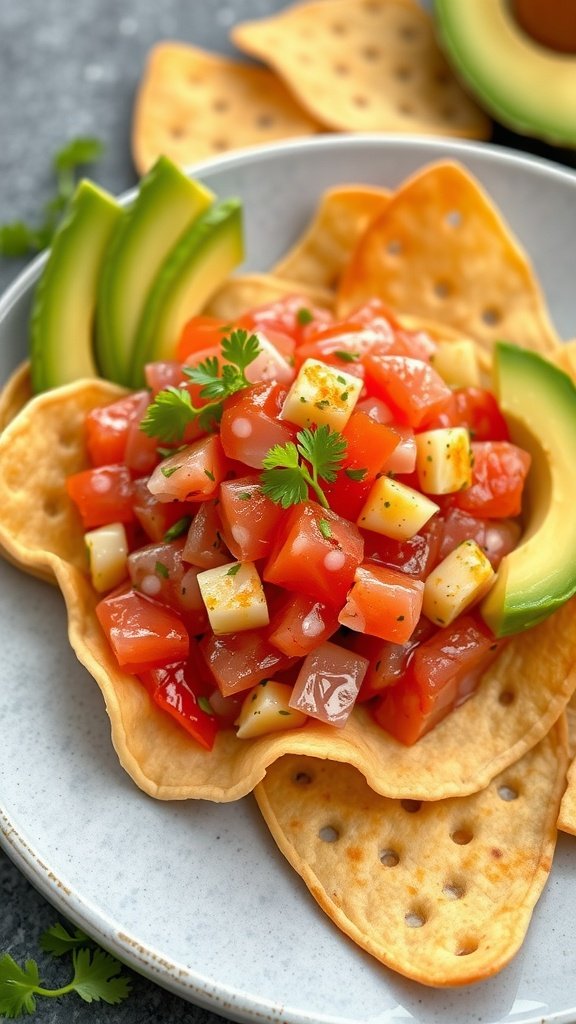
Spicy Tuna Tartare on Crispy Wontons is a delightful dish that combines fresh, flavorful ingredients with a satisfying crunch. The creamy texture of the spicy tuna contrasts beautifully with the crispy wonton, making each bite a treat for your taste buds. This recipe is not only simple to whip up, but it also adds a touch of elegance to any gathering.
Whether you’re hosting a party or just want to enjoy a delicious snack, this recipe is a fantastic addition to your repertoire. With its vibrant flavors and appealing presentation, it’s sure to impress your guests without requiring hours in the kitchen.
Ingredients
- 1 pound sushi-grade tuna, diced
- 2 tablespoons mayonnaise
- 1 tablespoon sriracha sauce
- 1 teaspoon soy sauce
- 1 tablespoon chopped green onions
- 1 avocado, sliced
- 1 package of wonton wrappers
- Vegetable oil for frying
- Sesame seeds for garnish
Instructions
- Prepare the Wontons: Heat vegetable oil in a deep pan over medium heat. Fry wonton wrappers until golden and crispy, about 30 seconds per side. Remove and drain on paper towels.
- Make the Tuna Mixture: In a bowl, combine diced tuna, mayonnaise, sriracha, soy sauce, and green onions. Mix gently until well combined.
- Assemble: Spoon the spicy tuna mixture onto the crispy wontons. Top with avocado slices and a sprinkle of sesame seeds.
- Serve: Arrange on a platter and serve immediately for the best texture and flavor.
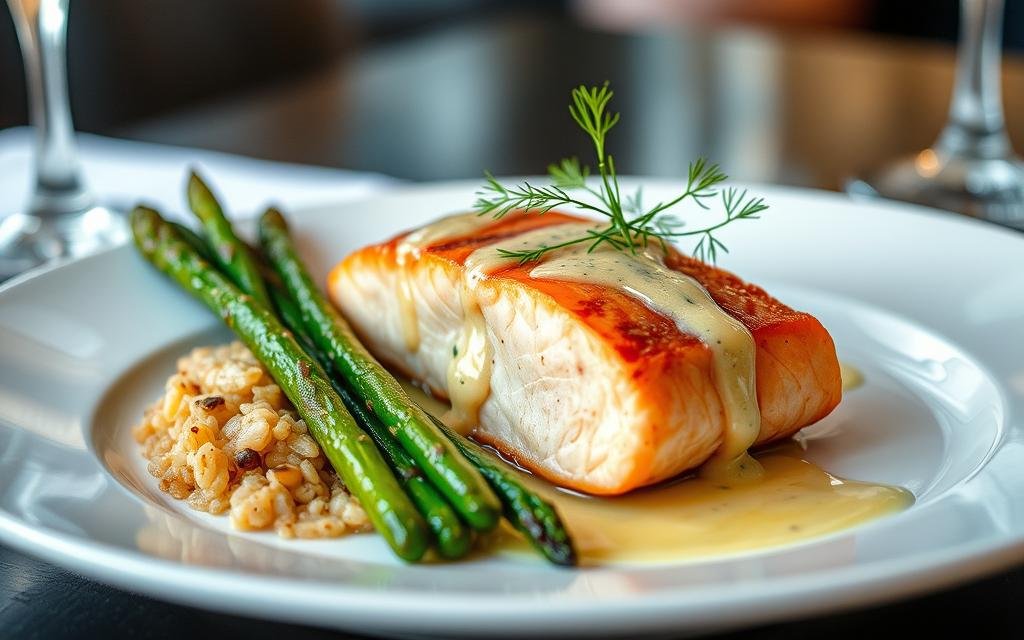
Seared Scallops with Lemon Butter Sauce
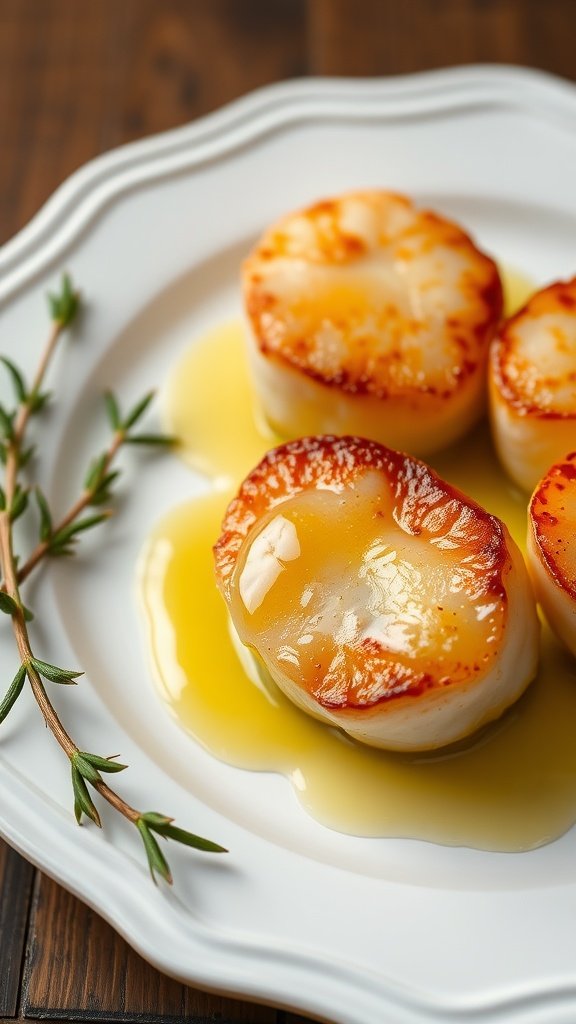
Seared scallops are a true delicacy, delivering a delightful burst of flavor in every bite. When paired with a zesty lemon butter sauce, they create a dish that feels indulgent yet is surprisingly easy to whip up at home. The scallops are tender and slightly sweet, complemented perfectly by the tangy and rich sauce.
This recipe is perfect for a casual gathering or an elegant dinner party. With a few simple ingredients and quick cooking time, you can impress your guests without spending hours in the kitchen.
Ingredients
- 1 pound large sea scallops
- Salt and pepper to taste
- 2 tablespoons olive oil
- 4 tablespoons unsalted butter
- 2 cloves garlic, minced
- Juice of 1 lemon
- 1 tablespoon fresh parsley, chopped
Instructions
- Prepare the Scallops: Pat the scallops dry with paper towels and season both sides with salt and pepper.
- Sear the Scallops: Heat olive oil in a skillet over medium-high heat. Once hot, add the scallops and sear for about 2-3 minutes on each side until golden brown. Remove from the skillet and set aside.
- Make the Sauce: In the same skillet, reduce the heat to medium. Add butter and garlic, cooking until fragrant. Stir in the lemon juice and parsley.
- Combine: Return the scallops to the skillet, tossing gently to coat in the sauce. Cook for an additional minute.
- Serve: Plate the scallops and drizzle with the lemon butter sauce before serving.
Mini Quiche with Wild Mushrooms
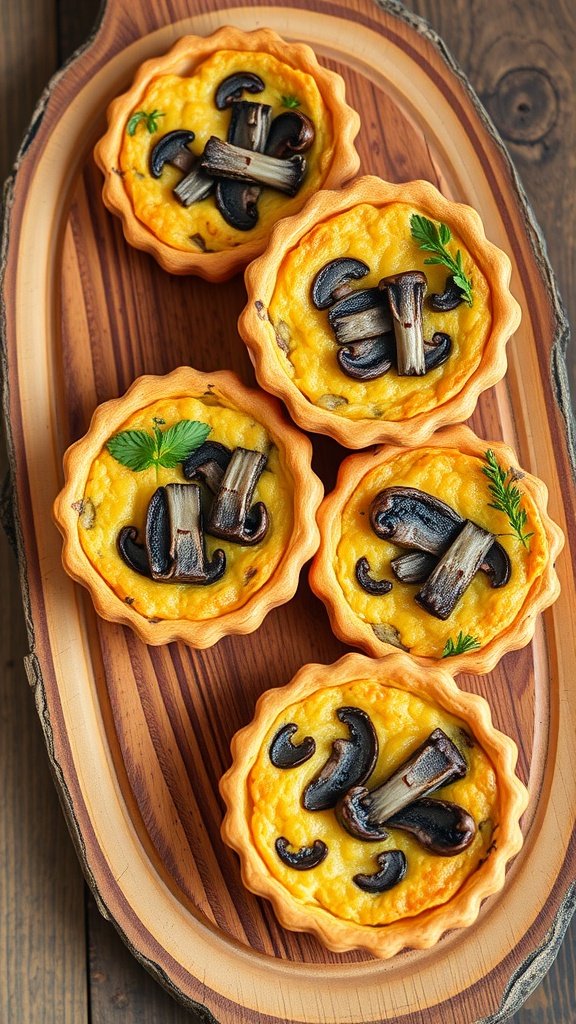
Mini quiches with wild mushrooms are a delightful and savory finger food that packs a punch of flavor in each bite. These little tarts are creamy, rich, and offer a wonderful earthy taste from the mushrooms. They’re perfect for entertaining, and what’s more, they’re simple to whip up!
The buttery crust complements the silky filling beautifully, making it a treat for your tastebuds. Whether served warm or at room temperature, they are sure to impress your guests with their elegant presentation and luxurious flavors.
Ingredients
- 1 pre-made pie crust or puff pastry
- 1 cup wild mushrooms, chopped
- 1 small onion, finely diced
- 2 tablespoons olive oil
- 4 large eggs
- 1 cup heavy cream
- 1/2 cup grated cheese (such as Gruyère or cheddar)
- Salt and pepper, to taste
- Fresh herbs for garnish (like thyme or parsley)
Instructions
- Preheat your oven to 375°F (190°C) and grease a mini muffin tin.
- Roll out the pie crust and cut it into small circles to fit the muffin tin. Press the circles into the cups.
- In a skillet, heat olive oil over medium heat. Sauté the onions until translucent, then add the chopped mushrooms and cook until tender. Season with salt and pepper.
- In a bowl, whisk together the eggs and heavy cream. Stir in the sautéed mushrooms, cheese, and more salt and pepper if needed.
- Pour the mixture into the prepared crusts, filling them about 3/4 full.
- Bake for 20-25 minutes, or until the quiches are set and lightly golden on top.
- Allow to cool slightly before removing from the muffin tin. Garnish with fresh herbs before serving.
Smoked Salmon Canapés
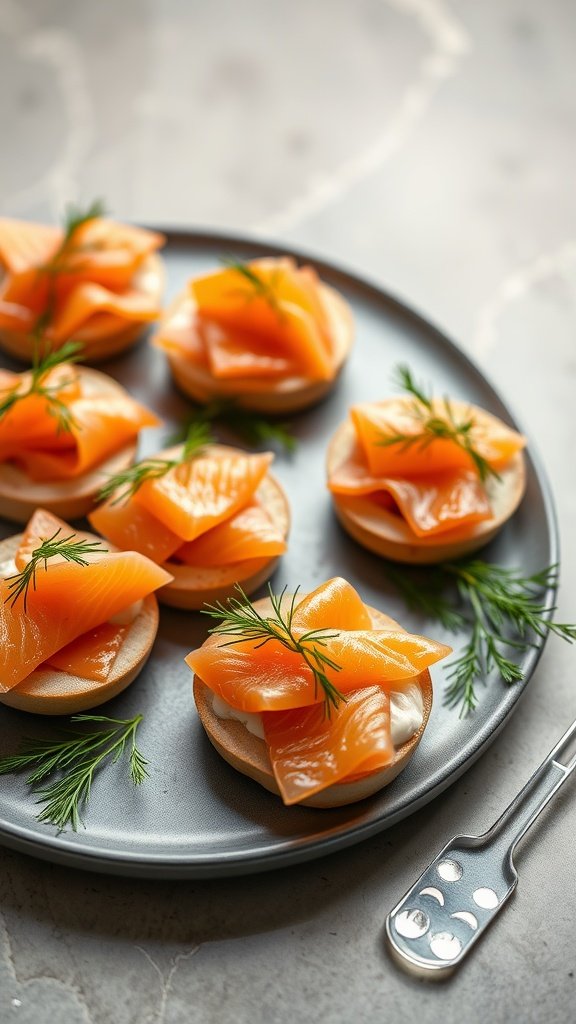
Smoked salmon canapés are a delightful combination of rich flavors and elegant presentation. These bite-sized treats are perfect for any gathering, offering a savory taste that balances the smoky notes of the salmon with a creamy spread. They are surprisingly simple to make and can add a luxurious touch to your appetizer spread.
With just a few ingredients, these canapés are not only quick to assemble but also visually appealing. Each one is a little work of art, making them a hit at parties. Plus, they can be prepped ahead of time, leaving you free to enjoy your event.
Ingredients
- 1 French baguette or small crackers
- 8 oz cream cheese, softened
- 1 tbsp lemon juice
- 8 oz smoked salmon, thinly sliced
- Fresh dill or chives for garnish
Instructions
- Prepare the Base: Slice the French baguette into thin rounds or use your favorite crackers as the base for the canapés.
- Mix the Spread: In a bowl, combine the softened cream cheese and lemon juice until smooth. Adjust the seasoning with salt and pepper if desired.
- Assemble the Canapés: Spread a layer of the cream cheese mixture onto each slice of baguette or cracker. Top with a slice of smoked salmon, folding it elegantly.
- Garnish: Add a sprig of fresh dill or chives on top for a pop of color and extra flavor.
- Serve: Arrange the canapés on a serving platter and enjoy your luxurious finger foods!
Sweet and Spicy Chicken Wings

Sweet and spicy chicken wings are a delightful treat for any gathering. The combination of heat and sweetness makes each bite a flavorful adventure. This recipe is straightforward, making it perfect for both seasoned cooks and those just starting out in the kitchen.
With a zesty sauce that caramelizes beautifully, these wings are sure to impress your guests. They are perfect for game day or any casual get-together. Just toss them in the oven or on the grill, and enjoy the deliciousness!
Ingredients
- 2 pounds chicken wings
- 1/2 cup honey
- 1/4 cup soy sauce
- 2 tablespoons sriracha sauce
- 2 cloves garlic, minced
- 1 tablespoon fresh ginger, grated
- 1 tablespoon sesame oil
- Salt and pepper to taste
- Chopped green onions for garnish
- Sesame seeds for garnish
Instructions
- Preheat your oven to 400°F (200°C).
- In a bowl, mix together honey, soy sauce, sriracha, garlic, ginger, sesame oil, and season with salt and pepper.
- Place chicken wings in a large baking dish and pour the sauce over them, ensuring they are well coated.
- Bake in the preheated oven for 40-45 minutes, turning halfway through, until the wings are crispy and cooked through.
- Remove from the oven and garnish with chopped green onions and sesame seeds before serving.
Artisan Cheese Board with Fruits
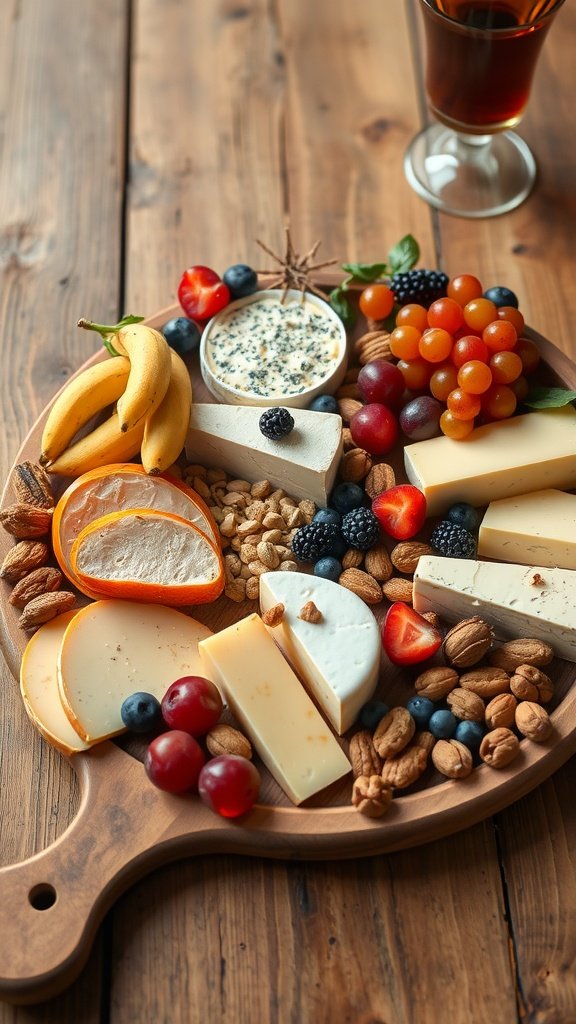
Creating an artisan cheese board is a delightful way to elevate your gatherings. It’s not only visually appealing but also a treat for the taste buds, combining the rich flavors of various cheeses with the sweetness of fresh fruits and the crunch of nuts. This recipe is simple to assemble, making it perfect for both casual get-togethers and elegant soirées.
The key to a successful cheese board is variety. Choose cheeses with different textures and flavors, pair them with seasonal fruits, and add some crunchy accompaniments like nuts or crackers. This not only enhances the taste but also adds an appealing contrast to the presentation.
Ingredients
- 3 types of cheese (e.g., brie, aged cheddar, goat cheese)
- 1 cup assorted fresh fruits (e.g., grapes, berries, sliced apples)
- 1/2 cup mixed nuts (e.g., almonds, walnuts)
- 1/4 cup honey or fig jam
- 1 package of artisan crackers
- Fresh herbs for garnish (optional)
Instructions
- Select a large wooden or marble board for serving.
- Arrange the cheeses in various sections of the board, slicing some for easy serving.
- Fill in the gaps with fresh fruits, mixing colors for visual appeal.
- Add a handful of nuts in empty spaces for crunchiness.
- Include a small bowl of honey or fig jam for drizzling.
- Finish with a selection of artisan crackers around the edges.
- Garnish with fresh herbs if desired. Serve and enjoy!
Spiced Sweet Potato Fries with Aioli
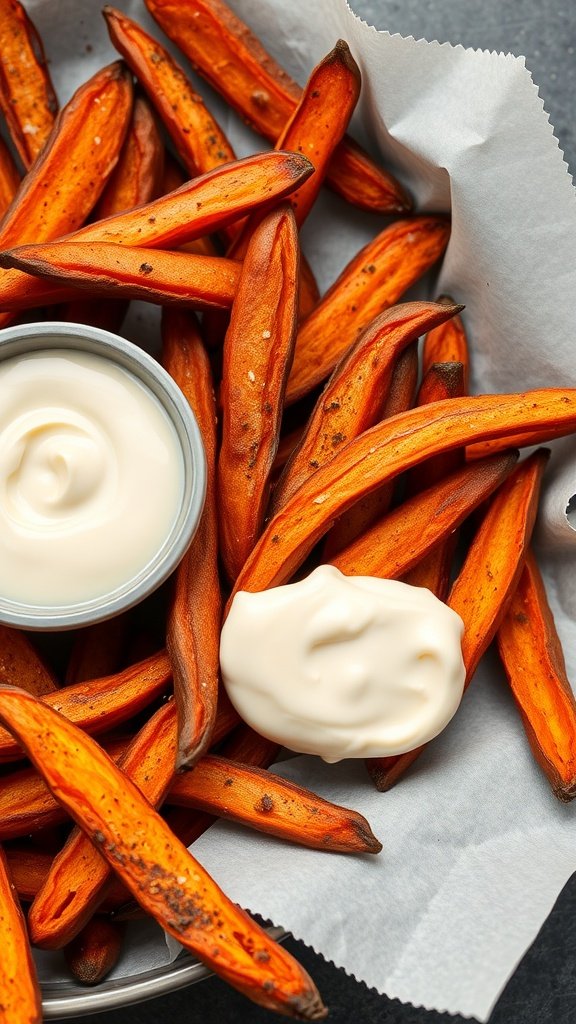
Spiced sweet potato fries are a flavorful twist on a classic snack. They combine the natural sweetness of sweet potatoes with a delightful blend of spices, creating a tasty treat that perfectly balances sweet and savory.
Pair these fries with a creamy aioli for a dipping sauce that adds an extra layer of richness. This recipe is simple to prepare, making it an ideal finger food for parties or just a cozy night in.
Ingredients
- 2 large sweet potatoes
- 2 tablespoons olive oil
- 1 teaspoon paprika
- 1/2 teaspoon garlic powder
- 1/2 teaspoon cayenne pepper
- 1 teaspoon salt
- 1/2 teaspoon black pepper
Instructions
- Preheat your oven to 425°F (220°C).
- Wash and peel the sweet potatoes, then cut them into thin wedges.
- In a large bowl, toss the sweet potato wedges with olive oil, paprika, garlic powder, cayenne pepper, salt, and black pepper until well coated.
- Spread the fries in a single layer on a baking sheet lined with parchment paper.
- Bake for 25-30 minutes, turning halfway through, until they are golden and crispy.
- While the fries are baking, prepare the aioli by mixing mayonnaise with a squeeze of lemon juice and a pinch of garlic powder.
- Once the fries are done, let them cool slightly before serving with the aioli.
BBQ Shrimp Skewers with Cilantro
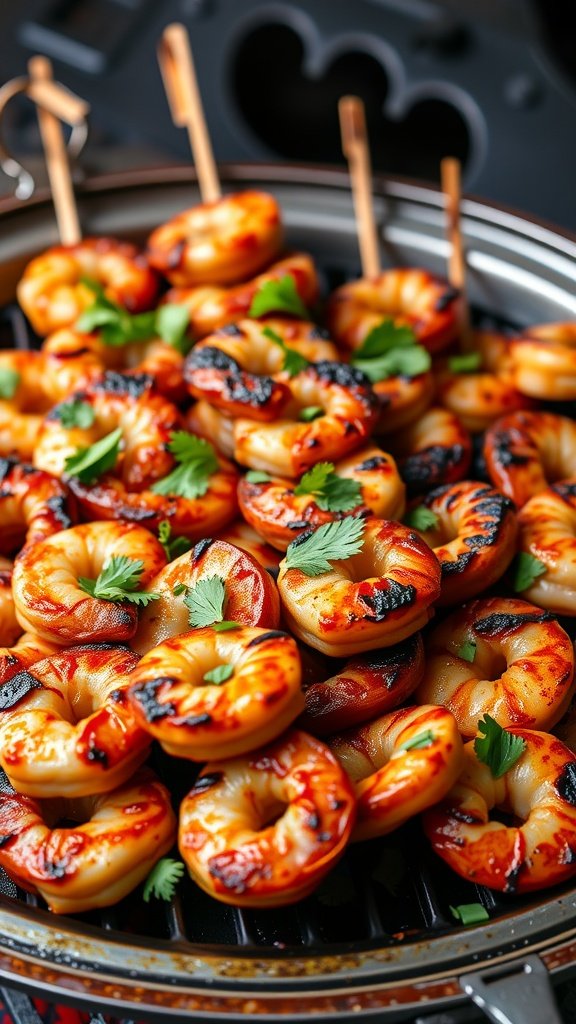
BBQ Shrimp Skewers with Cilantro are a delightful treat that combines the smoky flavors of grilling with the fresh, vibrant taste of cilantro. This dish is not only easy to prepare, but it also packs a flavorful punch that will impress your guests at any gathering. The shrimp are marinated to infuse them with a zesty kick, making each bite both juicy and satisfying.
Perfect for summer barbecues or casual get-togethers, these skewers are a hit with seafood lovers and those looking for a light bite. They can be served as a main course or as an elegant finger food that’s simple to hold and enjoy. With just a few ingredients and minimal prep time, you’ll have a dish that feels special without a lot of fuss.
Ingredients
- 1 pound large shrimp, peeled and deveined
- 3 tablespoons olive oil
- 2 tablespoons lime juice
- 2 cloves garlic, minced
- 1 teaspoon smoked paprika
- Salt and pepper to taste
- 1/4 cup fresh cilantro, chopped
- Skewers (soaked in water if wooden)
Instructions
- Marinate the Shrimp: In a large bowl, combine olive oil, lime juice, minced garlic, smoked paprika, salt, and pepper. Add the shrimp and toss well to coat. Cover and let marinate in the refrigerator for at least 30 minutes.
- Prepare the Grill: Preheat your grill to medium-high heat. If using wooden skewers, make sure they have been soaked in water to prevent burning.
- Skewer the Shrimp: Thread the marinated shrimp onto the skewers, leaving a little space between each shrimp for even cooking.
- Grill the Shrimp: Place the skewers on the preheated grill. Cook for about 2-3 minutes on each side, or until the shrimp are pink and opaque.
- Garnish and Serve: Remove the skewers from the grill and sprinkle with fresh cilantro. Serve immediately with lime wedges for an extra burst of flavor.
Savory Stuffed Mini Peppers
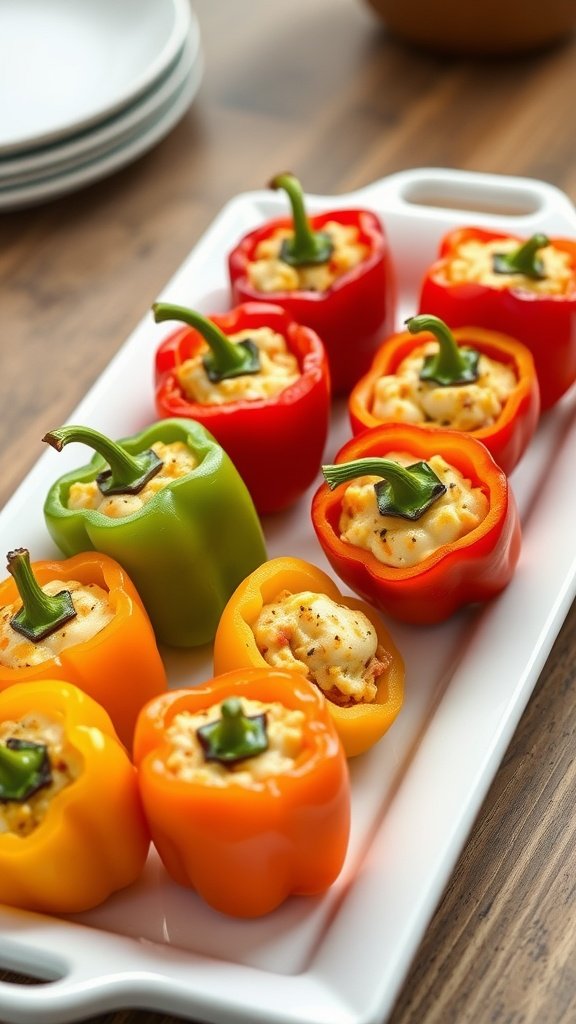
Savory stuffed mini peppers are a delightful bite-sized treat that packs a flavorful punch. These colorful little gems are a perfect combination of sweetness from the peppers and a savory filling that can be customized to your taste. They’re not only visually appealing but also simple to prepare, making them an ideal choice for gatherings or as a fun weeknight snack.
The best part about these stuffed mini peppers is their versatility. You can fill them with a variety of ingredients, from creamy cheeses and herbs to hearty meats and grains. The result is a satisfying blend of tastes and textures that’s sure to impress your guests or family. Enjoy them warm or at room temperature, and watch them disappear!
Ingredients
- 12 mini bell peppers (assorted colors)
- 1 cup cooked quinoa or rice
- 1 cup shredded cheese (cheddar, mozzarella, or your choice)
- 1/2 cup black beans, drained and rinsed
- 1/4 cup diced tomatoes
- 1 teaspoon cumin
- 1/2 teaspoon smoked paprika
- Salt and pepper to taste
- Fresh cilantro for garnish (optional)
Instructions
- Preheat your oven to 375°F (190°C).
- Slice the tops off the mini bell peppers and remove the seeds. Arrange them upright in a baking dish.
- In a large bowl, combine the cooked quinoa or rice, shredded cheese, black beans, diced tomatoes, cumin, smoked paprika, salt, and pepper. Mix well to combine.
- Spoon the filling into each mini pepper, packing it in gently.
- Bake in the preheated oven for 20-25 minutes, or until the peppers are tender and the cheese is melted and bubbly.
- Remove from the oven and let cool slightly. Garnish with fresh cilantro before serving.
Mini Tacos with Gourmet Fillings
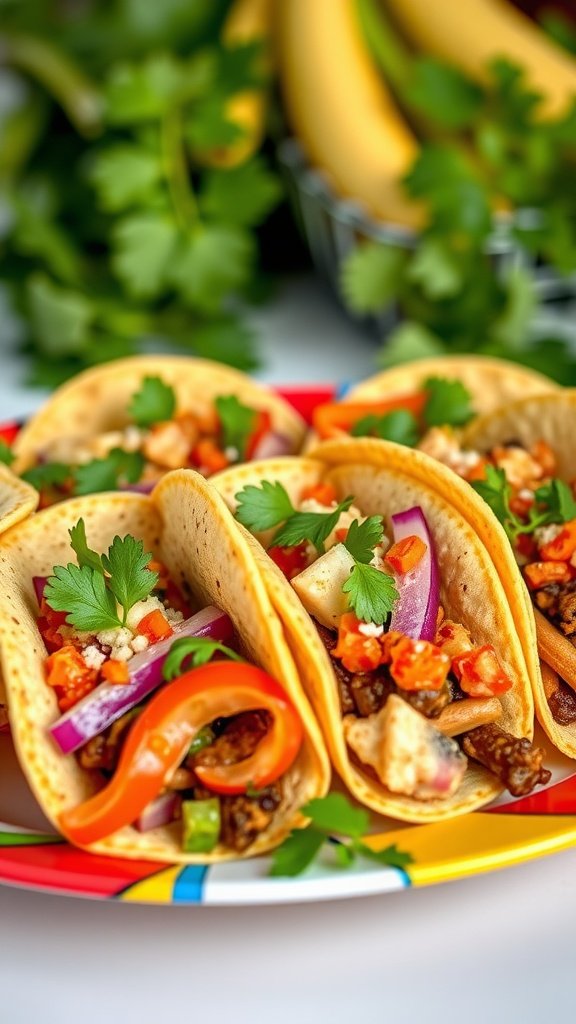
Mini tacos are a delightful twist on traditional tacos, offering a bite-sized option that packs in all the flavor without the fuss. These little gems are versatile, allowing you to experiment with gourmet fillings that elevate them to a new level. With a blend of crunchy vegetables, savory proteins, and fresh herbs, they create a colorful and delicious bite that’s sure to impress your guests.
Making these mini tacos is simple and fun, making them perfect for gatherings or casual family dinners. You can mix and match fillings to suit your tastes or dietary preferences, ensuring everyone finds something they love. These tacos are not only visually appealing but also burst with flavor, making them a go-to finger food for any occasion.
Ingredients
- 12 mini corn tortillas
- 1 cup cooked chicken, shredded
- 1/2 cup black beans, rinsed and drained
- 1/2 cup diced bell peppers
- 1/4 cup red onion, thinly sliced
- 1/2 cup diced avocado
- 1/4 cup crumbled feta cheese
- 1/4 cup fresh cilantro, chopped
- Juice of 1 lime
- Salt and pepper to taste
Instructions
- Warm the tortillas: In a skillet over medium heat, warm the mini corn tortillas for about 30 seconds on each side until soft and pliable.
- Prepare the filling: In a bowl, combine shredded chicken, black beans, diced bell peppers, red onion, avocado, feta cheese, and cilantro. Squeeze lime juice over the mixture and season with salt and pepper. Gently toss to combine.
- Assemble the tacos: Place a generous spoonful of the filling onto each mini tortilla. Top with additional cilantro or feta, if desired.
- Serve: Arrange the mini tacos on a serving platter and enjoy them fresh!
Mini Lobster Tacos with Lime Cream
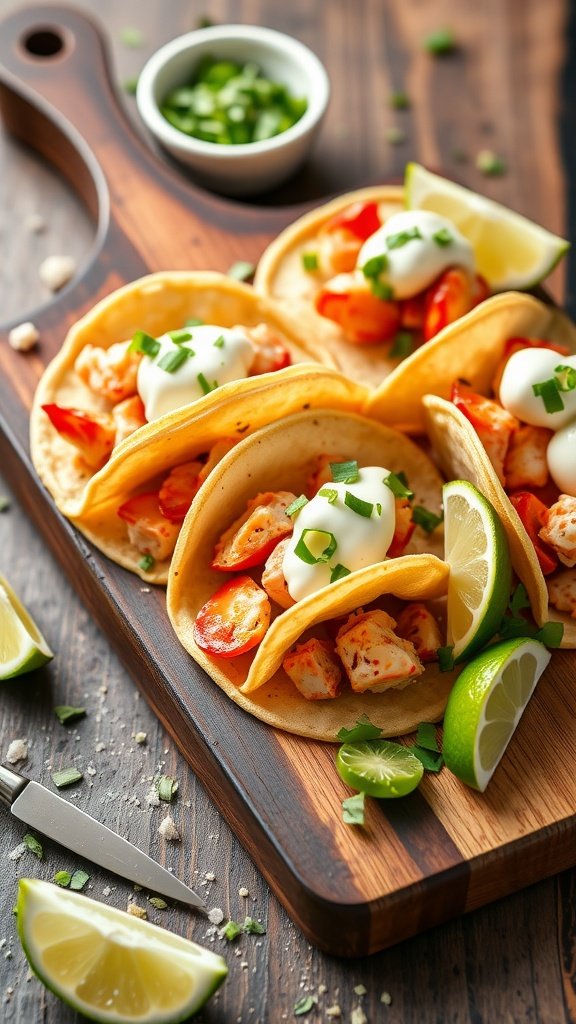
Mini lobster tacos are a delightful twist on a classic favorite, offering a taste of the sea in a fun, handheld format. The sweet and tender lobster meat pairs beautifully with a zesty lime cream, creating a refreshing contrast that’s sure to please your taste buds.
These little bites are surprisingly simple to make. Perfect for gatherings or just a fun dinner at home, they bring a touch of luxury without requiring hours in the kitchen. Whether you’re hosting a party or enjoying a cozy night in, these mini tacos are sure to impress.
Ingredients
- 1 pound cooked lobster meat, chopped
- 8 small corn tortillas
- 1/2 cup sour cream
- 1 lime, juiced
- 1 tablespoon lime zest
- 1/4 cup diced tomatoes
- 1/4 cup chopped green onions
- 1 tablespoon cilantro, chopped
- Salt and pepper to taste
Instructions
- Prepare the Lime Cream: In a bowl, combine the sour cream, lime juice, lime zest, salt, and pepper. Mix until smooth and set aside.
- Warm the Tortillas: In a skillet over medium heat, warm the corn tortillas for about 30 seconds on each side until pliable.
- Assemble the Tacos: Place a few pieces of chopped lobster in the center of each tortilla. Top with diced tomatoes, green onions, and a drizzle of lime cream.
- Garnish: Finish with a sprinkle of chopped cilantro for added flavor and color.
- Serve: Enjoy immediately while warm, with extra lime wedges on the side for drizzling.
Pistachio-Crusted Goat Cheese Balls

Pistachio-crusted goat cheese balls are a delightful finger food that blends creamy and crunchy textures. The tangy flavor of goat cheese pairs beautifully with the earthy taste of pistachios, making each bite a treat for the taste buds. Not only are they tasty, but they are also easy to prepare, making them perfect for gatherings or a sophisticated snack at home.
The recipe is versatile, allowing for creativity in flavorings and toppings. You can serve them plain or drizzle them with honey or a tangy sauce for an extra layer of flavor. Whether you’re hosting a party or just want a quick appetizer, these goat cheese balls are sure to impress.
Ingredients
- 8 oz goat cheese, softened
- 1/2 cup pistachios, finely chopped
- 1 tablespoon honey
- 1 tablespoon fresh chives, chopped
- 1 teaspoon lemon zest
- Salt and pepper to taste
Instructions
- Prepare Cheese Mixture: In a bowl, combine the softened goat cheese, honey, chopped chives, lemon zest, salt, and pepper. Mix well until smooth and well incorporated.
- Form Balls: Using your hands, roll the cheese mixture into small balls, about 1 inch in diameter.
- Coat with Pistachios: Place the chopped pistachios in a shallow dish. Roll each cheese ball in the pistachios until fully coated.
- Chill: Place the coated balls on a plate and refrigerate for at least 30 minutes to firm up.
- Serve: Arrange on a platter and drizzle with more honey if desired. Enjoy!
Cheese-stuffed Mushrooms with Herbs
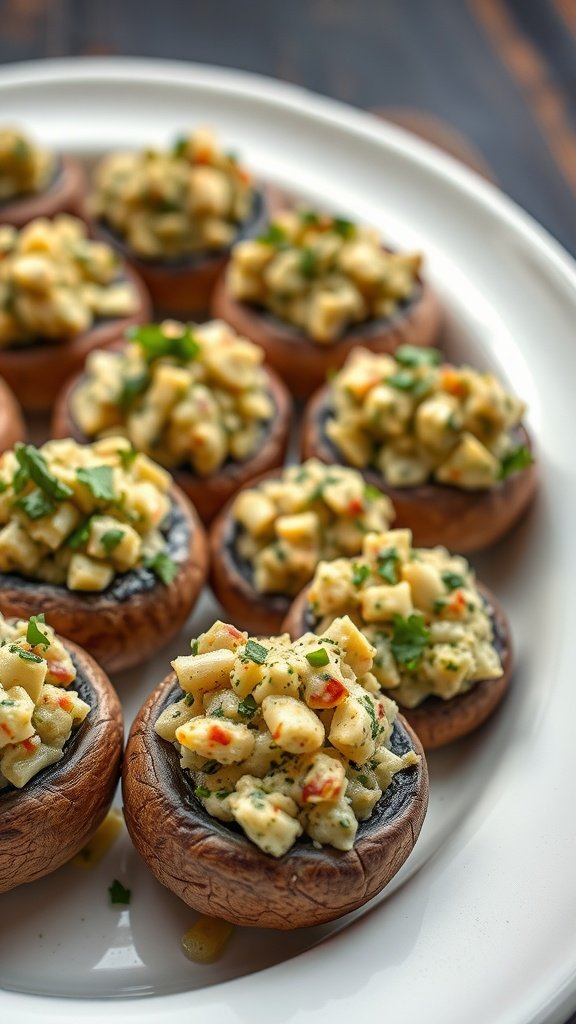
Cheese-stuffed mushrooms are a delightful appetizer that combines earthy flavors with creamy, cheesy goodness. These little bites are wonderfully savory, with fresh herbs adding a burst of freshness that elevates each bite. They’re not only delicious but also simple to prepare, making them a hit at any gathering.
Perfect for entertaining, these stuffed mushrooms are sure to impress your guests without requiring hours in the kitchen. Whether you’re hosting a party or just enjoying a cozy night in, they provide a luxurious twist on finger foods that everyone will love.
Ingredients
- 12 large mushrooms, stems removed
- 1 cup cream cheese, softened
- 1/2 cup grated Parmesan cheese
- 1/4 cup fresh herbs (parsley, chives, or thyme), chopped
- 1 clove garlic, minced
- 1/4 teaspoon red pepper flakes (optional)
- Salt and pepper to taste
- 2 tablespoons olive oil
Instructions
- Preheat the oven to 375°F (190°C).
- In a bowl, combine the cream cheese, Parmesan cheese, chopped herbs, minced garlic, and red pepper flakes. Season with salt and pepper.
- Spoon the cheese mixture into the mushroom caps, packing it slightly.
- Place the stuffed mushrooms on a baking sheet and drizzle with olive oil.
- Bake for 20-25 minutes, or until the mushrooms are tender and the tops are golden.
- Let them cool slightly before serving. Enjoy!
Buffalo Cauliflower Bites

Buffalo Cauliflower Bites are a delightful twist on the classic buffalo wings, offering a spicy kick and a satisfying crunch without the meat. These bites are ideal for gatherings or as a tasty snack, and they can easily be made in your kitchen with just a handful of ingredients. The flavors are bold, with that signature buffalo sauce bringing heat, while the cauliflower provides a unique texture that everyone will enjoy.
Not only are these bites simple to prepare, but they are also a healthier alternative to traditional fried snacks. Baked until golden and served with a cooling ranch or blue cheese dip, they make for a fun finger food that satisfies cravings without the guilt. Whether you’re hosting a party or enjoying a cozy night in, these Buffalo Cauliflower Bites are sure to impress.
Ingredients
- 1 head of cauliflower, cut into bite-sized florets
- 1 cup all-purpose flour
- 1 cup water
- 1 teaspoon garlic powder
- 1 teaspoon onion powder
- 1 teaspoon paprika
- 1/2 teaspoon salt
- 1 cup buffalo sauce
- 2 tablespoons butter, melted
- Ranch or blue cheese dressing for dipping
Instructions
- Preheat your oven to 450°F (230°C) and line a baking sheet with parchment paper.
- In a bowl, whisk together flour, garlic powder, onion powder, paprika, salt, and water until smooth. Dip each cauliflower floret into the batter, letting the excess drip off.
- Place the coated florets on the prepared baking sheet and bake for about 20 minutes, or until golden brown and crispy.
- While the cauliflower bakes, mix buffalo sauce with melted butter in a separate bowl.
- Once the cauliflower is done, toss it in the buffalo sauce mixture and return to the oven for an additional 5-10 minutes.
- Serve hot with ranch or blue cheese dressing for dipping.
Zucchini Fritters with Feta
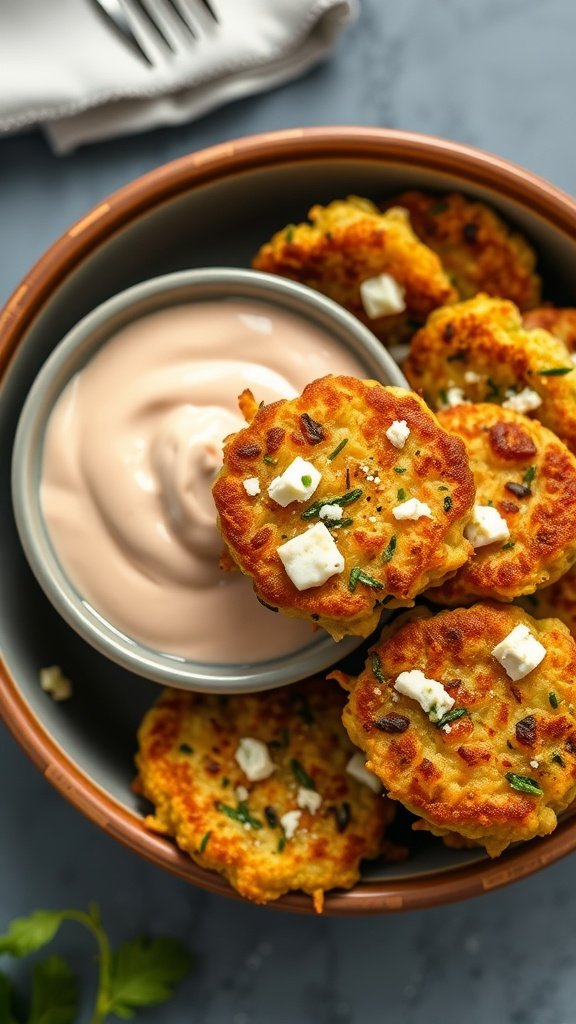
These zucchini fritters with feta are a delightful treat that perfectly blends fresh vegetables and creamy cheese. The crisp exterior gives way to a tender, flavorful interior, making them a satisfying finger food option that’s both light and filling.
Easy to whip up, these fritters are a great way to use up zucchini, especially during the summer months when it’s plentiful. Pair them with a tangy dipping sauce for an extra touch of flavor that everyone will enjoy!
Ingredients
- 2 medium zucchinis, grated
- 1 teaspoon salt
- 1/2 cup all-purpose flour
- 1/2 cup crumbled feta cheese
- 1/4 cup chopped fresh parsley
- 2 large eggs
- 1/2 teaspoon black pepper
- 1/4 teaspoon garlic powder
- Oil for frying
Instructions
- Prepare the Zucchini: Place the grated zucchini in a bowl, sprinkle with salt, and let it sit for about 10 minutes. Then, squeeze out the excess moisture using a clean kitchen towel.
- Mix the Fritter Batter: In a large mixing bowl, combine the drained zucchini, flour, feta, parsley, eggs, pepper, and garlic powder. Stir until well combined.
- Heat the Oil: In a frying pan, heat oil over medium heat. You want enough oil to cover the bottom of the pan.
- Fry the Fritters: Drop spoonfuls of the batter into the hot oil, flattening them slightly. Cook for about 3-4 minutes on each side, or until golden brown.
- Drain and Serve: Remove the fritters from the pan and place on a paper towel to absorb excess oil. Serve warm with your favorite dipping sauce.
Beet and Goat Cheese Salad Bites
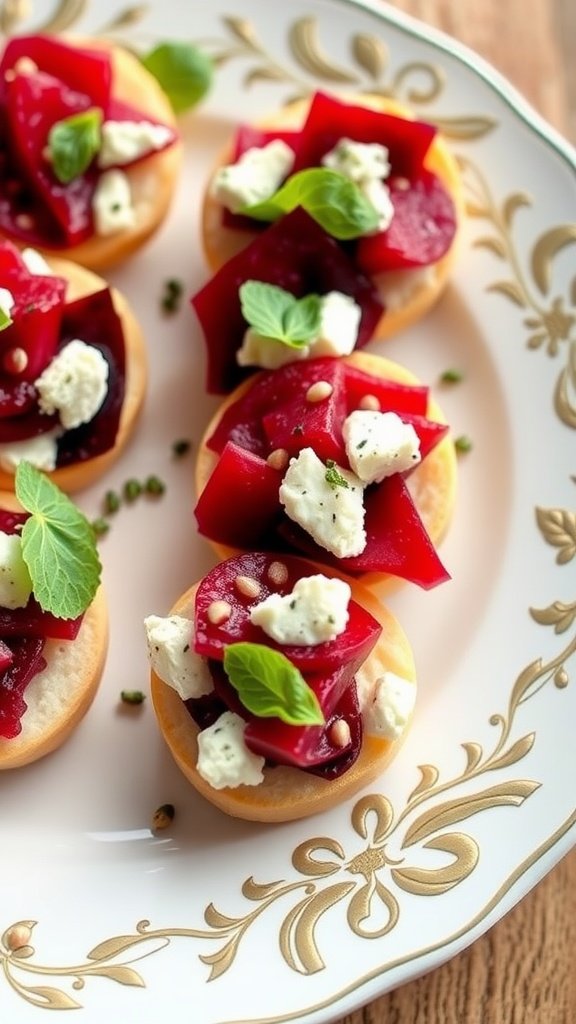
These Beet and Goat Cheese Salad Bites are a delightful combination of earthy beets and creamy goat cheese, all served on a crisp base. The flavors are refreshing and perfect for any occasion, making them a great addition to your finger food collection. Plus, they’re easy to whip up, so you can impress guests without spending all day in the kitchen.
The sweetness of the beets paired with the tanginess of the goat cheese creates a lovely balance, while fresh herbs add an aromatic touch. These bites are not only delicious but also visually appealing, making them a standout choice for your next gathering.
Ingredients
- 2 medium-sized beets, cooked and diced
- 4 ounces goat cheese, crumbled
- 1 tablespoon olive oil
- 1 tablespoon balsamic vinegar
- Salt and pepper to taste
- Fresh mint or basil leaves for garnish
- 4-6 crackers or small rounds of bread
Instructions
- Prepare the Beets: If using fresh beets, wash and cook them until tender. Once cooled, peel and dice them into small cubes.
- Mix the Dressing: In a small bowl, whisk together olive oil, balsamic vinegar, salt, and pepper.
- Assemble the Bites: On each cracker or bread round, layer a spoonful of diced beets, followed by crumbled goat cheese.
- Drizzle the Dressing: Lightly drizzle the dressing over the assembled bites for added flavor.
- Garnish: Top with fresh mint or basil leaves to add a pop of color and freshness.
- Serve: Arrange on a platter and enjoy these tasty bites as an appetizer or party snack!
Chocolate-covered Raspberry Bites

Chocolate-covered raspberry bites are a delightful combination of sweet and tart flavors. The juicy raspberries, encased in rich chocolate, create a treat that is both refreshing and indulgent. These bites are not only visually appealing but also easy to make, making them a great choice for parties or cozy gatherings.
The balance of the smooth chocolate and the vibrant raspberry is sure to please your taste buds. Plus, they come together quickly, ensuring you won’t spend all day in the kitchen. Whether you serve them as a fancy appetizer or a sweet dessert, these chocolate-covered raspberry bites are sure to impress!
Ingredients
- 1 cup fresh raspberries
- 1 cup dark chocolate chips
- 1 tablespoon coconut oil (optional)
- Fresh mint leaves for garnish
- Sprinkles or crushed nuts for decoration (optional)
Instructions
- Prepare the Raspberries: Rinse and dry the raspberries gently to remove any excess moisture. Set aside.
- Melt the Chocolate: In a microwave-safe bowl, combine the dark chocolate chips and coconut oil. Heat in the microwave in 30-second intervals, stirring between each, until fully melted and smooth.
- Dip the Raspberries: Hold each raspberry by the stem and dip it into the melted chocolate, ensuring it’s fully coated. Allow any excess chocolate to drip off.
- Set and Decorate: Place the chocolate-covered raspberries on a parchment-lined tray. If desired, sprinkle with crushed nuts or decorative sprinkles before the chocolate sets.
- Chill: Refrigerate the tray for about 15-20 minutes until the chocolate is firm. Once set, garnish with fresh mint leaves if desired.
- Serve: Enjoy these chocolate-covered raspberry bites as a delicious finger food at your next gathering!
Marinated Olives with Fresh Herbs
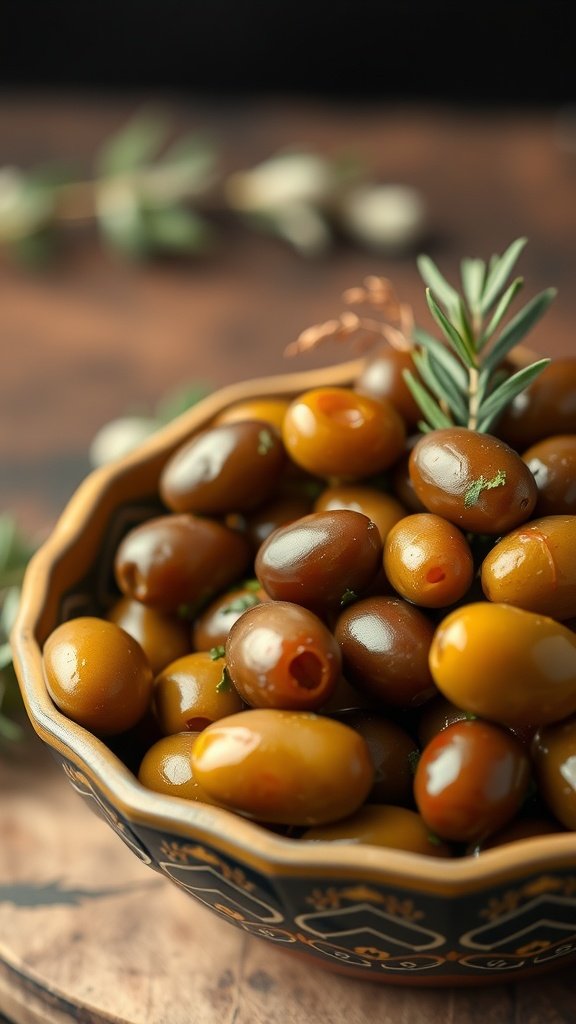
Marinated olives are a delightful appetizer that brings a burst of flavor to any gathering. With their savory taste and a hint of freshness from the herbs, they are a simple yet elegant option for finger foods. Whether you’re hosting a dinner party or enjoying a quiet evening, these olives can be prepped in just a few minutes, making them a go-to choice when you want something special without much fuss.
The combination of olives with fresh herbs like rosemary and thyme adds depth and complexity to each bite. It’s a dish that pairs beautifully with cheeses, crackers, or even as a standalone snack. Best of all, they can be made ahead of time, allowing the flavors to meld together for an even more satisfying treat.
Ingredients
- 2 cups mixed olives (green and black)
- 1/4 cup olive oil
- 2 cloves garlic, minced
- 1 tablespoon fresh rosemary, chopped
- 1 tablespoon fresh thyme, chopped
- 1 teaspoon red pepper flakes (optional)
- 1 tablespoon lemon zest
- 1 tablespoon balsamic vinegar
- Salt and pepper to taste
Instructions
- In a bowl, combine the olives, olive oil, minced garlic, chopped rosemary, thyme, red pepper flakes, lemon zest, and balsamic vinegar.
- Toss everything together until the olives are well coated with the marinade.
- Season with salt and pepper to taste.
- Cover and let the olives marinate in the refrigerator for at least 1 hour, or preferably overnight, to allow the flavors to develop.
- Serve chilled or at room temperature, garnished with additional herbs if desired.
Peach and Prosciutto Bruschetta
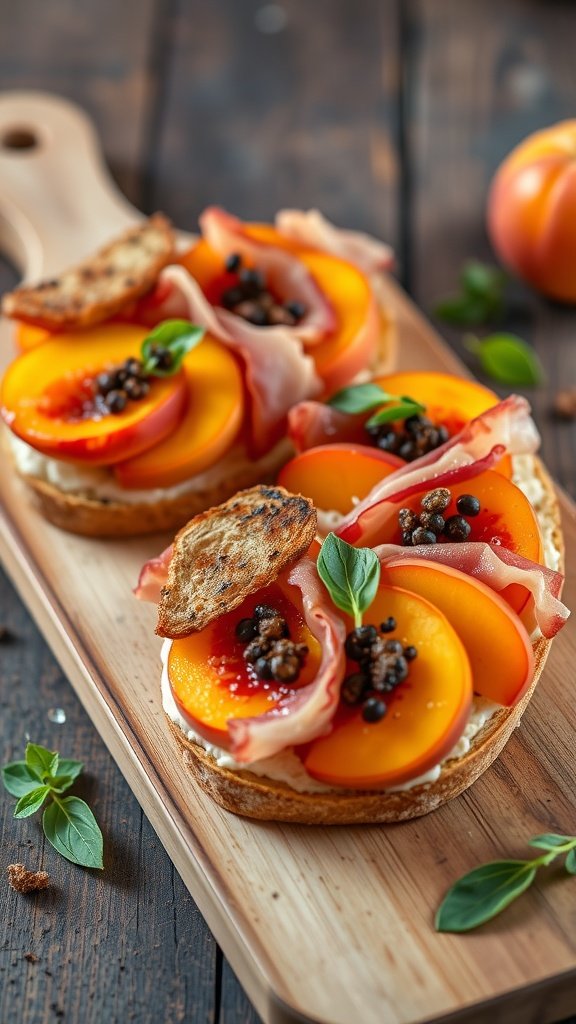
This Peach and Prosciutto Bruschetta is a delightful mix of sweet and savory flavors that are sure to impress your guests. The juicy peaches balance perfectly with the salty prosciutto, creating a taste sensation that’s both refreshing and rich.
Making this dish is simple and quick, making it an ideal choice for entertaining. With just a few ingredients, you can whip up a beautiful appetizer that’s not only delicious but also visually stunning.
Ingredients
- 1 baguette, sliced
- 2 ripe peaches, pitted and thinly sliced
- 4 oz prosciutto, thinly sliced
- 8 oz cream cheese, softened
- 1 tablespoon honey
- Fresh basil leaves
- 1 tablespoon balsamic glaze
Instructions
- Prepare the Bread: Preheat your oven to 400°F (200°C). Place the baguette slices on a baking sheet and toast them in the oven for about 5-7 minutes until lightly golden.
- Mix the Cream Cheese: In a small bowl, combine the softened cream cheese and honey until smooth. Spread a generous layer of this mixture on each toasted baguette slice.
- Assemble the Bruschetta: Layer the peach slices over the cream cheese. Top with a slice of prosciutto and add a few fresh basil leaves for flavor.
- Finish with a Drizzle: Just before serving, drizzle a little balsamic glaze over the top for an added touch of sweetness and acidity.
- Serve: Arrange the bruschetta on a platter and enjoy this delightful combination of flavors with your guests!
Savory Spinach and Cheese Pinwheels

Savory Spinach and Cheese Pinwheels are a delightful finger food that combines the goodness of spinach with creamy cheese, all wrapped in a soft tortilla. These pinwheels are not only easy to prepare but also bursting with flavor, making them a hit at any gathering. Their delicate taste and appealing presentation mean they’re perfect for both casual snacks and elegant parties.
With just a few simple ingredients, you can whip up this tasty treat in no time. They’re perfect for dipping, whether in a tangy sauce or enjoyed on their own. Plus, you can prep them ahead of time, making them a convenient option for busy hosts!
Ingredients
- 1 large tortilla
- 1 cup fresh spinach, chopped
- 1 cup cream cheese, softened
- 1/2 cup shredded mozzarella cheese
- 1/4 cup grated Parmesan cheese
- 1 clove garlic, minced
- Salt and pepper to taste
Instructions
- Prepare the Filling: In a bowl, mix together the cream cheese, mozzarella cheese, Parmesan cheese, garlic, and chopped spinach. Season with salt and pepper.
- Assemble the Pinwheels: Spread the cheese and spinach mixture evenly over the tortilla. Roll it up tightly, then wrap in plastic wrap and refrigerate for at least 30 minutes.
- Slice and Serve: Remove the tortilla from the fridge, unwrap, and slice into 1-inch thick pinwheels. Serve with a dipping sauce of your choice or enjoy plain!
Caramelized Onion and Gorgonzola Tart
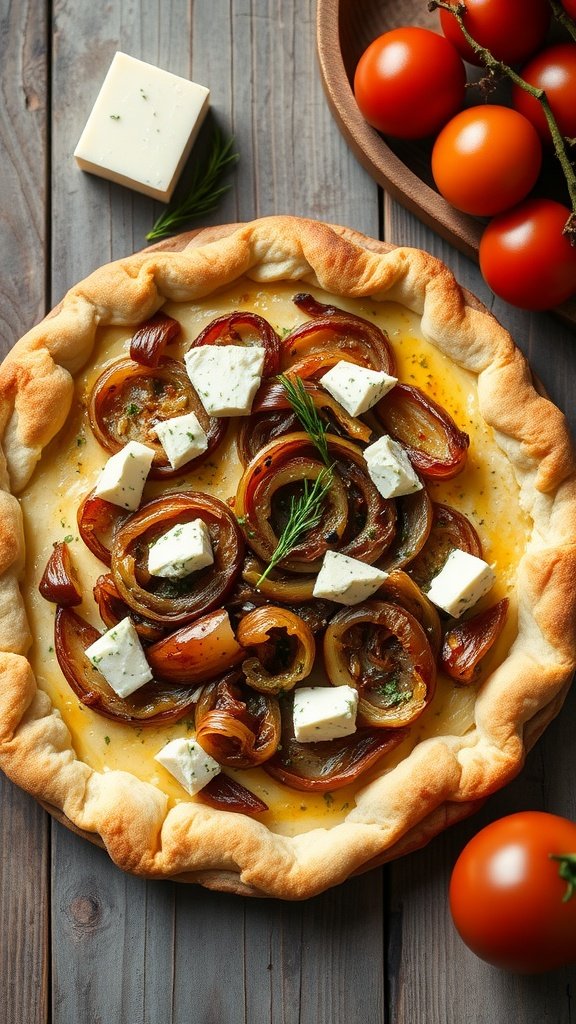
This caramelized onion and Gorgonzola tart is a delightful finger food that combines sweet and savory flavors in a wonderfully flaky pastry. The rich, buttery crust serves as the perfect base for the sweet caramelized onions, which are balanced beautifully by the tangy, creamy Gorgonzola cheese. It’s a dish that’s simple enough for a casual gathering yet elegant enough to impress your guests.

The layers of flavor in this tart make it a standout option for any appetizer spread. With its golden crust and melting cheese, it’s sure to be a favorite. Plus, it’s easy to prepare, allowing you to spend more time enjoying the company of friends and family. Whether served warm or at room temperature, this tart is a lovely addition to any finger foods menu.
Ingredients
- 1 sheet of puff pastry, thawed
- 3 large onions, thinly sliced
- 2 tablespoons olive oil
- 1 teaspoon sugar
- 1/2 teaspoon salt
- 1/4 teaspoon black pepper
- 1 cup Gorgonzola cheese, crumbled
- 2 eggs
- 1/2 cup heavy cream
- Fresh thyme or rosemary for garnish
Instructions
- Preheat the oven to 400°F (200°C). Roll out the puff pastry and fit it into a tart pan, trimming any excess.
- In a large skillet, heat the olive oil over medium heat. Add the sliced onions, sugar, salt, and pepper. Cook, stirring frequently, for about 20-25 minutes until the onions are caramelized and golden brown.
- In a bowl, whisk together the eggs and heavy cream. Stir in the crumbled Gorgonzola cheese and mix until well combined.
- Spread the caramelized onions evenly over the pastry. Pour the egg and cheese mixture on top, ensuring it evenly coats the onions.
- Bake the tart in the preheated oven for 30-35 minutes or until the filling is set and the top is golden brown. Let it cool slightly before slicing.
- Garnish with fresh thyme or rosemary before serving.
Chili Lime Shrimp Cups
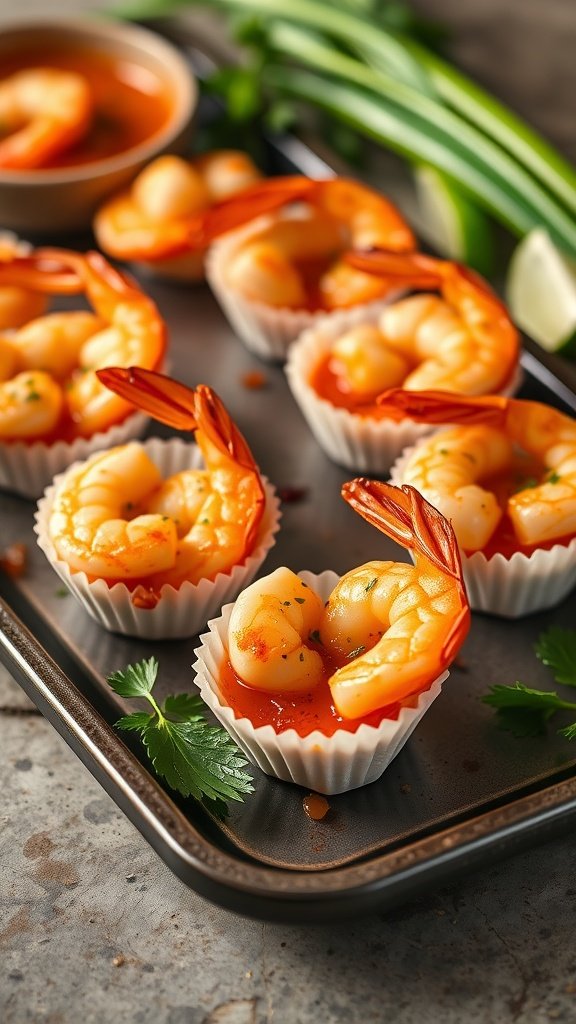
Chili lime shrimp cups are a delightful and refreshing appetizer that packs a flavorful punch. The bright, zesty flavors of lime combined with a hint of spice from the chili make this dish not only tasty but also visually appealing. They are simple to prepare, making them a great choice for parties or casual gatherings.
These shrimp cups feature succulent shrimp nestled in crispy cups, drizzled with a tangy sauce that enhances their natural sweetness. Perfect for finger food lovers, they are bound to be a hit at any event!
Ingredients
- 1 pound large shrimp, peeled and deveined
- 1 tablespoon olive oil
- 2 tablespoons lime juice
- 1 teaspoon chili powder
- 1/2 teaspoon garlic powder
- Salt and pepper to taste
- 12 mini phyllo pastry cups
- Fresh cilantro, for garnish
- Lime wedges, for serving
Instructions
- Preheat your oven to 350°F (175°C). Arrange the mini phyllo pastry cups on a baking sheet.
- In a bowl, combine olive oil, lime juice, chili powder, garlic powder, salt, and pepper. Add the shrimp, mixing until they are well coated.
- Place the shrimp in the phyllo cups and bake for 10-12 minutes, or until the shrimp are pink and cooked through.
- Remove from the oven and garnish with fresh cilantro. Serve with lime wedges and enjoy!
Almond-crusted Chicken Tenders
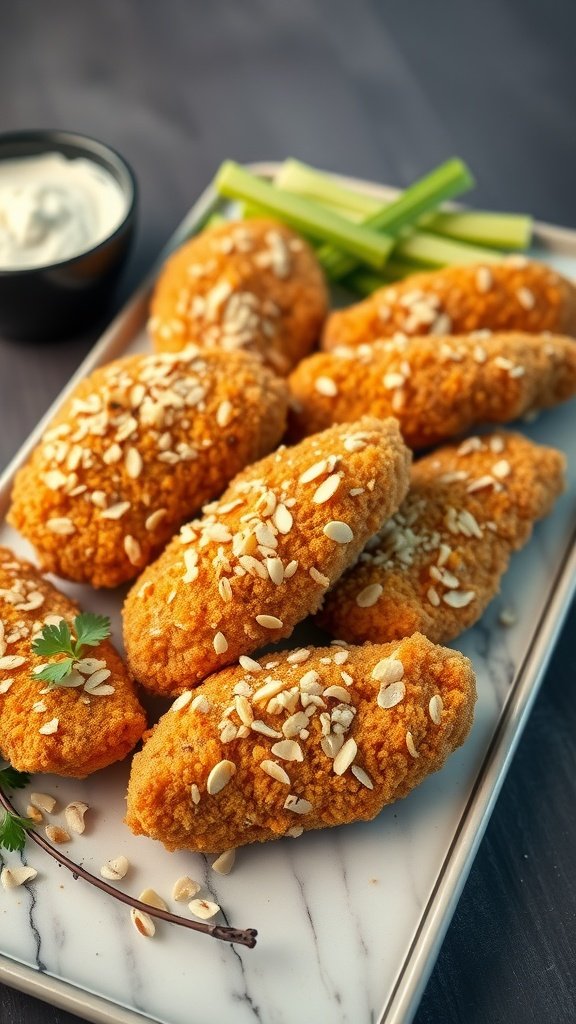
Almond-crusted chicken tenders bring a delightful crunch and nutty flavor to your finger food menu. These tenders are juicy and tender on the inside, with a crispy almond coating that adds a luxurious touch. Perfect for parties or a cozy family dinner, they’re simple to make and sure to impress.
Whether served with a zesty dipping sauce or alongside fresh veggies, these chicken tenders are an easy yet elegant option for any gathering. Plus, they’re baked instead of fried, making them a slightly healthier choice for snacking!
Ingredients
- 1 pound chicken tenders
- 1 cup almond flour
- 1/2 cup grated Parmesan cheese
- 1 teaspoon garlic powder
- 1 teaspoon paprika
- 1/2 teaspoon salt
- 1/2 teaspoon black pepper
- 2 large eggs
- 2 tablespoons olive oil
Instructions
- Preheat your oven to 400°F (200°C) and line a baking sheet with parchment paper.
- In a bowl, mix almond flour, Parmesan cheese, garlic powder, paprika, salt, and pepper.
- In another bowl, beat the eggs. Dip each chicken tender first into the eggs, then coat with the almond mixture, pressing gently to adhere.
- Place the coated tenders on the prepared baking sheet. Drizzle olive oil over the top.
- Bake for 15-20 minutes or until golden brown and cooked through. Serve warm with your favorite dipping sauce.
Salmon Rillettes on Toast Points

Salmon rillettes are a delightful way to enjoy the rich, buttery flavor of salmon, transformed into a creamy spread that’s perfect for any gathering. The taste is a beautiful balance of savory and fresh, with subtle hints of herbs and spices that elevate the dish. This recipe is simple to make, requiring minimal ingredients and just a bit of time, making it a fantastic choice for both novice cooks and seasoned chefs.
Once prepared, the rillettes can be slathered generously on crisp toast points, creating an elegant finger food that’s sure to impress your guests. Whether served as an appetizer at a party or as a sophisticated snack, salmon rillettes offer a luxurious twist that everyone will love.
Ingredients
- 8 ounces cooked salmon, flaked
- 4 ounces cream cheese, softened
- 2 tablespoons unsalted butter, softened
- 1 tablespoon fresh lemon juice
- 1 tablespoon fresh dill, chopped
- 1 teaspoon Dijon mustard
- Salt and pepper to taste
- 8 slices of baguette, toasted
Instructions
- In a mixing bowl, combine the flaked salmon, cream cheese, and butter. Mix until well blended.
- Add lemon juice, dill, Dijon mustard, and season with salt and pepper. Stir until fully combined and smooth.
- Spread the salmon mixture onto the toasted baguette slices.
- Serve immediately or refrigerate for up to 2 hours before serving to allow flavors to meld.
Lobster and Avocado Crostini

Indulge your taste buds with these Lobster and Avocado Crostini, a delightful finger food that perfectly balances creamy avocado with tender lobster. This dish features a toasted bread base, making it both crunchy and satisfying. The flavors are light yet luxurious, making it perfect for any gathering or a special treat for yourself.
Not only is this recipe simple to prepare, but it also looks impressive on any appetizer platter. With just a few ingredients, you’ll have a dish that feels gourmet without a lot of fuss. The combination of fresh ingredients brings a burst of flavor in every bite, making them a go-to choice for seafood lovers.
Ingredients
- 1 baguette, sliced into 1/2-inch pieces
- 2 ripe avocados
- 1 tablespoon lemon juice
- 8 ounces cooked lobster meat, chopped
- 2 tablespoons mayonnaise
- 1 tablespoon chopped chives
- Salt and pepper to taste
- Olive oil for drizzling
Instructions
- Preheat the oven to 400°F (200°C). Arrange the baguette slices on a baking sheet and drizzle with olive oil. Toast in the oven for 5-7 minutes until golden brown.
- In a bowl, mash the avocados and mix in the lemon juice, salt, and pepper.
- In another bowl, combine the chopped lobster meat, mayonnaise, and chives, mixing well.
- Spread a layer of avocado on each toasted bread slice, then top with a generous spoonful of the lobster mixture.
- Serve immediately and enjoy your deliciously elegant Lobster and Avocado Crostini!
Truffle Infused Mini Quiches

Truffle infused mini quiches bring a delightful twist to a classic finger food. These little bites are packed with flavor, combining the rich, earthy notes of truffle oil with a creamy egg filling. They’re simple to make and will impress your guests with their gourmet flair.
Perfect for parties or casual gatherings, these mini quiches can be customized to include your favorite ingredients, from cheeses to vegetables. With a flaky crust and a luscious filling, they offer a satisfying taste that pairs beautifully with a glass of wine. Here’s how to make them:
Ingredients
- 1 pre-made pastry shell (store-bought or homemade)
- 4 large eggs
- 1 cup heavy cream
- 1 tablespoon truffle oil
- 1/2 cup grated cheese (Gruyère or cheddar)
- 1/4 cup finely chopped onion
- 1/4 cup chopped fresh herbs (like parsley or thyme)
- Salt and pepper to taste
Instructions
- Preheat the oven to 375°F (190°C).
- In a mixing bowl, whisk together the eggs, cream, truffle oil, salt, and pepper until well combined.
- Place the pastry shells on a baking sheet and evenly distribute the chopped onion and herbs in each shell.
- Sprinkle the grated cheese on top of the onions and herbs.
- Carefully pour the egg mixture into each shell, filling them about three-quarters full.
- Bake for 20-25 minutes, or until the filling is set and the tops are lightly golden.
- Allow them to cool slightly before serving. Enjoy your delightful mini quiches!