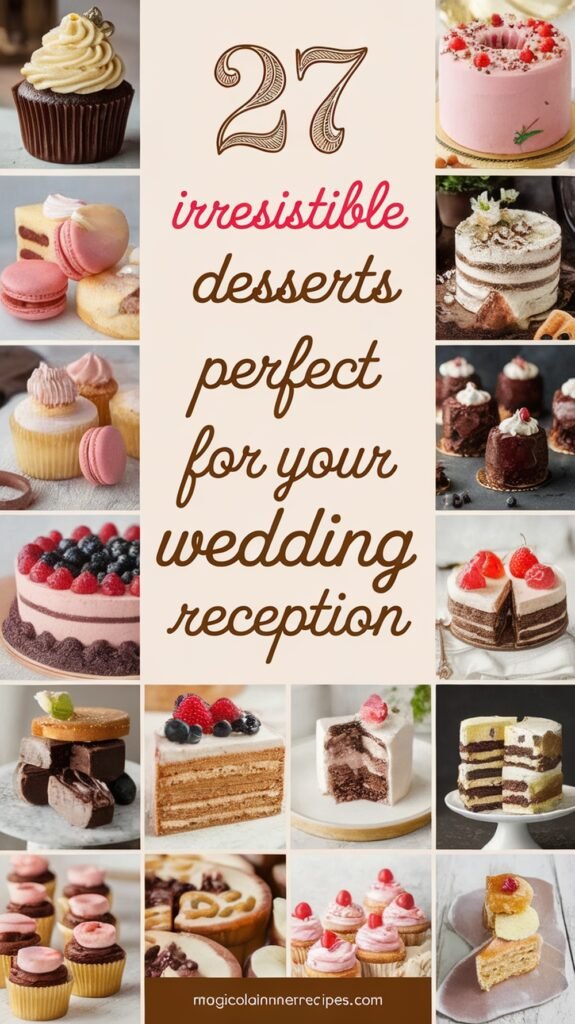
Your wedding reception deserves desserts that taste as sweet as love feels! Dive into this collection of 27 mouthwatering options that will satisfy every sweet tooth in the room. From elegant cakes to playful treats, these desserts are bound to add a sprinkle of joy to your celebration and leave your guests asking for seconds!
Chocolate Fondue Fountain
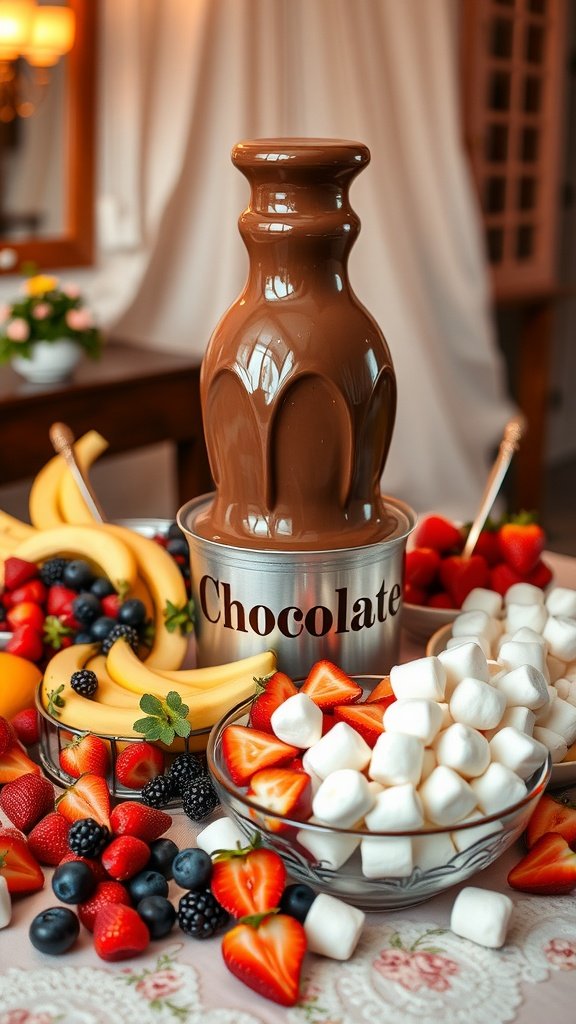
Chocolate fondue fountains are a delightful centerpiece for any wedding reception-worthy dessert table. The smooth, rich chocolate cascading down creates a visually appealing treat that invites guests to gather around and indulge. It’s not just about taste; it’s an experience! The combination of warm, melted chocolate paired with fresh fruits and sweets adds a touch of fun to the festivities.
This recipe is simple and allows for creativity in choosing dippables. Fresh strawberries, bananas, marshmallows, and pretzels are just a few popular options. Guests can dip their favorites, making it an interactive dessert that everyone will love!
Ingredients
- 2 cups semi-sweet chocolate chips
- 1 tablespoon vegetable oil
- 1 cup heavy cream
- Fresh strawberries
- Banana slices
- Marshmallows
- Mini pretzels
- Blackberries
- Blueberries
Instructions
- Melt the Chocolate: In a microwave-safe bowl, combine the chocolate chips and vegetable oil. Heat in the microwave in 30-second intervals, stirring in between, until smooth.
- Add Cream: Slowly stir in the heavy cream until well combined, ensuring a silky texture.
- Set Up the Fountain: Pour the melted chocolate into the fondue fountain and turn it on, allowing the chocolate to flow.
- Prepare Dippables: Arrange your chosen fruits and sweets on a platter around the fountain.
- Enjoy: Let guests dip their favorites into the flowing chocolate and enjoy the delicious experience!
Tiramisu Cups
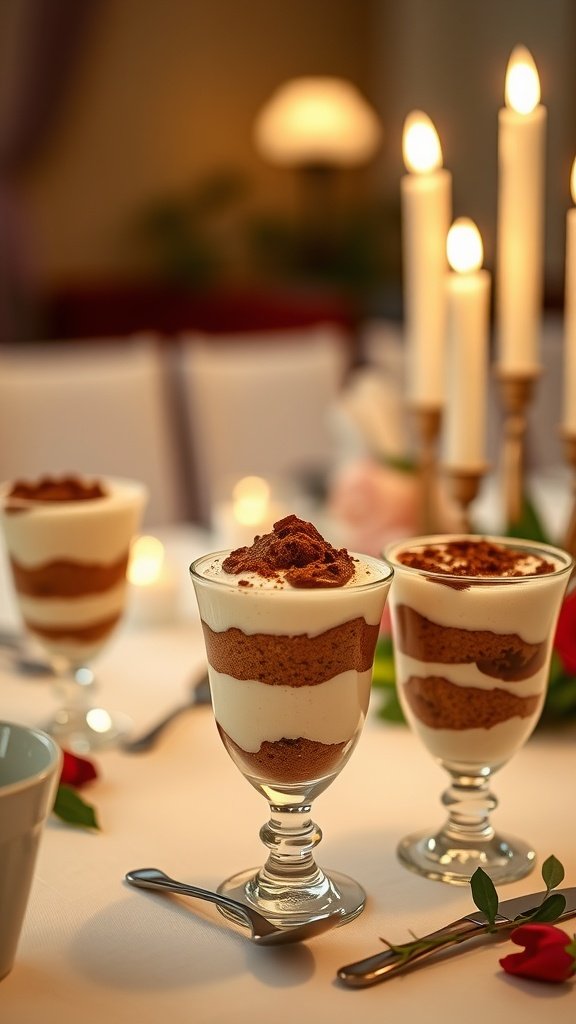
Tiramisu cups are a delightful and elegant twist on the classic Italian dessert. These individual servings combine layers of coffee-soaked ladyfingers with a creamy mascarpone mixture, creating a luxurious treat that’s both comforting and refreshing. The rich coffee flavor, paired with the lightness of the cream, makes for a dessert that feels special yet is surprisingly easy to whip up.
Perfect for wedding receptions or any festive gathering, these cups are not only visually appealing but also offer the perfect portion size for guests. Each spoonful brings a comforting blend of flavors that can elevate any dessert table. Plus, they can be made ahead of time, allowing you to enjoy the celebration without stress!
Ingredients
- 1 cup strong brewed coffee, cooled
- 2 tablespoons coffee liqueur (optional)
- 1 cup mascarpone cheese
- 1 cup heavy cream
- 1/2 cup granulated sugar
- 1 teaspoon vanilla extract
- 24 ladyfingers
- Unsweetened cocoa powder, for dusting
Instructions
- Prepare the Coffee: In a shallow dish, combine the cooled coffee and coffee liqueur, if using. Set aside.
- Make the Cream Mixture: In a mixing bowl, beat the heavy cream with sugar and vanilla extract until soft peaks form. Gently fold in the mascarpone cheese until well combined.
- Layer the Cups: Quickly dip each ladyfinger into the coffee mixture, ensuring they are soaked but not soggy. Place a layer of dipped ladyfingers at the bottom of each cup, followed by a layer of the mascarpone mixture.
- Repeat Layers: Continue layering until the cups are filled, finishing with the mascarpone mixture on top.
- Chill and Serve: Dust the tops with cocoa powder and refrigerate for at least 4 hours before serving to allow flavors to meld.
Classic Wedding Cake
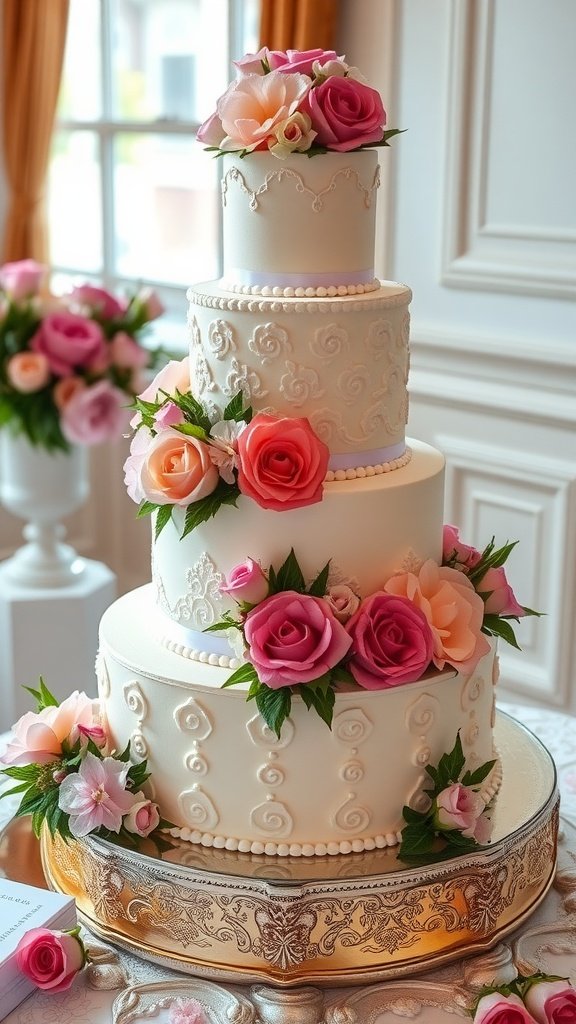
A classic wedding cake is a timeless centerpiece for any wedding reception, combining elegance and tradition in every bite. Typically featuring multiple tiers, this cake is often layered with delicious fillings and covered in smooth fondant or buttercream, presenting a beautiful palette of flavors and aesthetics. The taste is rich yet light, making it the perfect treat to celebrate love and joy.
While crafting a wedding cake might seem daunting, it can be surprisingly simple if you break it down into manageable steps. With practice, you can create a stunning cake that not only looks exquisite but also delights your guests. Plus, the joy of making such a special dessert adds to the overall celebration!
Ingredients
- 3 cups all-purpose flour
- 2 1/2 teaspoons baking powder
- 1/2 teaspoon salt
- 1 cup unsalted butter, softened
- 2 cups granulated sugar
- 4 large eggs
- 1 tablespoon vanilla extract
- 1 cup milk
- 4 cups powdered sugar
- 1/2 cup unsalted butter, softened
- 4 tablespoons heavy cream
- 1 teaspoon vanilla extract (for frosting)
Instructions
- Preheat your oven to 350°F (175°C) and grease and flour three 8-inch round cake pans.
- In a bowl, whisk together flour, baking powder, and salt. Set aside.
- In a large bowl, beat the softened butter and granulated sugar until fluffy. Add eggs one at a time, blending well after each addition. Mix in vanilla.
- Gradually add the flour mixture to the butter mixture, alternating with milk, starting and ending with the flour. Mix until just combined.
- Divide the batter evenly among the prepared pans and smooth the tops. Bake for 25-30 minutes, or until a toothpick comes out clean.
- Let the cakes cool in the pans for 10 minutes before transferring them to wire racks to cool completely.
- For the frosting, beat together powdered sugar, softened butter, heavy cream, and vanilla until smooth and creamy.
- Once the cakes are completely cool, spread frosting between layers and cover the entire cake with the remaining frosting. Decorate as desired.
Lemon Tartlets
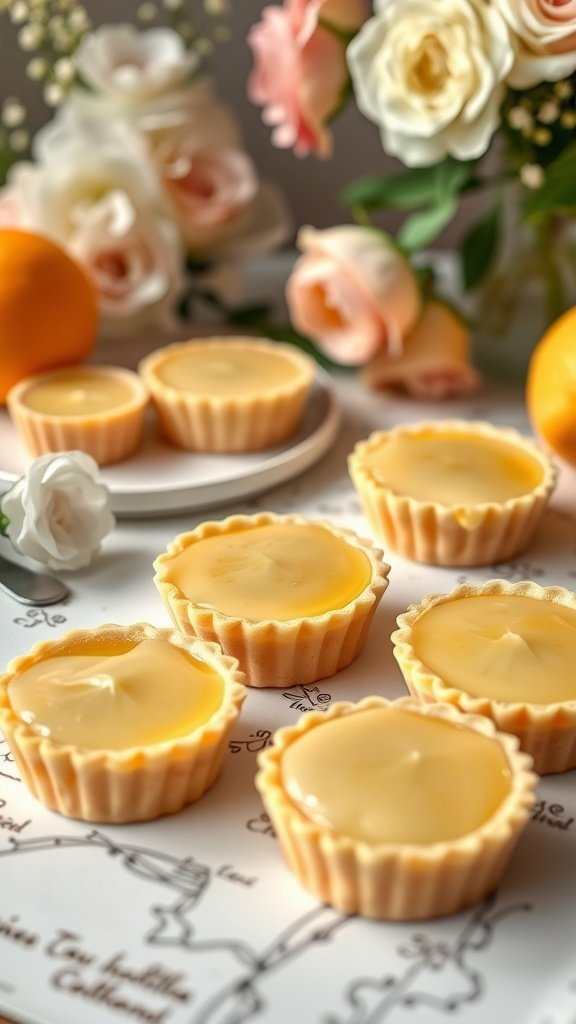
Lemon tartlets are a delightful treat that perfectly balances tart and sweet flavors. These little pastries are refreshing and light, making them an ideal addition to any wedding reception-worthy dessert table. They’re surprisingly simple to make, allowing even novice bakers to impress their guests with a touch of elegance.
The crisp tart shell complements the creamy lemon filling beautifully, creating a burst of citrus that dances on your palate. Whether served with a dollop of whipped cream or enjoyed on their own, these lemon tartlets are sure to bring smiles to everyone at your wedding celebration.
Ingredients
- 1 1/4 cups all-purpose flour
- 1/2 cup unsalted butter, softened
- 1/4 cup powdered sugar
- 1 egg yolk
- 2 tablespoons ice water
- 1 cup granulated sugar
- 1/4 cup cornstarch
- 1/4 teaspoon salt
- 1 cup water
- 3 large eggs
- 1/2 cup freshly squeezed lemon juice
- 2 tablespoons lemon zest
Instructions
- Make the Tart Crust: Preheat your oven to 350°F (175°C). In a bowl, mix flour, powdered sugar, and butter until crumbly. Add egg yolk and ice water, mixing until a dough forms. Press the dough into mini tartlet pans and chill for 15 minutes.
- Bake the Crusts: Bake the chilled crusts for 15-20 minutes or until lightly golden. Remove from oven and let cool completely.
- Prepare the Filling: In a saucepan, whisk together granulated sugar, cornstarch, and salt. Gradually add water, stirring constantly over medium heat until thickened. Remove from heat and whisk in eggs, lemon juice, and lemon zest.
- Fill the Tartlets: Pour the lemon mixture into the cooled tart crusts. Bake for an additional 10-12 minutes until set. Allow to cool completely before serving.
- Serve: Optionally, garnish with whipped cream or fresh berries for a beautiful presentation.
Cupcake Stand

Cupcakes are a delightful addition to any wedding reception. They come in a variety of flavors and can be beautifully decorated to match the wedding theme. With their individual servings, guests can easily enjoy them without the fuss of slicing a cake. Plus, they offer a delightful burst of sweetness that pairs perfectly with any celebration.
Making cupcakes is quite simple, making them an accessible treat for bakers of all skill levels. You can experiment with flavors like vanilla, chocolate, or red velvet, and top them with different types of frosting for added flair. Whether you display them on a stunning cupcake stand or arrange them in creative ways, these treats are sure to impress.
Ingredients
- 1 ½ cups all-purpose flour
- 1 cup granulated sugar
- ½ cup unsalted butter, softened
- 2 large eggs
- 1 teaspoon vanilla extract
- ½ cup milk
- 2 teaspoons baking powder
- ¼ teaspoon salt
- Frosting of your choice (buttercream, cream cheese, or fondant)
- Decorative toppings (sprinkles, fruit, or candies)
Instructions
- Preheat the oven to 350°F (175°C) and line a muffin pan with cupcake liners.
- In a large bowl, cream together the softened butter and sugar until light and fluffy. Add the eggs one at a time, mixing well after each addition.
- Stir in the vanilla extract and milk until well combined.
- In a separate bowl, whisk together the flour, baking powder, and salt. Gradually add the dry ingredients to the wet mixture, mixing until just combined.
- Fill the cupcake liners about two-thirds full with the batter.
- Bake for 18-20 minutes, or until a toothpick inserted in the center comes out clean. Let them cool completely before frosting.
- Once cooled, decorate with your choice of frosting and add fun toppings to personalize each cupcake.
Macaron Tower
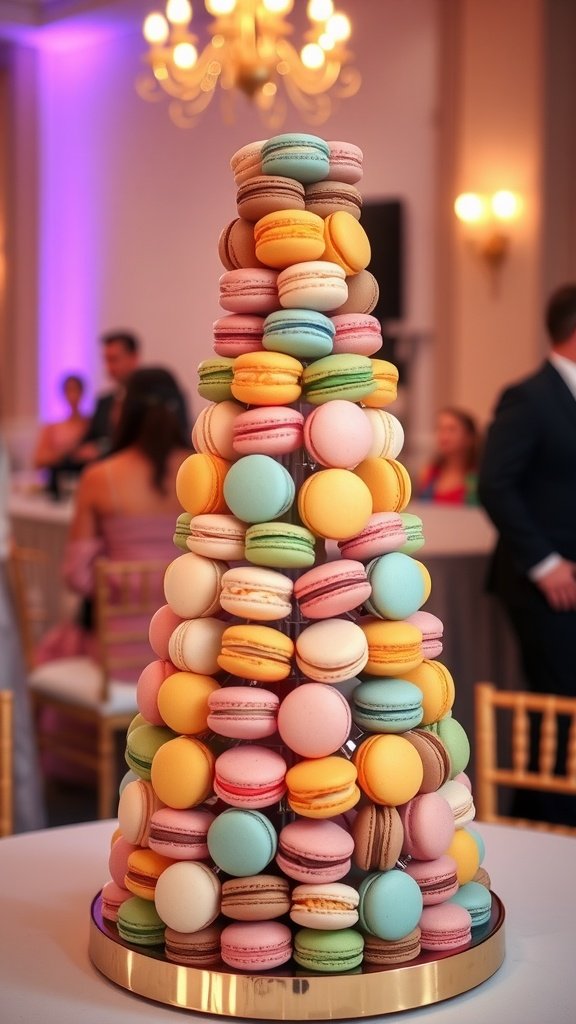
Creating a macaron tower is a delightful way to elevate any wedding reception. These delicate French cookies, filled with a variety of flavors, are not only visually stunning but also provide a burst of taste that guests will love. With their crisp exterior and soft, chewy inside, macarons come in endless flavor combinations, allowing you to customize the tower to match your wedding theme or personal preferences.
This recipe is approachable, even for novice bakers. Although macarons have a reputation for being tricky, following the right steps will lead to success. Plus, with a little practice, you’ll have a beautiful macaron tower to impress your guests!
Ingredients
- 1 cup almond flour
- 1 3/4 cups powdered sugar
- 1/4 cup granulated sugar
- 4 large egg whites, aged at room temperature
- 1/2 teaspoon cream of tartar
- 1 teaspoon vanilla extract
- Food coloring (optional)
- Buttercream, ganache, or jam for filling
Instructions
- Prepare the Dry Ingredients: Sift together almond flour and powdered sugar to remove lumps. Repeat this step to ensure a fine texture.
- Whip Egg Whites: In a clean bowl, whisk the egg whites with cream of tartar until foamy. Gradually add granulated sugar and continue to whip until stiff peaks form.
- Add Flavoring: Gently fold in the sifted almond flour mixture and vanilla extract. If using, add food coloring until you achieve the desired color.
- Pipe the Macarons: Transfer the batter to a piping bag and pipe small circles onto a baking sheet lined with parchment paper. Tap the baking sheet to release air bubbles.
- Let Them Rest: Allow the piped macarons to sit at room temperature for 30-60 minutes until they form a skin.
- Bake: Preheat the oven to 300°F (150°C) and bake for 15-20 minutes. Let cool completely before removing from the baking sheet.
- Fill the Macarons: Pair the shells and spread your choice of filling between them. Allow the filled macarons to rest in the refrigerator for a few hours for the flavors to meld.
- Assemble the Tower: Stack the macarons in a decorative tower shape, using a sturdy base to support them.
Mini Cheesecake Bites
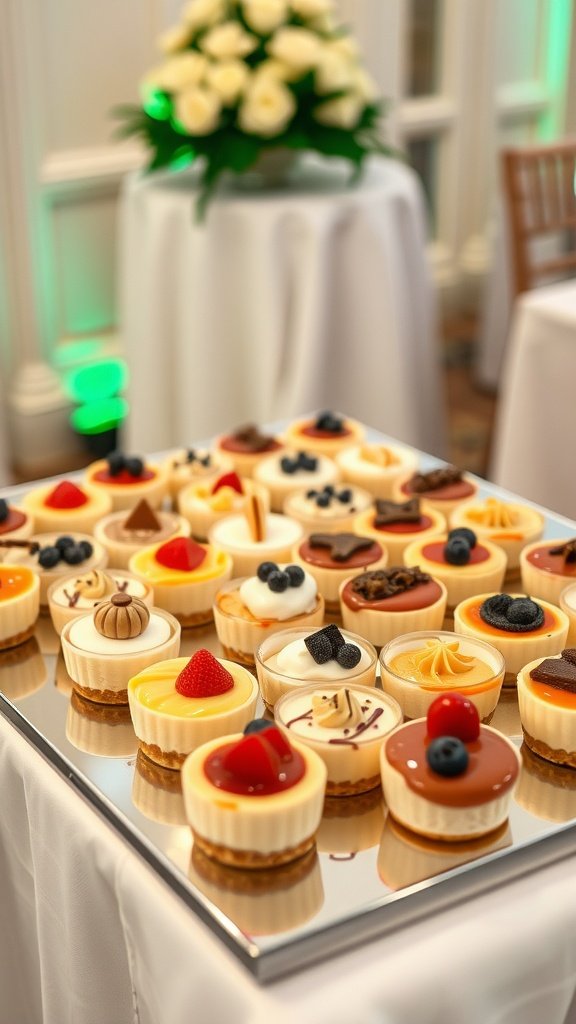
Mini cheesecake bites are the ideal addition to any wedding reception-worthy dessert table. These little treats pack a big flavor punch, combining the creamy texture of traditional cheesecake with the convenience of bite-sized servings. They are perfect for guests who want to indulge without committing to a large slice.
Not only are they delicious, but they are also simple to make. You can customize each bite with different toppings to cater to a variety of tastes. Whether it’s fresh fruit, chocolate drizzle, or a sprinkle of nuts, these mini cheesecakes can be adapted to suit your theme and preferences.
Ingredients
- 1 1/2 cups graham cracker crumbs
- 1/3 cup granulated sugar
- 1/2 cup unsalted butter, melted
- 16 oz cream cheese, softened
- 1 cup powdered sugar
- 1 teaspoon vanilla extract
- 2 large eggs
- Your choice of toppings (fresh berries, chocolate, caramel, etc.)
Instructions
- Preheat the oven to 325°F (160°C). Line a mini muffin tin with paper liners.
- In a bowl, mix graham cracker crumbs, sugar, and melted butter until combined. Press about 1 tablespoon of the mixture into the bottom of each muffin cup.
- In another bowl, beat the cream cheese, powdered sugar, and vanilla until smooth. Add eggs, one at a time, mixing well after each addition.
- Pour the cream cheese mixture over the crust in each muffin cup, filling them about 3/4 full.
- Bake for 15-18 minutes until the centers are set. Let them cool completely before adding your favorite toppings.
- Chill in the refrigerator for at least 2 hours before serving to let the flavors meld.
Fruit Tart
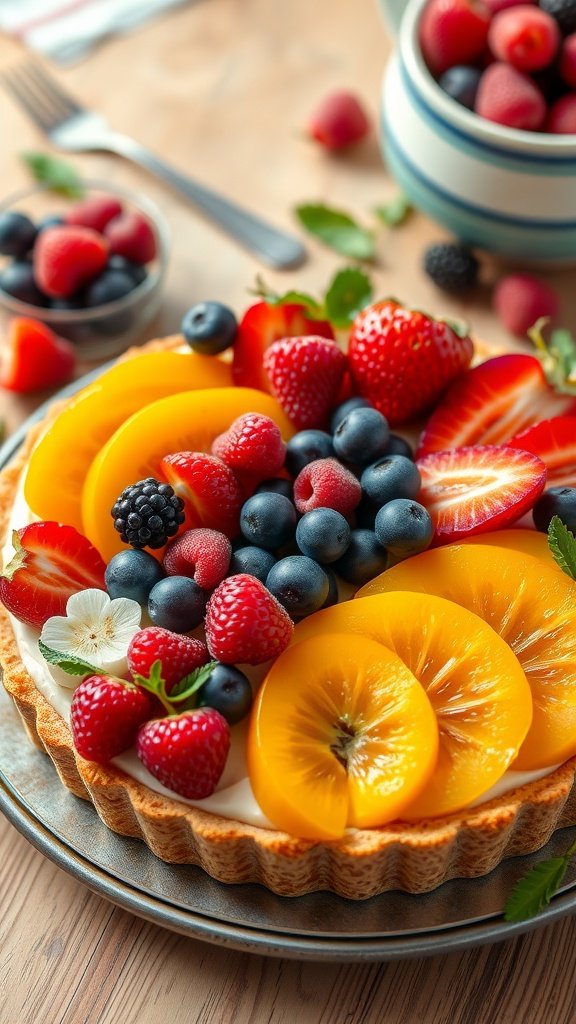
Fruit tarts are a delightful way to celebrate special occasions, making them a perfect fit for wedding reception-worthy desserts. This dessert features a crisp pastry crust filled with a creamy custard or pastry cream, topped with an array of fresh, colorful fruits. The combination of textures and flavors creates a light and refreshing indulgence that everyone will enjoy.
Not only does a fruit tart look beautiful on the dessert table, but it’s also surprisingly simple to make. The tart can be prepared ahead of time, allowing you to focus on other aspects of your event. With its vibrant fruits and luscious filling, a fruit tart is sure to impress your guests.
Ingredients
- 1 pre-made tart shell (9-inch)
- 1 cup heavy cream
- 1/2 cup powdered sugar
- 1 teaspoon vanilla extract
- 1 cup pastry cream (store-bought or homemade)
- 1 cup strawberries, sliced
- 1 cup blueberries
- 1 cup raspberries
- 1 cup peaches, sliced (or your favorite seasonal fruit)
- 1/4 cup apricot glaze (optional, for shine)
Instructions
- Prepare the Tart Shell: If using a frozen tart shell, bake according to the package instructions until golden brown. Allow it to cool completely.
- Make the Whipped Cream: In a large bowl, whip heavy cream, powdered sugar, and vanilla extract until soft peaks form.
- Assemble the Tart: Spread the pastry cream evenly in the cooled tart shell. Top with whipped cream, smoothing it out gently.
- Add the Fruit: Arrange the fresh fruit on top of the tart, creating a beautiful pattern.
- Glaze (optional): If desired, brush the fruit with apricot glaze for added shine.
- Chill: Refrigerate the tart for at least 1 hour before serving to allow the flavors to meld.
Pistachio and Rose Water Pudding
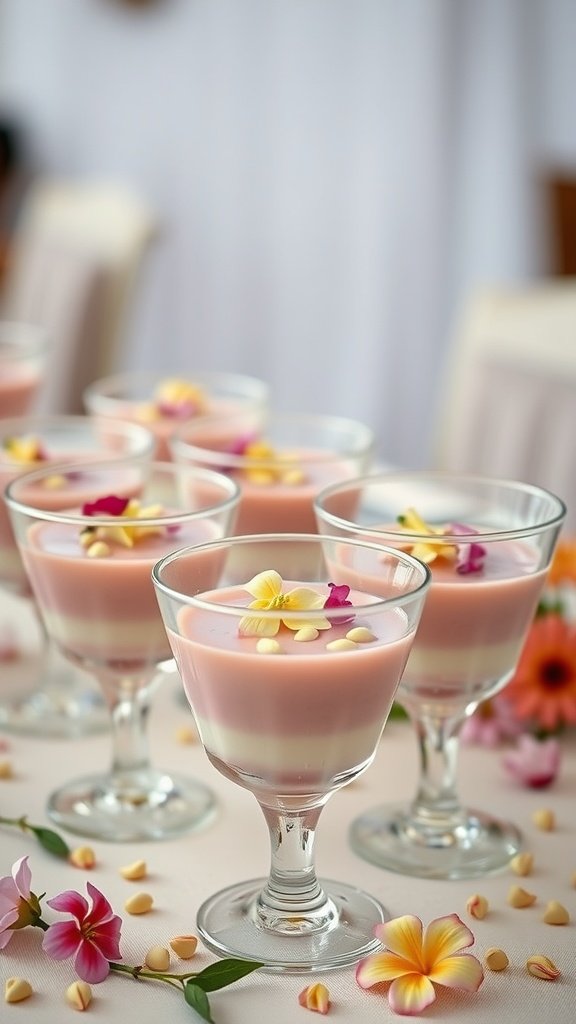
Pistachio and Rose Water Pudding is a delightful dessert that brings a touch of elegance to any occasion. With creamy layers infused with the nutty flavor of pistachios and the floral notes of rose water, this pudding is both refreshing and indulgent. It’s surprisingly easy to prepare, making it an excellent choice for wedding reception-worthy desserts.
The combination of textures—smooth pudding layered with crunchy pistachios—creates a delightful experience for the palate. This dessert not only looks beautiful but also offers a unique flavor profile that will impress your guests. Whether served in elegant cups or small bowls, it’s perfect for adding a touch of sophistication to your dessert table.
Ingredients
- 1 cup unsalted pistachios, shelled
- 4 cups milk
- 1/2 cup sugar
- 1/4 cup cornstarch
- 1/4 teaspoon salt
- 1 teaspoon rose water
- 1 tablespoon butter
- Pistachios and edible flowers for garnish
Instructions
- Prepare the Pistachios: Blend the pistachios in a food processor until finely ground. Set aside.
- Make the Pudding Base: In a saucepan, combine the milk, sugar, cornstarch, and salt. Whisk until smooth and bring to a gentle boil over medium heat, stirring continuously until the mixture thickens.
- Add Flavors: Remove the saucepan from heat and stir in the ground pistachios, rose water, and butter until well combined.
- Layer the Pudding: Pour the pudding into individual serving cups, layering as desired. Allow the pudding to cool before refrigerating for at least 2 hours to set.
- Serve: Garnish the pudding with crushed pistachios and edible flowers before serving to enhance its visual appeal.
Vanilla Bean Panna Cotta
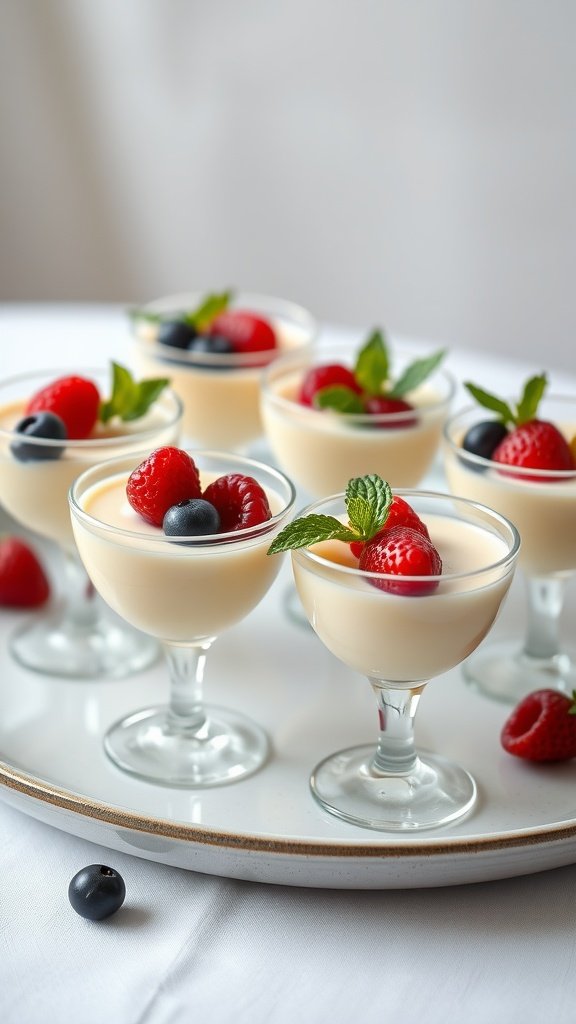
Vanilla bean panna cotta is a delightful Italian dessert that brings a touch of elegance to any wedding reception. With its silky smooth texture and rich vanilla flavor, this dessert is both simple to make and beautifully impressive. It’s a light option that is perfect for balancing out heavier meal courses, making it a great choice for your special day.
This panna cotta is not only delicious but also customizable. You can serve it with fresh fruits, coulis, or even a sprinkle of nuts for added texture and flavor. It’s an easy dessert to prepare in advance, leaving you with more time to enjoy your celebration. Here’s how to whip up this lovely treat:
Ingredients
- 2 cups heavy cream
- 1/2 cup granulated sugar
- 1 tablespoon vanilla bean paste (or 1 vanilla bean)
- 1 packet (2 1/4 teaspoons) unflavored gelatin
- 3 tablespoons cold water
- 1/2 teaspoon sea salt
Instructions
- Bloom the Gelatin: In a small bowl, sprinkle gelatin over cold water and let it sit for about 5 minutes until it becomes soft.
- Heat the Cream: In a saucepan, combine heavy cream, sugar, vanilla bean paste, and salt. Heat over medium heat until the mixture is hot but not boiling, stirring frequently.
- Dissolve the Gelatin: Remove the pan from heat and stir in the bloomed gelatin until fully dissolved.
- Pour and Chill: Pour the mixture into individual serving dishes or glasses. Refrigerate for at least 4 hours, or until set.
- Serve: Once set, garnish with fresh berries, mint leaves, or a drizzle of fruit sauce for a beautiful presentation.
Coffee and Donut Station
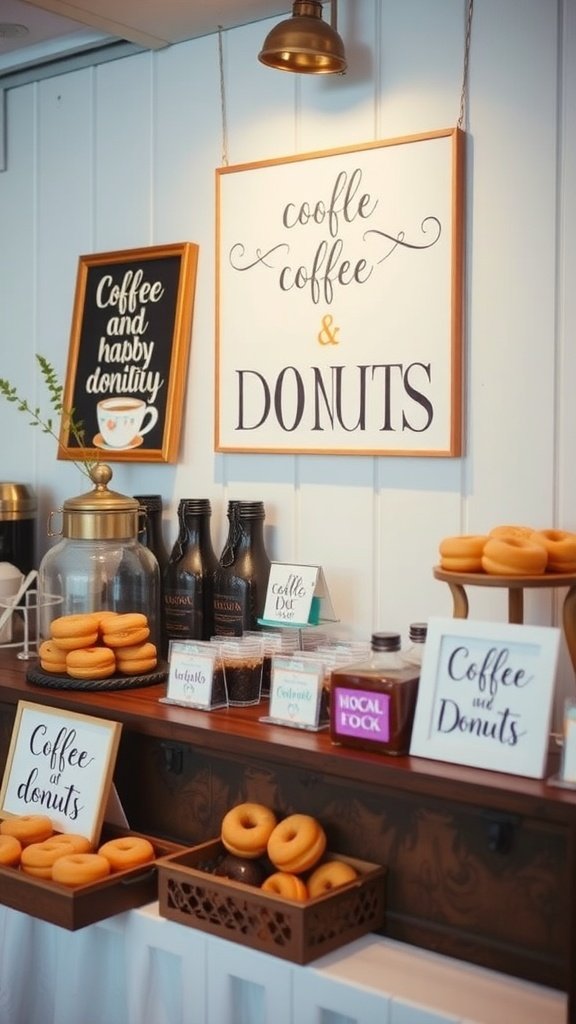
A Coffee and Donut Station is the perfect addition to any wedding reception, offering guests a delightful combination of rich, aromatic coffee and sweet, fluffy donuts. This setup creates an inviting space that encourages mingling and enjoyment, making it a memorable treat for everyone. The flavors of freshly brewed coffee paired with a variety of donuts are sure to please both coffee lovers and dessert enthusiasts alike.
Setting up this station is simple and allows for creativity. You can choose an assortment of donuts, from classic glazed to filled varieties, and provide different types of coffee, such as espresso, cappuccino, and flavored brews. Adding toppings and sauces can further enhance the experience. Guests will love customizing their drinks and donuts, making it a fun and interactive dessert option at your celebration.
Ingredients
- 2 cups all-purpose flour
- 1/2 cup granulated sugar
- 1 tablespoon baking powder
- 1/4 teaspoon salt
- 1/2 teaspoon ground cinnamon
- 1/4 cup unsalted butter, melted
- 2 large eggs
- 3/4 cup milk
- 1 teaspoon vanilla extract
- 1 cup powdered sugar (for glaze)
- 2 tablespoons milk (for glaze)
- Sprinkles or toppings (optional)
Instructions
- Preheat the Oven: Preheat your oven to 350°F (175°C) and lightly grease a donut pan.
- Mix Dry Ingredients: In a large bowl, whisk together the flour, sugar, baking powder, salt, and cinnamon.
- Add Wet Ingredients: In another bowl, mix the melted butter, eggs, milk, and vanilla until well combined. Pour this mixture into the dry ingredients and stir until just combined.
- Fill the Pan: Transfer the batter to a piping bag or a zip-top bag, cut a corner, and pipe the batter into each donut mold, filling about 2/3 full.
- Bake the Donuts: Bake for 10-12 minutes or until a toothpick inserted comes out clean. Allow them to cool in the pan for a few minutes before transferring to a wire rack.
- Prepare the Glaze: In a small bowl, whisk together powdered sugar and milk until smooth. Dip the cooled donuts into the glaze and top with sprinkles if desired.
- Serve: Arrange the donuts on a platter and serve with brewed coffee for a delightful wedding reception-worthy dessert experience.
Red Velvet Cake Pops
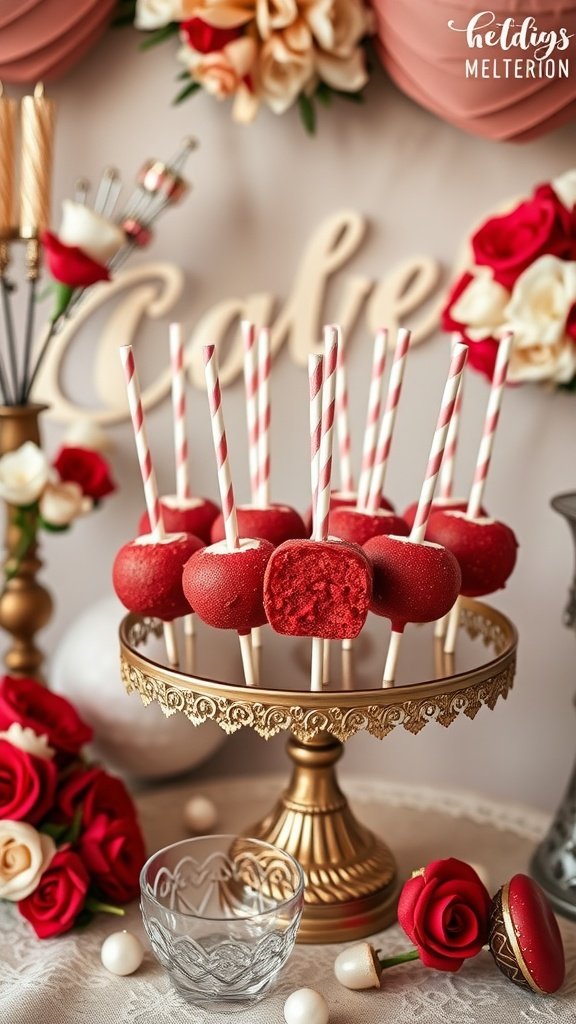
Red velvet cake pops are a delightful twist on a classic dessert, perfect for wedding receptions. These bite-sized treats combine the rich flavors of red velvet cake with creamy frosting, all wrapped up in a sweet chocolate coating. They have a soft, moist texture and a hint of cocoa, making them a crowd-pleaser for any celebration.
Making cake pops is quite simple, even for novice bakers. The process involves baking a red velvet cake, crumbling it, and mixing it with frosting before shaping it into balls. After that, it’s just a matter of dipping them in chocolate and decorating as you like. These cake pops not only taste delicious but also add a beautiful pop of color to your dessert table.
Ingredients
- 1 box red velvet cake mix
- 3 large eggs
- 1 cup vegetable oil
- 1 cup buttermilk
- 1 teaspoon vanilla extract
- 1/2 cup cream cheese frosting (store-bought or homemade)
- 1 cup chocolate chips (for coating)
- Sprinkles or edible decorations (optional)
Instructions
- Bake the Cake: Preheat your oven to 350°F (175°C) and prepare a cake pan according to package instructions. Mix the red velvet cake ingredients and bake for about 30-35 minutes. Allow it to cool completely.
- Crumble the Cake: Once cooled, crumble the cake into a large bowl until it resembles fine crumbs.
- Mix with Frosting: Add the cream cheese frosting to the cake crumbs and mix until well combined. You should be able to form a ball with the mixture.
- Shape the Cake Pops: Scoop out the mixture and roll it into 1-inch balls. Place them on a baking sheet lined with parchment paper.
- Chill: Refrigerate the cake pops for about 30 minutes to help them hold their shape.
- Melt the Chocolate: In a microwave-safe bowl, melt the chocolate chips in 30-second intervals until smooth.
- Dip and Decorate: Insert a lollipop stick into each cake ball, then dip it into the melted chocolate, allowing any excess to drip off. Decorate with sprinkles or edible decorations as desired.
- Set: Place the decorated cake pops back on the parchment paper and let them set until the chocolate hardens.
S’mores Bar
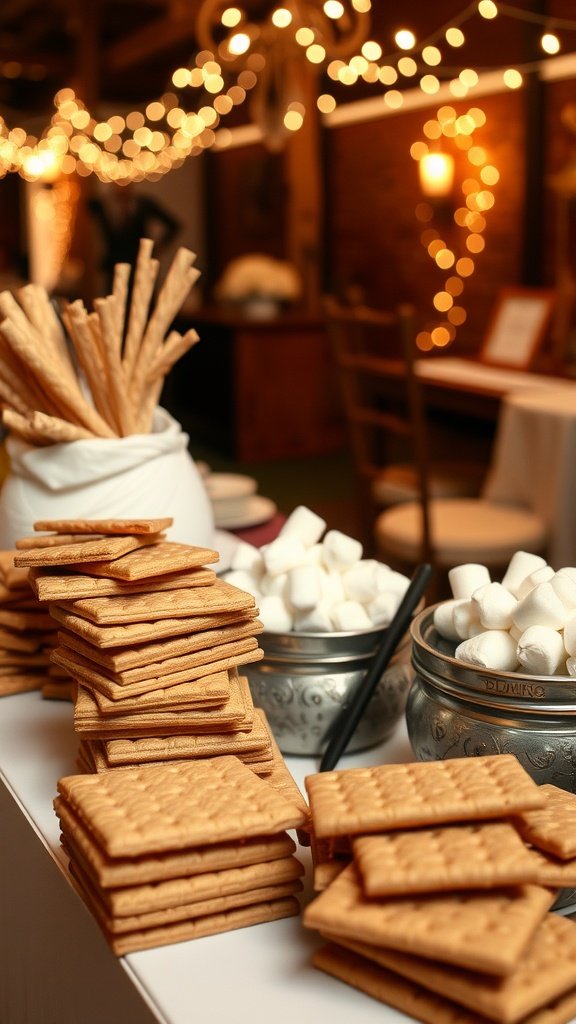
A S’mores Bar is a delightful addition to any wedding reception, turning a simple dessert into a fun, interactive experience for guests. The combination of crispy graham crackers, melty chocolate, and gooey marshmallows brings nostalgic flavors that everyone loves. Setting up a S’mores Bar is straightforward and allows guests to create their own perfect combination, making it a charming and memorable treat for all.
Not only is it easy to assemble, but it also adds a cozy and whimsical atmosphere to the celebration. With a few ingredients and some simple setup, a S’mores Bar becomes a showstopper. Guests can roast marshmallows to their liking and build their own sweet creations, catering to various tastes and preferences.
Ingredients
- Graham crackers
- Chocolate bars (milk chocolate, dark chocolate, or any variation you prefer)
- Marshmallows
- Skewers for roasting (if you plan to toast marshmallows)
- Optional toppings: peanut butter, caramel sauce, or flavored marshmallows
Instructions
- Set Up the Bar: Place stacks of graham crackers on a table, along with chocolate bars and bowls of marshmallows. If using, set out optional toppings.
- Prepare for Roasting: If you want toasted marshmallows, set up a safe space for roasting them. You can use a tabletop fire pit or a small grill.
- Assemble S’mores: Guests can take a graham cracker, add a piece of chocolate, and roast a marshmallow to their liking. Once the marshmallow is ready, place it on top of the chocolate and finish with another graham cracker.
- Enjoy: Encourage guests to get creative with their combinations, adding in any optional toppings they like!
Banoffee Pie
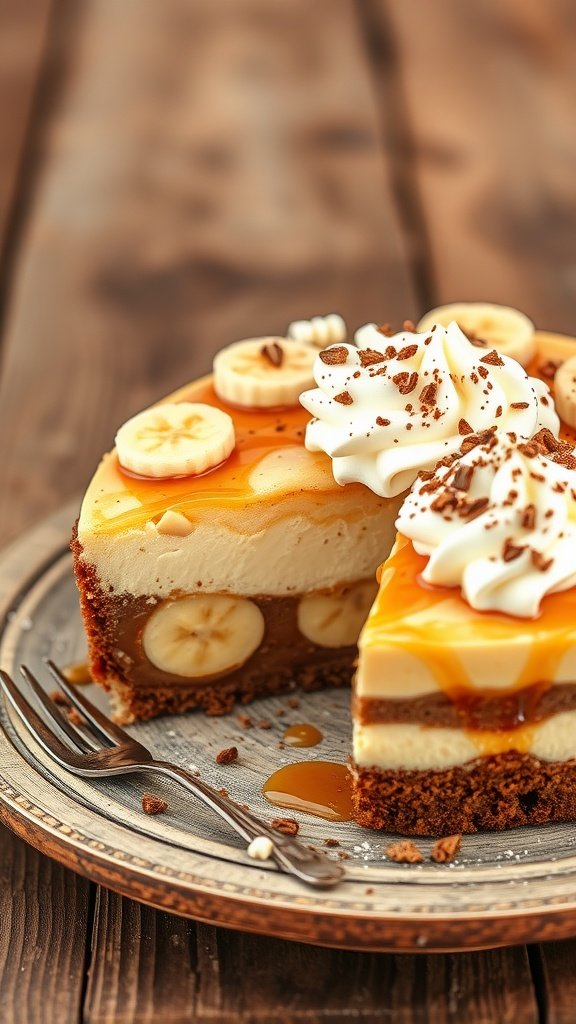
Banoffee pie is a delightful dessert that combines the sweet flavors of bananas, toffee, and cream, all nestled in a buttery biscuit crust. This treat is not only easy to make, but it also brings a cheerful touch to any wedding reception-worthy dessert table. The taste is a perfect balance of creamy sweetness and a slight crunch from the crust, making it a favorite among many.
With its layers of rich toffee, fresh bananas, and whipped cream, banoffee pie is as indulgent as it is inviting. It’s a simple recipe that can be whipped up in no time, ensuring you spend less time in the kitchen and more time celebrating your special day.
Ingredients
- 200g digestive biscuits
- 100g unsalted butter, melted
- 397g can of sweetened condensed milk
- 2 ripe bananas, sliced
- 300ml double cream
- 2 tablespoons cocoa powder or grated chocolate for decoration
- Caramel sauce for drizzling
Instructions
- Make the Base: Start by crushing the digestive biscuits in a plastic bag or food processor until they resemble fine crumbs. Combine with the melted butter and mix well. Press the mixture into the base of a springform pan to form an even layer. Chill in the refrigerator for about 30 minutes.
- Prepare the Toffee: In a saucepan, simmer the sweetened condensed milk over low heat for about 1-2 hours, stirring occasionally until it turns a caramel color. Allow it to cool slightly before spreading it over the biscuit base.
- Add Bananas: Once the toffee has cooled, layer the sliced bananas evenly over the toffee layer.
- Whip the Cream: In a mixing bowl, whip the double cream until it forms soft peaks. Spread this over the bananas, creating a smooth top.
- Garnish: Dust with cocoa powder or sprinkle grated chocolate for decoration, and drizzle caramel sauce on top before serving.
Chocolate-Covered Strawberries
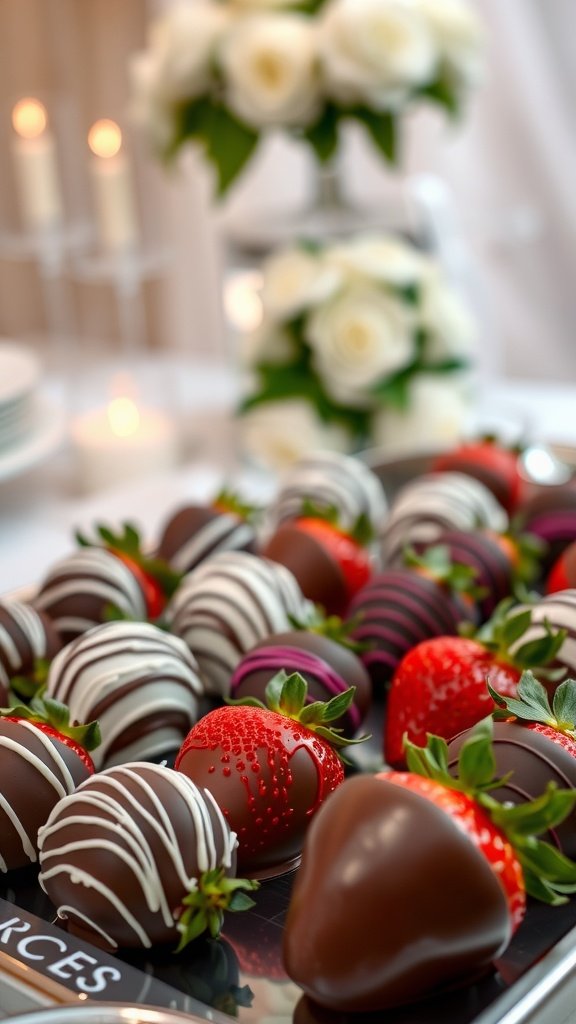
Chocolate-covered strawberries are a delightful treat that combines the sweetness of fresh strawberries with rich, melted chocolate. This simple recipe is perfect for wedding receptions, adding a touch of elegance and indulgence to any dessert table. The contrast of juicy fruit and smooth chocolate creates a satisfying bite that guests will love.
Making chocolate-covered strawberries is easy and can be done in just a few steps, making it a great option for those who want a quick yet impressive dessert. Whether you choose dark, milk, or white chocolate, you can customize the look by drizzling with different colors of chocolate, or even adding sprinkles for an extra festive touch.
Ingredients
- 1 pound fresh strawberries
- 8 ounces semisweet chocolate chips
- 4 ounces white chocolate chips (optional for drizzling)
- 1 tablespoon coconut oil (optional, for smoothness)
Instructions
- Wash the strawberries and pat them dry completely with a paper towel. Any water can prevent the chocolate from sticking.
- In a microwave-safe bowl, combine the semisweet chocolate chips and coconut oil. Microwave in 30-second intervals, stirring between each, until melted and smooth.
- Hold each strawberry by the green stem and dip it into the melted chocolate, allowing any excess to drip off.
- Place the dipped strawberries on a parchment-lined baking sheet. If desired, melt the white chocolate in the same manner and drizzle over the dipped strawberries for decoration.
- Let the strawberries sit at room temperature or refrigerate until the chocolate is set, about 30 minutes.
Strawberry Shortcake
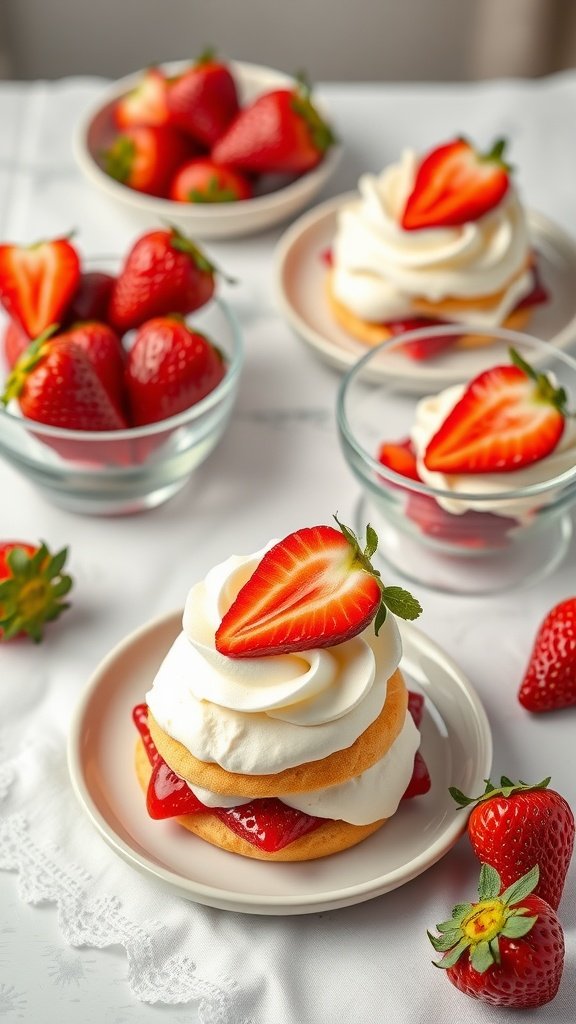
Strawberry shortcake is a delightful dessert that brings together the sweetness of ripe strawberries, fluffy whipped cream, and light, buttery cake. It’s a crowd-pleaser that adds a refreshing touch to any wedding reception-worthy dessert table. Plus, it’s simple to make, allowing you to focus on other aspects of your big day.
This dessert not only tastes delicious, but it also presents beautifully, making it a lovely choice for weddings. The combination of textures—soft cake, juicy berries, and airy cream—creates a memorable experience for your guests. Whether you serve it in individual portions or as a larger cake, strawberry shortcake is sure to impress.
Ingredients
- 2 cups all-purpose flour
- 1/4 cup sugar
- 1 tablespoon baking powder
- 1/2 teaspoon salt
- 1/2 cup unsalted butter, cold and cubed
- 1 cup heavy cream, plus more for whipping
- 2 cups fresh strawberries, hulled and sliced
- 1/4 cup powdered sugar
- 1 teaspoon vanilla extract
Instructions
- Preheat your oven to 425°F (220°C) and line a baking sheet with parchment paper.
- In a large bowl, whisk together flour, sugar, baking powder, and salt. Cut in the cold butter until the mixture resembles coarse crumbs.
- Pour in the heavy cream gradually, stirring until just combined. Do not overmix.
- Turn the dough out onto a floured surface and gently knead it a few times. Roll out to about 1-inch thick, then cut into rounds using a biscuit cutter.
- Place the rounds on the prepared baking sheet and bake for 15-20 minutes until golden brown. Let them cool.
- In a separate bowl, toss sliced strawberries with a bit of sugar and let them sit for about 10 minutes to release their juices.
- Whip the remaining heavy cream with powdered sugar and vanilla until soft peaks form.
- To assemble, slice the shortcakes in half, layer with strawberries and whipped cream, and top with the other half. Serve immediately and enjoy your strawberry shortcake!
Almond Joy Cake

If you’re looking for a dessert that adds a delightful twist to your wedding reception, the Almond Joy Cake is a solid choice. This cake combines the classic flavors of chocolate, coconut, and almonds, evoking the nostalgic taste of the beloved candy bar. It’s rich, moist, and offers a wonderful contrast of textures, making each slice a treat to savor.
This cake is surprisingly easy to make, even for those who aren’t expert bakers. With simple ingredients and straightforward steps, you can create a show-stopping dessert that will impress your guests. The combination of layers filled with coconut cream and topped with velvety chocolate ganache makes it truly special.
Ingredients
- 1 ½ cups all-purpose flour
- 1 cup granulated sugar
- ½ cup unsweetened cocoa powder
- 1 teaspoon baking soda
- ½ teaspoon salt
- 1 cup buttermilk
- ½ cup vegetable oil
- 2 large eggs
- 1 teaspoon vanilla extract
- 1 cup shredded coconut
- 1 cup chopped almonds
- 1 cup semi-sweet chocolate chips
Instructions
- Preheat the oven to 350°F (175°C). Grease and flour two 9-inch round cake pans.
- In a large bowl, mix flour, sugar, cocoa powder, baking soda, and salt.
- Add buttermilk, oil, eggs, and vanilla. Beat on medium speed for about 2 minutes until well combined.
- Fold in the shredded coconut and chopped almonds until evenly distributed.
- Divide the batter between the prepared pans and bake for 25-30 minutes or until a toothpick comes out clean.
- Let the cakes cool in the pans for 10 minutes, then transfer to wire racks to cool completely.
- Once the cakes are cool, melt the chocolate chips and spread them over the top of one layer. Sprinkle with additional coconut and almonds. Place the second layer on top and repeat.
Cheesecake Bar

A cheesecake bar is a delightful addition to any wedding reception. This setup allows guests to customize their own slices of creamy cheesecake with an array of toppings, creating a fun and interactive dessert experience. With a buttery graham cracker crust and rich, smooth filling, the taste is both indulgent and satisfying.
The beauty of a cheesecake bar lies in its variety. You can offer different flavors like classic vanilla, chocolate, or even seasonal fruit-infused options. It’s simple to prepare ahead of time, making it a stress-free choice for wedding planners. Guests will love choosing their favorite toppings, from fresh berries to chocolate drizzles, making each slice uniquely theirs.
Ingredients
- 2 cups graham cracker crumbs
- 1/2 cup unsalted butter, melted
- 1/4 cup sugar
- 3 (8 oz) packages cream cheese, softened
- 1 cup granulated sugar
- 1 teaspoon vanilla extract
- 3 large eggs
- 1 cup sour cream
- Your choice of toppings (fresh fruits, chocolate sauce, caramel, nuts, etc.)
Instructions
- Prepare the Crust: Preheat your oven to 325°F (160°C). In a mixing bowl, combine graham cracker crumbs, melted butter, and sugar until well mixed. Press this mixture firmly into the bottom of a 9×13 inch baking dish or a springform pan.
- Bake the Crust: Bake the crust for about 10 minutes, then remove from the oven and let it cool.
- Make the Filling: In a large mixing bowl, beat the softened cream cheese until smooth. Gradually add in granulated sugar and vanilla, mixing until combined. Add eggs one at a time, mixing well after each addition. Finally, stir in the sour cream until smooth.
- Pour Filling: Pour the cream cheese mixture over the cooled crust and spread it evenly.
- Bake the Cheesecake: Bake for 40-45 minutes, until the center is set but slightly jiggly. Turn off the oven and leave the cheesecake inside for another hour to cool gradually.
- Chill: Once cooled, refrigerate for at least 4 hours or overnight for best results.
- Serve: Cut into squares or wedges and set up a topping station for guests to customize their cheesecake slices with their favorite toppings.
Baked Alaska
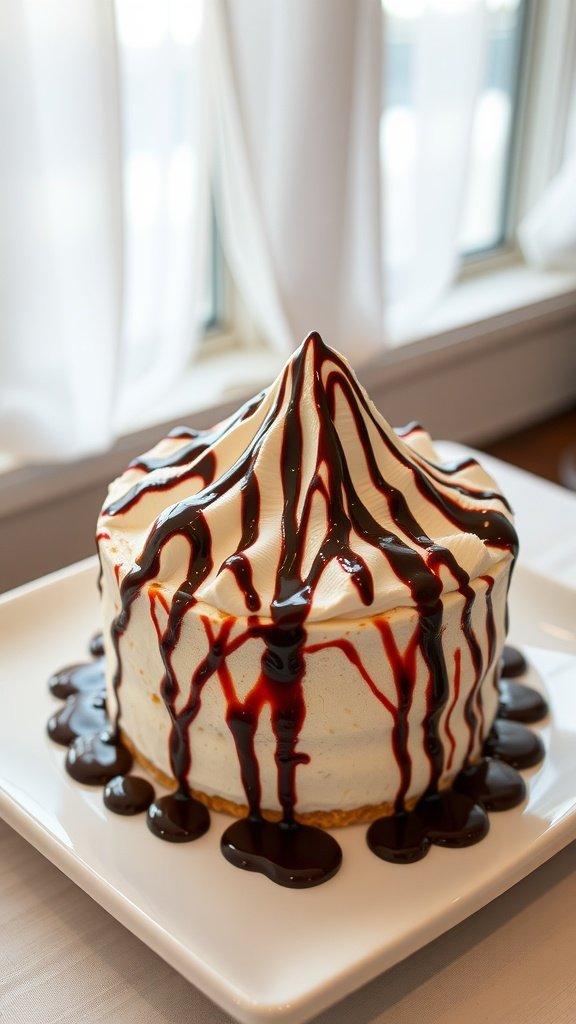
Baked Alaska is a delightful dessert that combines layers of cake, ice cream, and meringue into a show-stopping centerpiece. The contrast of textures, with a soft sponge cake base and a creamy ice cream filling, is enhanced by a crisp, toasted meringue topping. While it may seem fancy, making Baked Alaska can be quite straightforward, making it an excellent choice for Wedding Reception-Worthy Desserts.
This dessert not only looks impressive but also delivers a wonderful balance of flavors. The cake provides a subtle sweetness, while the ice cream offers a refreshing chill. The meringue adds a touch of elegance and a hint of sweetness, all brought together in a warm, comforting presentation. Your guests will surely be captivated by this classic dessert!
Ingredients
- 1 sponge cake (store-bought or homemade)
- 2 pints of your favorite ice cream
- 4 egg whites
- 1 cup granulated sugar
- 1 teaspoon vanilla extract
- 1/4 teaspoon cream of tartar
- Chocolate syrup (for drizzling)
Instructions
- Prepare the Base: Start by baking or using a pre-made sponge cake as the base. Cut it into a circle that fits the bottom of your serving dish.
- Layer the Ice Cream: Soften the ice cream slightly and spread it on top of the sponge cake in an even layer. You can choose one or multiple flavors. Freeze until solid, about 2 hours.
- Make the Meringue: In a mixing bowl, beat the egg whites with cream of tartar until soft peaks form. Gradually add the sugar while continuing to beat until stiff, glossy peaks form. Stir in the vanilla extract.
- Assemble the Dessert: Remove the cake and ice cream from the freezer. Spread the meringue over the ice cream, covering it completely and creating peaks for texture.
- Toast the Meringue: Use a kitchen torch to gently toast the meringue until golden brown. Alternatively, you can place it under a broiler for a minute or two, watching closely to prevent burning.
- Serve: Drizzle with chocolate syrup and slice to serve. Enjoy this delightful dessert!
Tropical Fruit Skewers
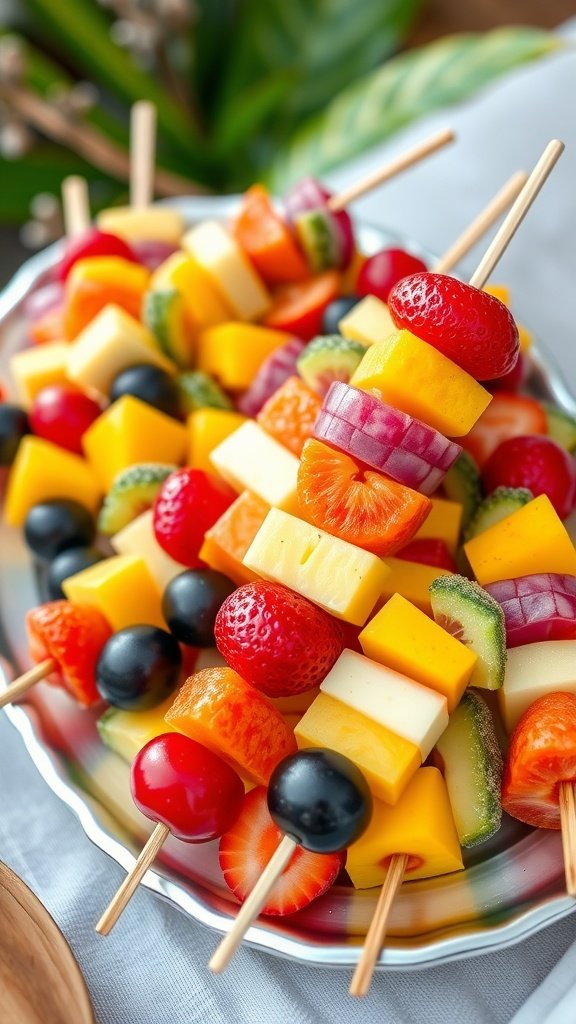
Looking for a light and refreshing addition to your wedding reception-worthy desserts? Tropical fruit skewers are a vibrant and tasty option that will appeal to guests of all ages. These skewers combine an array of juicy fruits, offering a burst of flavor in every bite. They are incredibly simple to make, requiring minimal preparation and no baking!
Not only are they visually appealing, but they also provide a healthy alternative to heavier desserts. Perfect for warm weather celebrations, these skewers can be customized with your favorite fruits or even paired with a sweet dipping sauce for an extra touch. They are guaranteed to be a hit!
Ingredients
- 1 cup fresh pineapple, cut into cubes
- 1 cup strawberries, hulled
- 1 cup mango, cut into cubes
- 1 cup kiwi, sliced
- 1 cup red grapes
- 1 cup cantaloupe, cut into balls
- Wooden skewers
- Optional: yogurt or chocolate for dipping
Instructions
- Prepare the Skewers: Start by cutting all the fruits into bite-sized pieces. If you’re using wooden skewers, soak them in water for about 30 minutes to prevent burning.
- Assemble the Skewers: Take a skewer and start adding fruits in your desired order. Alternate between different colors and types for a festive look.
- Serve: Arrange the skewers on a platter and, if desired, serve with a dipping sauce such as yogurt or melted chocolate.
- Enjoy: These tropical fruit skewers are best enjoyed fresh, so serve them right after assembling for maximum flavor!
Chocolate Mousse Cups
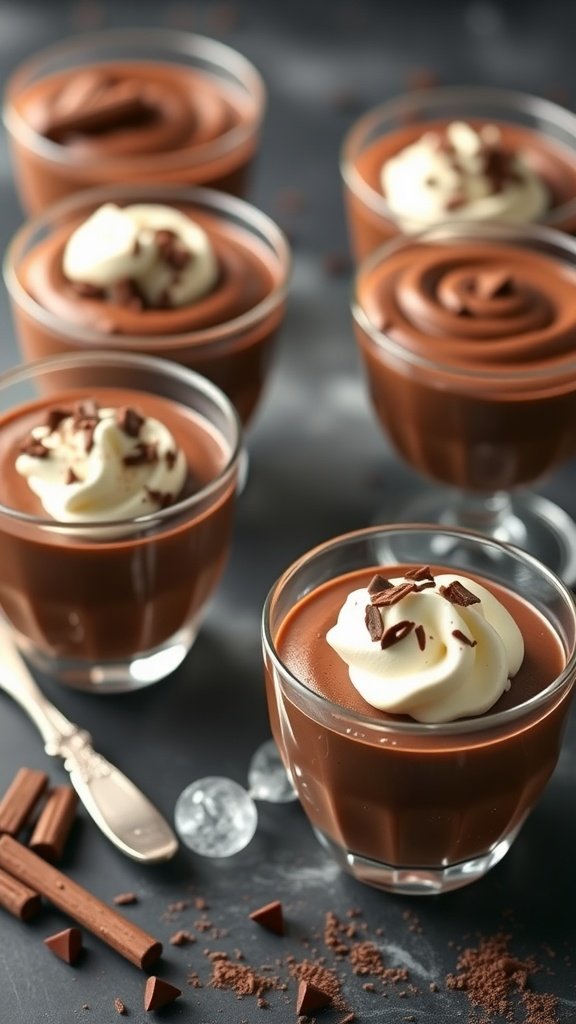
Chocolate mousse cups are a delightful treat that can elevate any wedding reception. They offer a rich, velvety chocolate flavor that feels indulgent yet light. These cups are not only delicious but also simple to make, making them a great choice for dessert tables.
The combination of creamy chocolate and light whipped cream creates a perfect balance, satisfying chocolate lovers without being overly heavy. Plus, individual servings in cups make for an elegant presentation that guests will appreciate.
Ingredients
- 6 ounces semi-sweet chocolate, chopped
- 3 tablespoons unsalted butter
- 3 large eggs, separated
- 1/4 cup granulated sugar
- 1 teaspoon vanilla extract
- 1/2 cup heavy cream
- Whipped cream and chocolate shavings for garnish
Instructions
- Melt the Chocolate: In a heatproof bowl, combine the chopped chocolate and butter. Set the bowl over a pot of simmering water and stir until melted and smooth. Remove from heat and let cool slightly.
- Whisk Egg Yolks: In a separate bowl, whisk together the egg yolks, sugar, and vanilla extract until pale and thick. Gradually mix this into the melted chocolate until fully combined.
- Beat Egg Whites: In another bowl, beat the egg whites until stiff peaks form. Gently fold them into the chocolate mixture in three additions.
- Whip the Cream: In a separate bowl, whip the heavy cream until soft peaks form. Gently fold this into the chocolate mixture until no streaks remain.
- Chill the Mousse: Spoon the mousse into individual cups and refrigerate for at least 2 hours or until set.
- Serve: Top with whipped cream and chocolate shavings before serving. Enjoy your delightful chocolate mousse cups!
Peach Melba Parfait
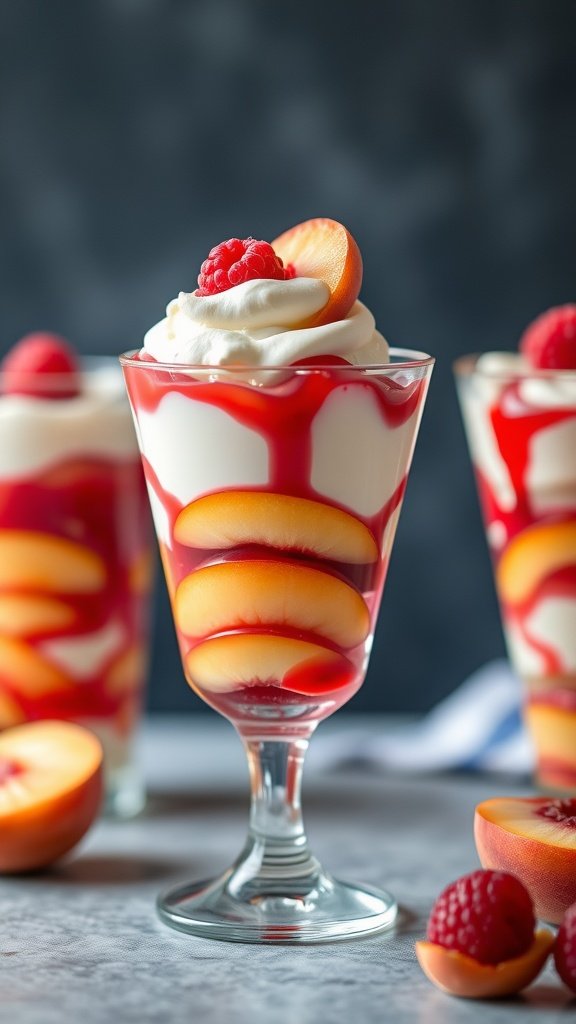
Peach Melba Parfait is a delightful treat that perfectly combines the sweetness of ripe peaches, the creaminess of whipped cream, and the tartness of raspberry sauce. This dessert is not only visually appealing but also offers a refreshing taste that’s perfect for any wedding reception-worthy dessert spread. With simple layers of fruit and cream, it’s incredibly easy to prepare, making it a great option for those looking to impress without spending all day in the kitchen.
The blend of flavors creates a light and airy dessert that feels indulgent yet refreshing. Whether you’re hosting a summer wedding or just looking for a sweet ending to a meal, this parfait is sure to satisfy your guests’ sweet cravings without overwhelming them. Plus, you can prepare it ahead of time, allowing you to enjoy the festivities without the stress of last-minute dessert preparations.
Ingredients
- 2 cups fresh peaches, sliced
- 1 cup raspberries
- 1 cup heavy cream
- 1/4 cup powdered sugar
- 1 teaspoon vanilla extract
- 1/4 cup raspberry sauce (store-bought or homemade)
- Mint leaves for garnish (optional)
Instructions
- Prepare the Whipped Cream: In a medium bowl, beat the heavy cream, powdered sugar, and vanilla extract until soft peaks form.
- Layer the Parfait: In serving glasses or bowls, start with a layer of sliced peaches, followed by a layer of whipped cream, and then a drizzle of raspberry sauce. Repeat the layers until the glasses are filled.
- Add the Raspberries: Top each parfait with fresh raspberries and a dollop of whipped cream.
- Garnish and Serve: Optionally, garnish with mint leaves for a pop of color. Serve immediately or chill until ready to serve.
Eclairs with Various Fillings
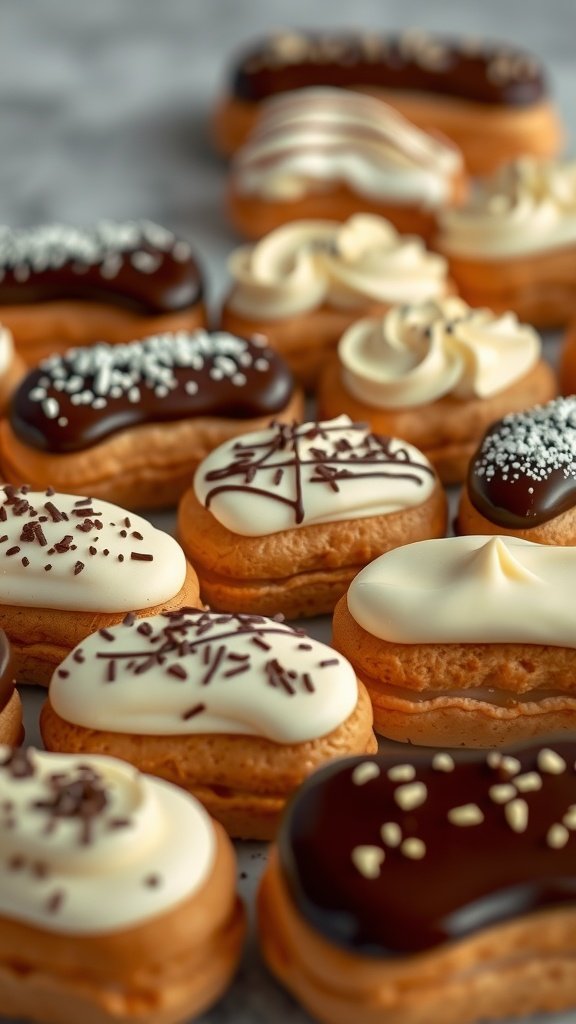
Eclairs are delightful pastries that can elevate any wedding reception dessert table. These light and airy treats are made from choux pastry and filled with a variety of delicious fillings, such as pastry cream, whipped cream, or even fruit-flavored mousse. The combination of textures—the crisp outer shell and the creamy filling—creates a satisfying bite that is sure to impress your guests.
Making eclairs can be quite simple, even if it may seem intimidating at first. With a little practice, you can achieve that perfect puff and create a range of flavors to cater to different tastes. Whether you choose classic chocolate, vanilla, or experiment with seasonal fruits, eclairs are versatile enough to suit any wedding theme.
Ingredients
- 1 cup water
- 1/2 cup unsalted butter
- 1 cup all-purpose flour
- 1/4 teaspoon salt
- 4 large eggs
- 1 cup pastry cream (vanilla or flavored)
- 1 cup heavy cream (for whipped filling)
- 1/2 cup chocolate (for glazing)
- Sprinkles or nuts (for topping)
Instructions
- Preheat the oven to 400°F (200°C). Line a baking sheet with parchment paper.
- In a saucepan, combine water and butter. Heat until the butter melts and the mixture comes to a boil.
- Remove from heat and quickly stir in flour and salt until well combined. Allow to cool for a few minutes.
- Add eggs one at a time, mixing until smooth after each addition. The batter should be thick and glossy.
- Spoon or pipe the batter onto the prepared baking sheet into 4-inch strips, spacing them apart.
- Bake for 20-25 minutes or until golden brown and puffed up. Let cool completely.
- Once cooled, use a pastry bag to fill eclairs with your chosen pastry cream or whipped cream.
- For the glaze, melt chocolate in a bowl and dip the tops of the filled eclairs. Add sprinkles or nuts for decoration. Allow to set before serving.
Nutella Tart
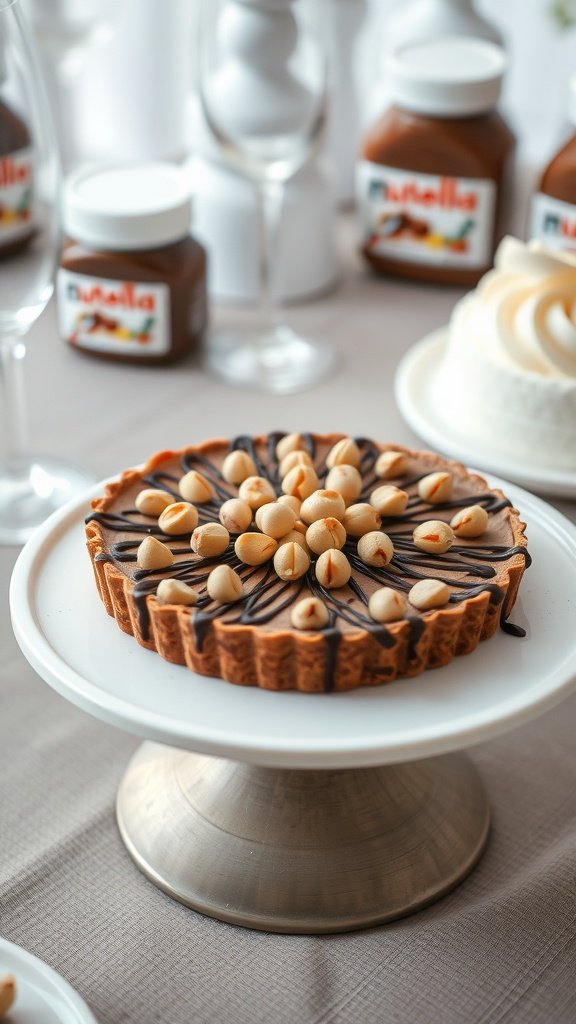
This Nutella Tart is a delightful blend of rich chocolate and creamy hazelnut that makes it a fantastic addition to any wedding reception-worthy desserts menu. With its buttery crust and luscious filling, it strikes the perfect balance between indulgence and elegance. Plus, it’s surprisingly simple to whip up, making it a great choice for both novice and experienced bakers.
The tart’s smooth texture and nutty flavor will leave your guests craving more. It’s a dessert that not only pleases the palate but also looks stunning on any dessert table, making it an ideal choice for special occasions.
Ingredients
- 1 1/4 cups all-purpose flour
- 1/2 cup unsalted butter, softened
- 1/4 cup powdered sugar
- 1/4 teaspoon salt
- 1 large egg yolk
- 1 cup Nutella
- 1/2 cup heavy cream
- 1 teaspoon vanilla extract
- Chopped hazelnuts or chocolate shavings for garnish
Instructions
- Make the Tart Crust: In a bowl, mix flour, powdered sugar, and salt. Cut in the butter until the mixture resembles coarse crumbs. Stir in the egg yolk until the dough comes together. Press the dough into a tart pan and chill for 30 minutes.
- Bake the Crust: Preheat the oven to 350°F (175°C). Bake the crust for 20 minutes or until lightly golden. Allow it to cool completely.
- Prepare the Filling: In a saucepan, heat the heavy cream until just simmering. Remove from heat and add Nutella and vanilla extract, stirring until smooth.
- Assemble the Tart: Pour the Nutella mixture into the cooled crust and spread evenly. Chill for at least 2 hours until set.
- Garnish and Serve: Before serving, top with chopped hazelnuts or chocolate shavings for added texture and presentation. Slice and enjoy!
Coconut Cream Pie
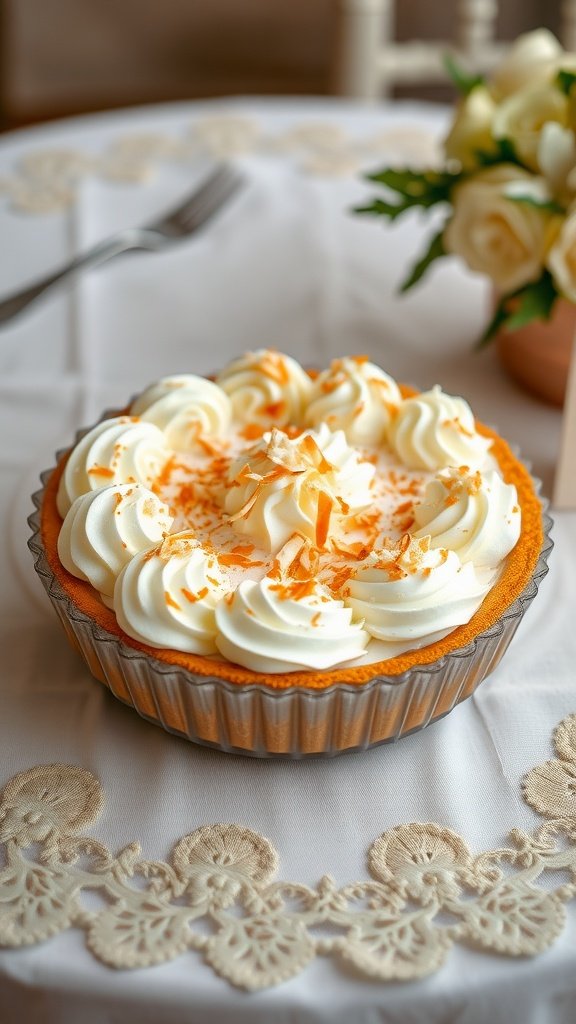
Coconut cream pie is a delightful dessert that brings tropical flavors to any gathering. Its creamy coconut filling, topped with fluffy whipped cream and toasted coconut flakes, creates a luscious treat that your guests will adore. Not only is it delicious, but it’s also simple to prepare, making it a perfect addition to your wedding reception-worthy desserts.
The balance of sweet and creamy textures makes each bite a delight. With a buttery crust holding everything together, this pie offers a comforting and satisfying experience that’s sure to impress. Plus, it can easily be made ahead of time, allowing you to focus on other aspects of your celebration.
Raspberry Lemonade Sorbet

Raspberry Lemonade Sorbet is a refreshing dessert that perfectly balances tartness and sweetness. This sorbet offers a delightful burst of flavor, making it an ideal choice for a wedding reception or any summer gathering. With its vibrant color and light, icy texture, it’s a simple yet elegant way to cool down on a warm day.
Not only is this dessert easy to make, but it also requires just a few ingredients. The combination of fresh raspberries and zesty lemonade creates a fruity treat that guests of all ages will enjoy. Serve it in elegant glasses for a touch of class at your event!
Ingredients
- 2 cups fresh raspberries
- 1 cup granulated sugar
- 1 cup water
- 1/2 cup fresh lemon juice
- 1 tablespoon lemon zest
Instructions
- Make the Syrup: In a small saucepan, combine the sugar and water. Heat over medium heat, stirring until the sugar dissolves. Remove from heat and let it cool.
- Puree the Raspberries: In a blender, combine the fresh raspberries, cooled syrup, lemon juice, and lemon zest. Blend until smooth.
- Strain the Mixture: Pour the mixture through a fine mesh sieve into a bowl to remove the seeds, pressing with a spatula to extract as much liquid as possible.
- Freeze: Pour the strained mixture into a shallow dish and freeze for about 4 hours, stirring every 30 minutes until the sorbet is firm and fluffy.
- Serve: Once frozen, scoop the sorbet into serving glasses and enjoy!
Baklava Delight
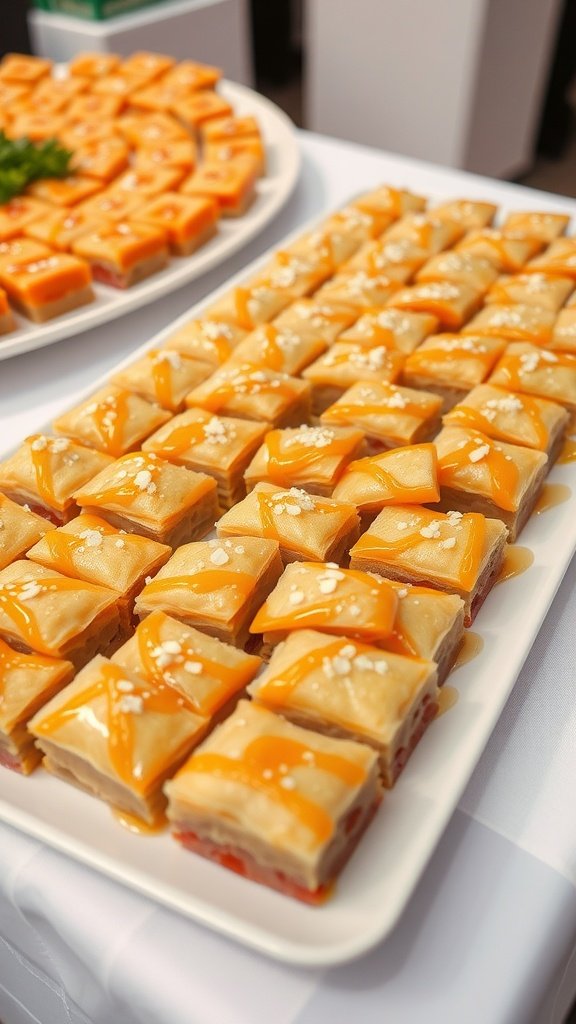
Bite into a piece of baklava, and you’ll be greeted by layers of flaky pastry, crunchy nuts, and a delightful syrup that ties it all together. This classic dessert has a unique combination of sweet and nutty flavors, making it a perfect choice for wedding reception-worthy desserts. While it may seem intricate, the process is quite manageable and rewarding, allowing you to impress guests with your culinary skills.
The layers of phyllo dough create a beautiful texture, while the honey and nut filling brings a rich sweetness to each bite. Once baked to golden perfection and drizzled with syrup, baklava becomes an irresistible treat that’s sure to please any crowd.
Ingredients
- 1 package of phyllo dough (16 oz), thawed
- 2 cups mixed nuts (walnuts, pistachios, or almonds), finely chopped
- 1 cup unsalted butter, melted
- 1 teaspoon ground cinnamon
- 1 cup granulated sugar
- 1 cup water
- 1/2 cup honey
- 1 teaspoon vanilla extract
- Pinch of salt
Instructions
- Prepare the Nuts: In a bowl, mix the chopped nuts with cinnamon and a pinch of salt. Set aside.
- Layer the Phyllo: Preheat your oven to 350°F (175°C). Brush a 9×13 inch baking dish with melted butter. Lay one sheet of phyllo in the dish and brush with butter. Repeat until you have about 8 sheets layered.
- Add the Filling: Spread a thin layer of the nut mixture over the phyllo. Continue layering phyllo sheets and nut mixture, alternating until finished, using about 8 sheets of phyllo for the top layer.
- Cut the Baklava: Before baking, cut the baklava into diamond or square shapes with a sharp knife.
- Bake: Bake in the preheated oven for about 45-50 minutes, or until golden brown.
- Prepare the Syrup: In a saucepan, combine sugar, water, honey, and vanilla. Bring to a boil, reduce heat, and simmer for about 10 minutes. Remove from heat and let cool.
- Finish the Baklava: Once the baklava is done baking, remove it from the oven and immediately pour the cooled syrup over the hot baklava. Allow it to soak in for at least 4 hours or overnight before serving.
Chocolate Chip Cookie Sandwiches
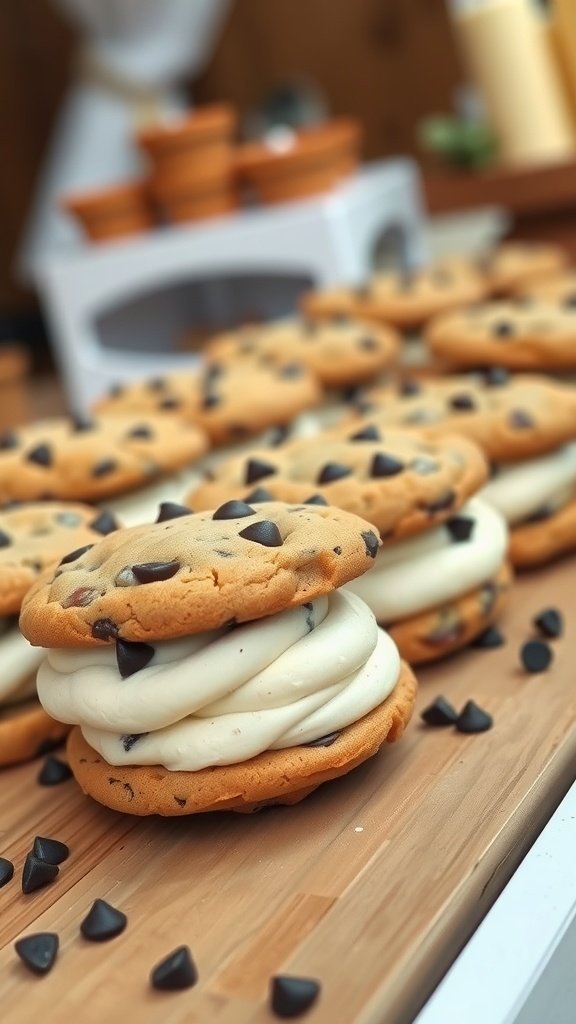
Chocolate chip cookie sandwiches are a delightful twist on the classic cookie. Combining two soft, chewy chocolate chip cookies with a creamy filling, they offer a comforting taste that feels like a warm hug. These treats are not only delicious but also simple to make, making them a perfect addition to any wedding reception-worthy dessert table.
The sweetness of the cookies pairs beautifully with the rich filling, creating a delightful contrast in texture and flavor. These sandwiches are sure to impress your guests and provide a nostalgic treat that everyone loves!
Ingredients
- 2 1/4 cups all-purpose flour
- 1 teaspoon baking soda
- 1/2 teaspoon salt
- 3/4 cup unsalted butter, softened
- 1/2 cup granulated sugar
- 1 cup brown sugar, packed
- 1 teaspoon vanilla extract
- 2 large eggs
- 2 cups semi-sweet chocolate chips
- 1 cup cream cheese, softened
- 1/2 cup powdered sugar
- 1 teaspoon vanilla extract (for filling)
Instructions
- Preheat the Oven: Begin by preheating your oven to 350°F (175°C).
- Make the Cookie Dough: In a bowl, whisk together flour, baking soda, and salt. In a separate bowl, cream together the softened butter, granulated sugar, brown sugar, and vanilla extract. Beat in the eggs, one at a time, then gradually mix in the dry ingredients. Fold in the chocolate chips.
- Shape the Cookies: Drop rounded tablespoons of dough onto lined baking sheets, leaving space between each for spreading. Bake for 10-12 minutes, or until the edges are golden and the centers are set. Allow to cool on the baking sheet for a few minutes before transferring to wire racks to cool completely.
- Prepare the Filling: In a mixing bowl, combine the softened cream cheese, powdered sugar, and vanilla extract. Beat until smooth and creamy.
- Assemble the Sandwiches: Once the cookies are completely cool, spread a generous layer of the cream cheese filling on the bottom of one cookie and top it with another cookie. Press gently to create a sandwich. Repeat with the remaining cookies.
- Serve and Enjoy: These chocolate chip cookie sandwiches are ready to be enjoyed. Store any leftovers in an airtight container in the refrigerator.