If you’re hosting a gathering or just looking for some fun snacks, these 27 mini finger foods are sure to satisfy. They’re easy to whip up and perfect for mingling, allowing your guests to nibble and chat without missing a beat. From savory bites to sweet treats, you’ll find plenty of tasty options to please any palate!
Mini Quiches with Various Fillings

Mini quiches are a delightful way to serve bite-sized portions that pack a punch of flavor. With their flaky crusts and rich, creamy fillings, they’re perfect for any gathering or snack time. These little treasures can be customized with a variety of ingredients, making them both versatile and tasty.
The best part is that they’re incredibly simple to whip up, whether you are using a pre-made crust or making your own. From classic cheese and spinach to zesty peppers and herbs, every bite offers a different taste experience. Let’s dive into a basic mini quiche recipe that you can adapt to your liking!
Mini Caprese Skewers
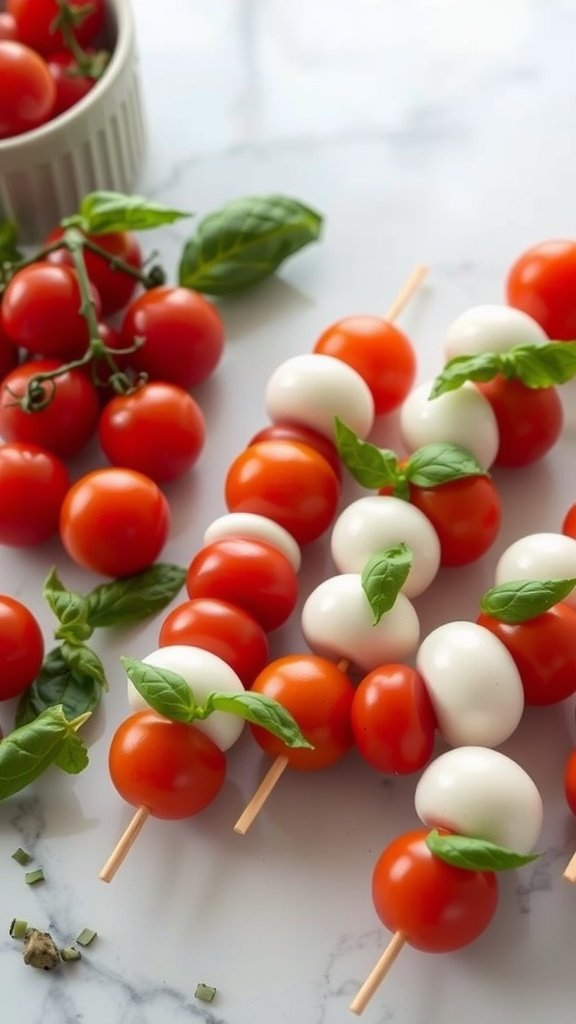
Mini Caprese skewers are a delightful and fresh appetizer that brings together the classic flavors of tomatoes, mozzarella, and basil. These bite-sized treats are not only visually appealing but also offer a burst of flavor with every bite. Perfect for gatherings, they are incredibly simple to make, requiring just a few ingredients and minimal prep time.
The combination of juicy cherry tomatoes, creamy mozzarella balls, and fragrant basil creates a refreshing taste that’s hard to resist. Drizzled with a touch of balsamic glaze, these skewers are a crowd-pleaser that can easily elevate any event, from picnics to dinner parties.
Ingredients
- 1 pint cherry tomatoes
- 1 pound fresh mozzarella balls
- Fresh basil leaves
- Balsamic glaze (for drizzling)
- Salt and pepper to taste
- Skewers or toothpicks
Instructions
- Gather all ingredients and prepare your skewers or toothpicks.
- On each skewer, thread a cherry tomato, followed by a basil leaf, and then a mozzarella ball. Repeat until the skewer is filled, alternating as desired.
- Once your skewers are ready, drizzle them with balsamic glaze and sprinkle with salt and pepper to taste.
- Serve immediately or chill in the refrigerator until ready to enjoy.
Spicy Shrimp Tacos in Mini Tortillas
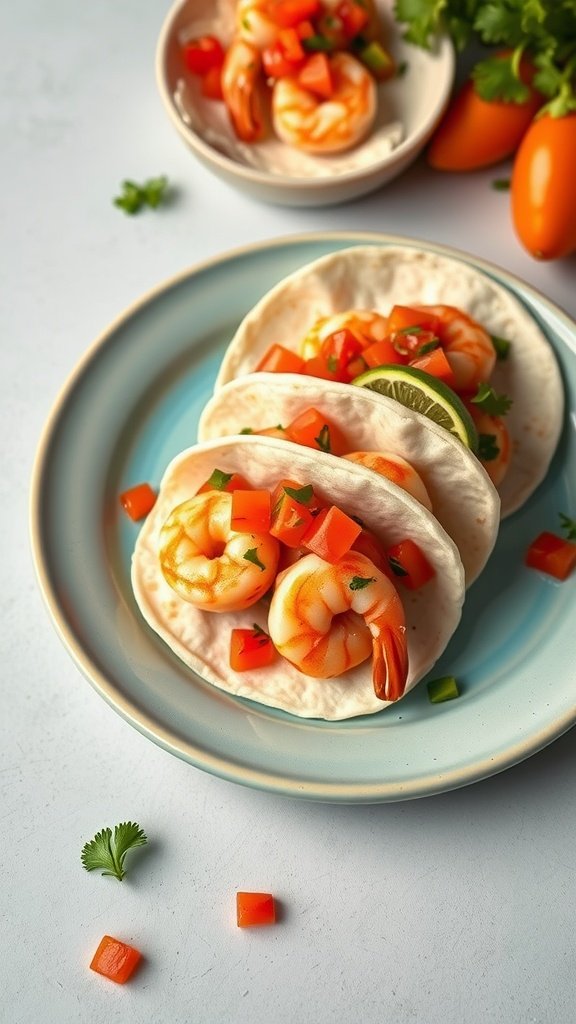
These spicy shrimp tacos are a delightful treat that pack a punch of flavor in every bite. The combination of succulent shrimp with fresh toppings creates a vibrant dish that’s sure to impress your guests. Plus, they’re simple to whip up, making them perfect for a casual gathering or a fun weeknight dinner.
The mini tortillas add a playful touch, allowing everyone to enjoy just the right amount of shrimp and toppings. Garnished with fresh cilantro and a squeeze of lime, these tacos are both zesty and refreshing!
Ingredients
- 1 lb shrimp, peeled and deveined
- 1 tablespoon olive oil
- 1 teaspoon chili powder
- 1/2 teaspoon cumin
- Salt and pepper to taste
- 12 mini tortillas
- 1 cup diced tomatoes
- 1 lime, cut into wedges
- 1/4 cup chopped cilantro
Instructions
- Season the shrimp with olive oil, chili powder, cumin, salt, and pepper. Mix well to coat.
- Heat a skillet over medium-high heat and cook the shrimp for 2-3 minutes on each side until they are pink and cooked through.
- Warm the mini tortillas in a separate pan or microwave.
- Assemble the tacos by placing a few shrimp in each tortilla and topping with diced tomatoes and cilantro.
- Serve with lime wedges for squeezing over the tacos before enjoying.
Mini Veggie Spring Rolls

Mini veggie spring rolls are a delightful combination of fresh vegetables wrapped in soft rice paper. These bite-sized treats are light, crispy, and bursting with flavor, making them a perfect addition to any appetizer spread. They’re not only pleasing to the palate but also simple to whip up, making them a go-to for casual gatherings or parties.
With a blend of crunchy veggies like bell peppers, cucumbers, and fragrant herbs, these spring rolls provide a refreshing crunch with every bite. Pair them with a zesty dipping sauce, and you have a snack that everyone will love.
Ingredients
- 8 rice paper wrappers
- 1 cup shredded carrots
- 1 cup cucumber, julienned
- 1 red bell pepper, thinly sliced
- 1 cup fresh cilantro leaves
- 1 cup lettuce leaves, shredded
- 1 cup bean sprouts
- 1/4 cup soy sauce
- 2 tablespoons lime juice
- 1 teaspoon chili sauce (optional)
Instructions
- Prepare the Vegetables: Wash and cut all your vegetables as indicated above. Set them aside.
- Soak the Rice Paper: Fill a shallow dish with warm water. Dip one rice paper wrapper into the water for about 10 seconds until it becomes soft. Lay it flat on a clean surface.
- Fill the Wrapper: On the lower third of the wrapper, place a small amount of each vegetable and a few cilantro leaves. Be careful not to overfill.
- Roll It Up: Fold the bottom of the wrapper over the filling, then fold in the sides and roll tightly to enclose the filling. Repeat with remaining wrappers.
- Make the Dipping Sauce: In a small bowl, mix soy sauce, lime juice, and chili sauce for a spicy kick.
- Serve: Arrange the spring rolls on a platter with the dipping sauce on the side.
Stuffed Mushrooms with Cream Cheese

Stuffed mushrooms with cream cheese are a delightful appetizer that brings a burst of flavor in every bite. The earthy taste of the mushrooms pairs perfectly with the creamy, savory filling, making them a hit at any gathering. These little bites are not only tasty but also simple to whip up, making them an ideal choice for busy hosts.
The gooey cream cheese mixture, often enhanced with herbs and spices, creates a comforting texture that’s hard to resist. Whether served warm or at room temperature, these stuffed mushrooms are sure to please a crowd and are perfect for any occasion.
Ingredients
- 16 large mushrooms (button or cremini)
- 8 oz cream cheese, softened
- 1/4 cup grated Parmesan cheese
- 1/4 cup cooked and crumbled bacon (optional)
- 2 tablespoons fresh parsley, chopped
- 1 teaspoon garlic powder
- 1/2 teaspoon onion powder
- Salt and pepper, to taste
- Olive oil, for drizzling
Instructions
- Preheat your oven to 375°F (190°C) and line a baking sheet with parchment paper.
- Clean the mushrooms and remove the stems. Finely chop the stems and set aside.
- In a bowl, mix together the cream cheese, Parmesan cheese, chopped mushroom stems, crumbled bacon (if using), parsley, garlic powder, onion powder, salt, and pepper until well combined.
- Stuff each mushroom cap generously with the cream cheese mixture. Place the stuffed mushrooms on the prepared baking sheet.
- Drizzle with olive oil and bake for 20-25 minutes until golden and bubbly. Allow to cool slightly before serving.
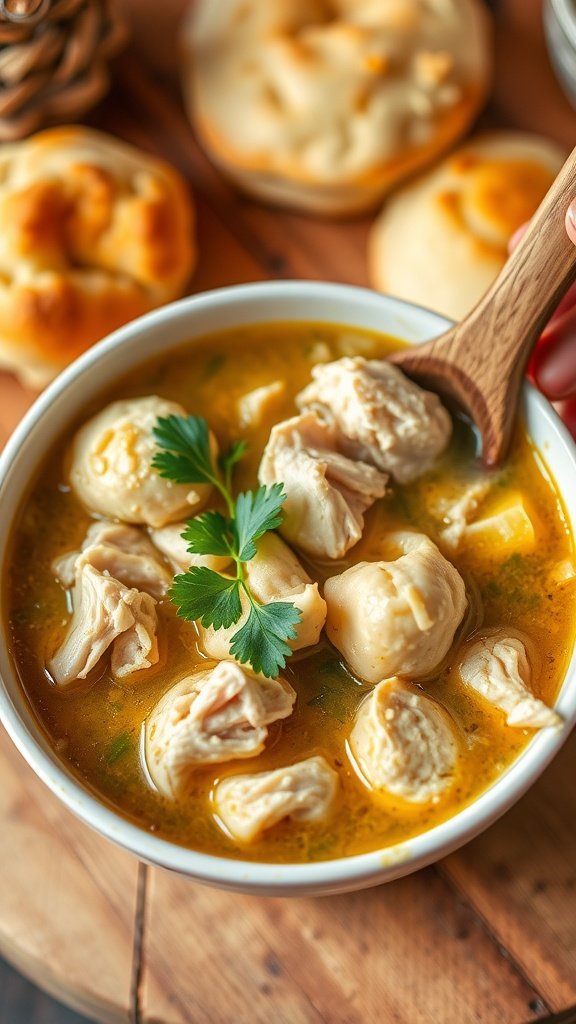
Crispy Chicken Wonton Cups

Crispy Chicken Wonton Cups are a delightful appetizer that offers a crunchy texture combined with a savory filling. These bite-sized treats are easy to prepare and make for a fun addition to any gathering. The flavors meld beautifully, with tender chicken, colorful veggies, and a hint of seasoning that keeps everyone coming back for more.
Whether you’re hosting a party or just want a tasty snack, these wonton cups are a hit. They are simple to make and can even be prepped in advance, allowing you to enjoy the celebration without spending all your time in the kitchen. Let’s dive into the recipe to bring these crispy delights to your table!
Ingredients
- 1 package of wonton wrappers
- 2 cups cooked chicken, shredded
- 1 cup bell peppers, diced
- 1/2 cup green onions, chopped
- 1/2 cup cream cheese, softened
- 2 tablespoons soy sauce
- 1 tablespoon sesame oil
- 1 teaspoon garlic powder
- 1 teaspoon ginger, minced
- Cooking spray
Instructions
- Preheat the oven to 375°F (190°C).
- In a large bowl, combine the shredded chicken, diced bell peppers, green onions, cream cheese, soy sauce, sesame oil, garlic powder, and minced ginger. Mix until well combined.
- Lightly spray a muffin tin with cooking spray. Press each wonton wrapper into the muffin cups, forming little bowls.
- Spoon the chicken mixture into each wonton cup, filling them generously.
- Bake for 15-20 minutes, or until the wonton wrappers are golden brown and crispy.
- Let cool slightly before serving, and enjoy with your favorite dipping sauce!
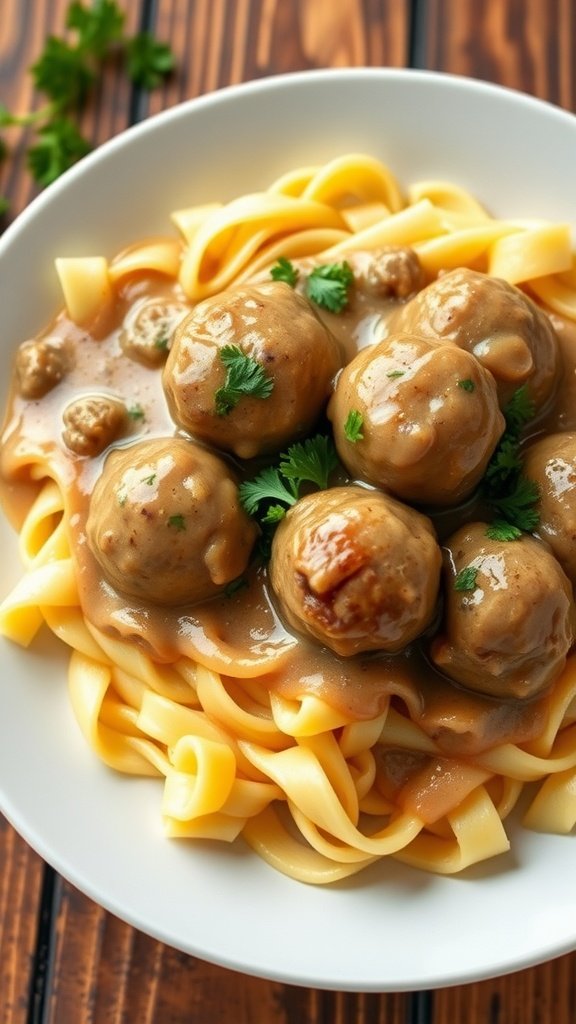
Savory Meatballs with Dipping Sauce

These savory meatballs are a delightful treat that’s both easy to make and packed with flavor. Perfectly seasoned and tender, they make a great appetizer for any gathering, and you can serve them with a variety of dipping sauces for extra fun.
With a combination of ground meat, spices, and herbs, these meatballs are sure to please everyone. Plus, they’re simple to whip up, requiring just a few basic ingredients. Whether you’re hosting a party or just looking for a snack, these meatballs are a tasty option that’s hard to resist!
Ingredients
- 1 pound ground beef (or turkey)
- 1/4 cup breadcrumbs
- 1/4 cup grated Parmesan cheese
- 1/4 cup chopped fresh parsley
- 1 clove garlic, minced
- 1 egg
- 1 teaspoon salt
- 1/2 teaspoon black pepper
- 1/2 teaspoon paprika
- 1/4 cup ketchup (for dipping sauce)
- 1 tablespoon Worcestershire sauce (for dipping sauce)
Instructions
- Preheat the oven to 400°F (200°C). Line a baking sheet with parchment paper.
- In a large bowl, combine ground beef, breadcrumbs, Parmesan cheese, parsley, garlic, egg, salt, pepper, and paprika. Mix until just combined.
- Form the mixture into small meatballs, about 1 inch in diameter, and place them on the prepared baking sheet.
- Bake for 20-25 minutes or until the meatballs are cooked through and slightly browned.
- While the meatballs are baking, mix ketchup and Worcestershire sauce in a small bowl to create a simple dipping sauce.
- Serve the meatballs warm with the dipping sauce on the side.
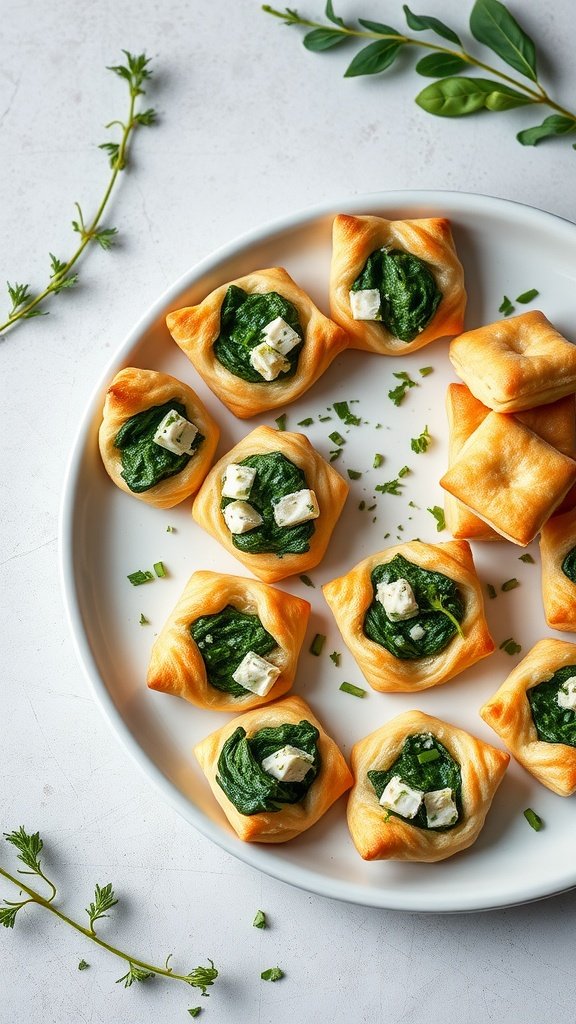
Savory Spinach and Feta Puffs

These savory spinach and feta puffs are a delightful mix of flavors that are sure to please any crowd. Combining the earthy taste of spinach with the rich creaminess of feta, these bite-sized treats are perfect for parties or casual snacking. They are also quite simple to make, making them a great option for both novice and experienced cooks.
With flaky, golden pastry encasing a flavorful filling, each puff is like a little pocket of goodness. Serve them warm for an inviting appetizer or snack that everyone will enjoy. Whether you’re hosting a gathering or just looking for something tasty to nibble on, these puffs fit the bill!
Ingredients
- 1 sheet of puff pastry, thawed
- 2 cups fresh spinach, chopped
- 1 cup feta cheese, crumbled
- 1/2 cup ricotta cheese
- 1 egg, beaten
- 2 cloves garlic, minced
- Salt and pepper, to taste
- 1 tablespoon olive oil
Instructions
- Preheat the oven to 400°F (200°C).
- In a skillet, heat olive oil over medium heat. Add minced garlic and sauté until fragrant, about 1 minute. Add the chopped spinach and cook until wilted. Season with salt and pepper, then remove from heat.
- In a bowl, combine the cooked spinach, feta, ricotta, and half of the beaten egg. Mix until well combined.
- Roll out the puff pastry and cut it into squares, about 4 inches each. Place a spoonful of the filling in the center of each square.
- Fold the corners of the pastry towards the center, pinching to seal. Place the puffs on a lined baking sheet.
- Brush the tops of the puffs with the remaining beaten egg for a golden finish.
- Bake for 20-25 minutes, or until the puffs are golden brown. Serve warm and enjoy!
Cheesy Garlic Breadsticks

Cheesy garlic breadsticks are a delightful snack that combines the flavors of melted cheese and aromatic garlic, all wrapped in soft, chewy bread. These finger foods are not only delicious but also easy to whip up, making them perfect for parties or casual gatherings.
The buttery garlic topping paired with gooey cheese creates a flavor explosion that everyone will love. Plus, they are simple to make and can be served with marinara sauce for dipping, ensuring that each bite is full of flavor.
Ingredients
- 2 cups all-purpose flour
- 1 teaspoon active dry yeast
- 1 teaspoon sugar
- 3/4 teaspoon salt
- 3/4 cup warm water
- 2 tablespoons olive oil
- 1/2 cup shredded mozzarella cheese
- 2 tablespoons garlic, minced
- 1 tablespoon fresh parsley, chopped
- 2 tablespoons butter, melted
Instructions
- Make the Dough: In a bowl, mix warm water, sugar, and yeast. Let it sit for about 5 minutes until frothy. Add olive oil, flour, and salt, and mix until a dough forms.
- Knead: On a floured surface, knead the dough for about 5 minutes until smooth. Place in a greased bowl, cover, and let rise for 30 minutes.
- Preheat Oven: Preheat your oven to 400°F (200°C).
- Shape the Breadsticks: Roll the dough into a rectangle and cut it into strips. Place them on a baking sheet lined with parchment paper.
- Prepare Garlic Butter: In a small bowl, mix melted butter, minced garlic, and parsley. Brush the mixture over the breadsticks and sprinkle with mozzarella cheese.
- Bake: Bake for 15-20 minutes, or until golden brown and cheese is bubbly. Allow to cool slightly before serving with marinara sauce.
Vegetable and Hummus Cups
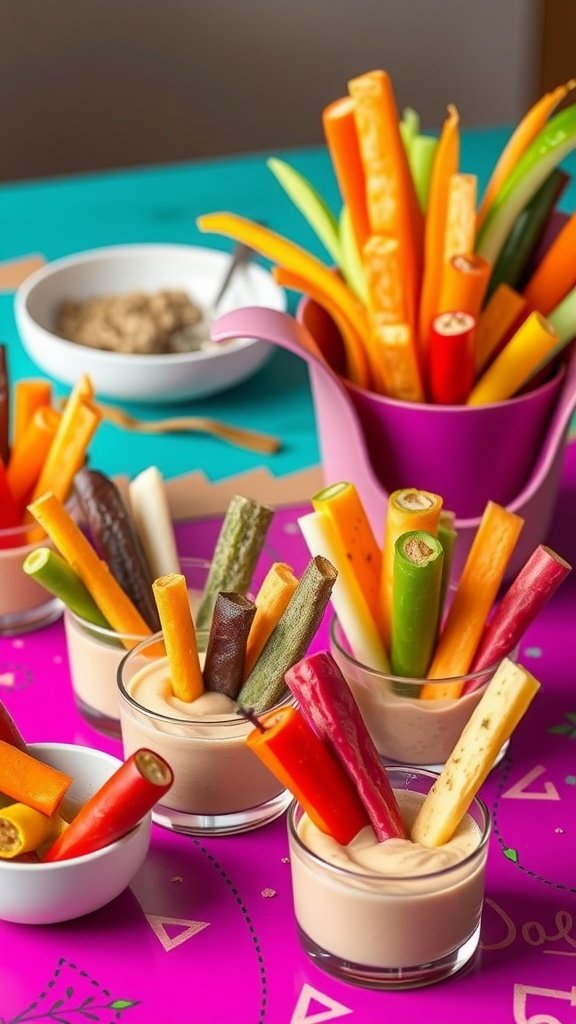
These vegetable and hummus cups are a delightful way to enjoy fresh veggies while dipping them in creamy hummus. They’re colorful, crunchy, and packed with flavor, making them a hit at any gathering. Plus, they’re incredibly simple to prepare, which means you can whip them up in no time!
Perfect for both kids and adults, these cups add a fun twist to your veggie platter. You can customize the veggies to suit your taste or what’s in season. Serve them at parties, picnics, or as a healthy snack at home!
Ingredients
- 1 cup hummus (store-bought or homemade)
- 1 cucumber, cut into sticks
- 2 carrots, cut into sticks
- 1 bell pepper, cut into sticks (any color)
- 1 zucchini, cut into sticks
- 1 cup celery sticks
- Fresh herbs for garnish (optional)
Instructions
- Prepare the Veggies: Wash and cut all the vegetables into thin sticks, ensuring they are of similar lengths for a neat presentation.
- Assemble the Cups: In small cups or glasses, add a generous scoop of hummus at the bottom.
- Insert the Veggies: Arrange the vegetable sticks upright in the hummus, mixing colors and types for visual appeal.
- Garnish: If desired, sprinkle some fresh herbs on top for added flavor and decoration.
- Serve: Enjoy immediately or chill in the refrigerator for a refreshing snack!
Mini Taco Cups with Ground Beef

Mini taco cups are the ultimate bite-sized snack that packs a punch of flavor in every bite. These tasty treats feature a crispy tortilla shell filled with seasoned ground beef, beans, and your favorite toppings, making them a hit for any gathering or casual meal. They’re easy to prepare and offer a fun twist on traditional tacos, perfect for both kids and adults.
With their delightful crunch and savory filling, mini taco cups are sure to become a favorite for parties or game day. You can customize them with toppings like cheese, salsa, or guacamole, ensuring everyone gets a taste of their favorites. Here’s how to make them!
Ingredients
- 1 pound ground beef
- 1 packet taco seasoning
- 1 cup canned black beans, rinsed and drained
- 1 package mini tortilla cups
- 1 cup shredded cheese (cheddar or Mexican blend)
- 1/2 cup salsa
- Fresh cilantro, for garnish
Instructions
- Preheat the oven to 375°F (190°C).
- In a skillet over medium heat, cook the ground beef until browned. Drain excess fat, then stir in the taco seasoning and black beans. Cook for an additional 5 minutes, allowing the flavors to meld.
- Arrange the mini tortilla cups on a baking sheet. Fill each cup with the beef and bean mixture, then top with shredded cheese.
- Bake in the preheated oven for about 10 minutes or until the cheese is melted and bubbly.
- Remove from the oven and drizzle with salsa. Garnish with fresh cilantro before serving.
Pigs in a Blanket with Mustard Dip

Pigs in a blanket are a classic finger food that everyone loves. These bite-sized delights consist of juicy little sausages wrapped in flaky pastry, creating a delicious combination of flavors and textures. They are super easy to make, making them perfect for parties, game days, or a cozy movie night.
The taste is savory and satisfying, especially when paired with a tangy mustard dip. This recipe is a crowd-pleaser that adds a fun twist to your gatherings with minimal effort.
Ingredients
- 1 package of cocktail sausages
- 1 sheet of puff pastry, thawed
- 1 egg, beaten (for egg wash)
- Mustard for dipping
Instructions
- Preheat the oven to 400°F (200°C).
- Roll out the puff pastry on a lightly floured surface and cut it into strips.
- Wrap each sausage with a strip of pastry, pinching the ends to seal.
- Place the wrapped sausages on a baking sheet lined with parchment paper.
- Brush the tops with the beaten egg for a golden finish.
- Bake for 15-20 minutes until golden brown and puffed up.
- Serve warm with mustard for dipping.
Baked Brie Bites with Fig Jam

Baked brie bites with fig jam are a delightful treat that perfectly balances creamy and sweet flavors. These mini pastries are easy to make and are sure to impress your guests with their elegant presentation and rich taste.
Using just a few ingredients, including flaky pastry dough and smooth brie cheese, you can create bite-sized appetizers that are perfect for gatherings. The addition of fig jam adds a hint of sweetness and depth to each bite, making them a crowd favorite.
Ingredients
- 1 sheet puff pastry, thawed
- 8 ounces brie cheese, rind removed and cut into small pieces
- 1/4 cup fig jam
- 1 egg, beaten (for egg wash)
- Fresh thyme leaves (optional, for garnish)
Instructions
- Preheat your oven to 375°F (190°C) and line a baking sheet with parchment paper.
- Roll out the puff pastry on a lightly floured surface and cut it into squares, about 3 inches by 3 inches.
- Place a piece of brie in the center of each square, and top it with a small spoonful of fig jam.
- Fold the corners of the pastry over the cheese and jam to form a small package, pinching the edges to seal.
- Brush the tops of the bites with the beaten egg to give them a nice golden color.
- Bake for 15-20 minutes, or until the pastry is puffed and golden brown. Remove from the oven and let cool slightly before serving.
- If desired, garnish with fresh thyme leaves before serving.
Crispy Zucchini Fritters
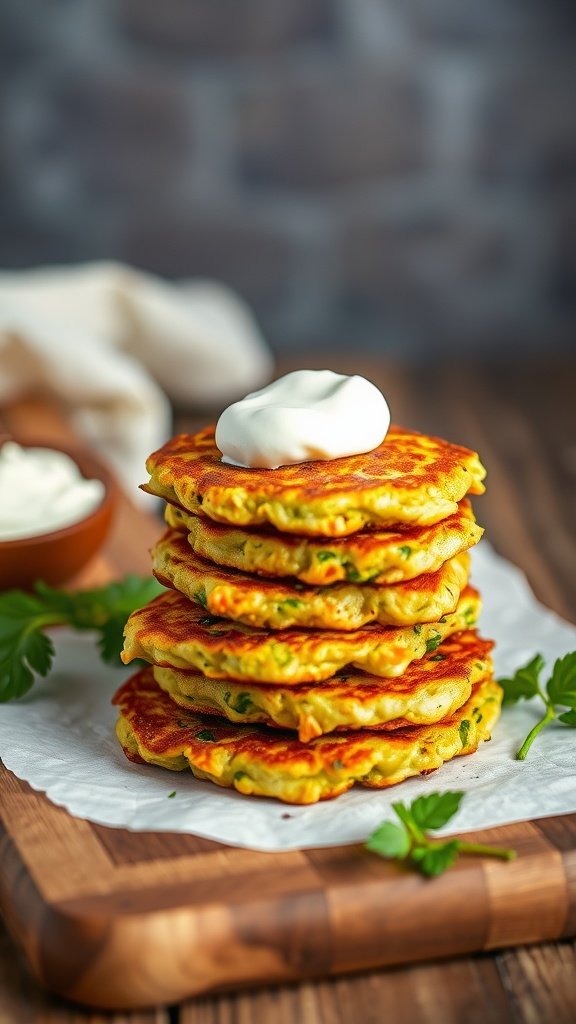
Crispy zucchini fritters are a delightful snack that perfectly balance crunch and flavor. These little bites are packed with fresh zucchini, making them light yet satisfying. Paired with a dollop of sour cream or your favorite dipping sauce, they are perfect for any gathering, adding a touch of freshness to your finger food spread.
This recipe is simple enough for even beginner cooks, requiring just a handful of ingredients. With a quick prep time and easy cooking process, you can whip up these fritters in no time, making them an excellent option for busy hosts or casual get-togethers.
Ingredients
- 2 medium zucchinis, grated
- 1 teaspoon salt
- 1/2 cup all-purpose flour
- 1/4 cup grated Parmesan cheese
- 2 large eggs
- 1/4 teaspoon black pepper
- 1/4 teaspoon garlic powder
- 1/4 cup chopped green onions
- Vegetable oil for frying
Instructions
- Prepare the Zucchini: Place the grated zucchini in a clean kitchen towel and squeeze out excess moisture. This step is crucial for getting crispy fritters.
- Mix the Batter: In a bowl, combine the drained zucchini, flour, Parmesan cheese, eggs, salt, pepper, garlic powder, and green onions. Mix until well combined.
- Heat the Oil: In a skillet over medium heat, add enough vegetable oil to cover the bottom of the pan. Once hot, scoop tablespoons of the zucchini mixture into the pan, flattening them slightly.
- Fry the Fritters: Cook for about 3-4 minutes on each side or until golden brown and crispy. Remove from the skillet and place on paper towels to absorb excess oil.
- Serve: Enjoy the fritters warm, topped with sour cream or your choice of dipping sauce.
Mini Corn Dogs with Honey Mustard

Mini corn dogs are a delightful twist on a classic fair food that everyone loves. These bite-sized treats are made by dipping hot dogs into a sweet cornbread batter and frying them to golden perfection. They’re perfectly crunchy on the outside while remaining soft and juicy on the inside. Pair them with honey mustard for a touch of sweetness that elevates the flavor even more.
This recipe is not only simple to make but also a crowd-pleaser, making it ideal for parties or game day gatherings. With just a few basic ingredients, you can whip up these tasty morsels in no time. Let’s dive into how to create your own mini corn dogs!
Ingredients
- 1 cup cornmeal
- 1 cup all-purpose flour
- 1 tablespoon baking powder
- 1/4 cup granulated sugar
- 1/2 teaspoon salt
- 1 cup milk
- 1 large egg
- 1 tablespoon vegetable oil
- 10 hot dogs
- Wooden skewers or sticks
- Oil for frying
- Honey mustard for dipping
Instructions
- Prepare the Batter: In a large bowl, mix the cornmeal, flour, baking powder, sugar, and salt. In another bowl, whisk together the milk, egg, and vegetable oil. Combine the wet and dry ingredients until smooth.
- Prepare the Hot Dogs: Insert skewers into each hot dog, making sure they are secure. This will make them easier to dip and fry.
- Heat the Oil: In a deep pan or fryer, heat oil over medium-high heat until it reaches about 350°F (175°C).
- Dip and Fry: Dip each hot dog into the batter, ensuring they are fully coated. Carefully place them in the hot oil, frying a few at a time until golden brown, about 3-4 minutes. Remove and drain on a paper towel.
- Serve: Serve the mini corn dogs warm with honey mustard on the side for dipping. Enjoy!
Stuffed Mini Peppers with Cream Cheese
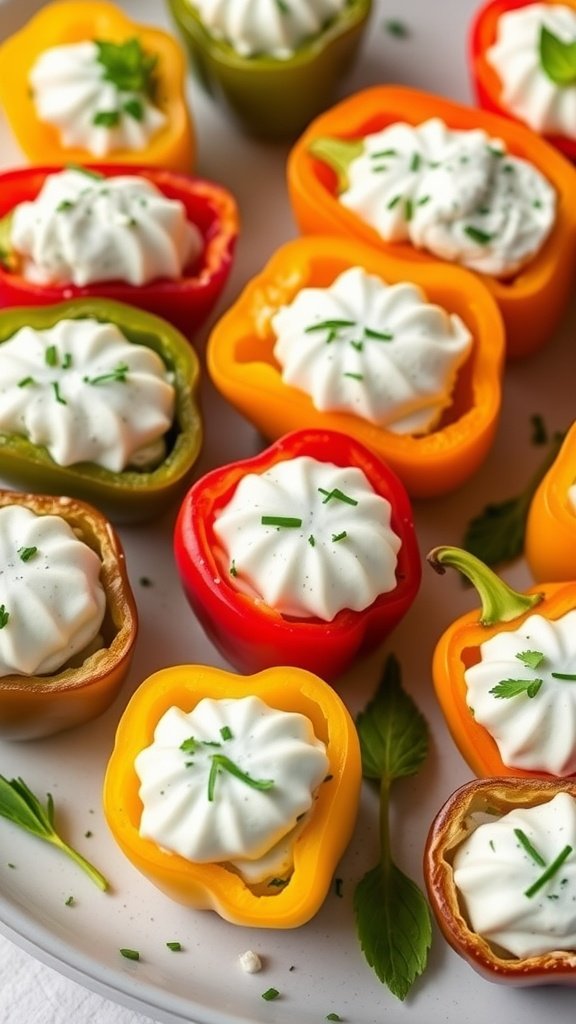
Stuffed mini peppers with cream cheese are a delightful treat that combines vibrant colors with a creamy, savory filling. The sweetness of the peppers complements the tangy cream cheese, making each bite a perfect balance of flavors. Plus, they’re super easy to prepare, making them a great option for parties or casual gatherings.
These bite-sized snacks are not only visually appealing but also packed with flavor. You can customize the filling by adding herbs or spices to suit your taste. Whether you’re hosting a gathering or just want a quick snack, stuffed mini peppers are a fun and tasty choice!
Ingredients
- 12 mini bell peppers (assorted colors)
- 8 oz cream cheese, softened
- 1/4 cup sour cream
- 1 tablespoon fresh chives, chopped
- 1 teaspoon garlic powder
- Salt and pepper to taste
Instructions
- Preheat your oven to 350°F (175°C).
- Cut the mini peppers in half lengthwise and remove the seeds.
- In a mixing bowl, combine the softened cream cheese, sour cream, chives, garlic powder, salt, and pepper. Mix until smooth.
- Spoon the cream cheese mixture into each pepper half, filling them generously.
- Place the stuffed peppers on a baking sheet and bake for 15-20 minutes, or until the peppers are tender.
- Let them cool slightly before serving. Enjoy your flavorful stuffed mini peppers!
Bite-Sized Chicken Satay Skewers
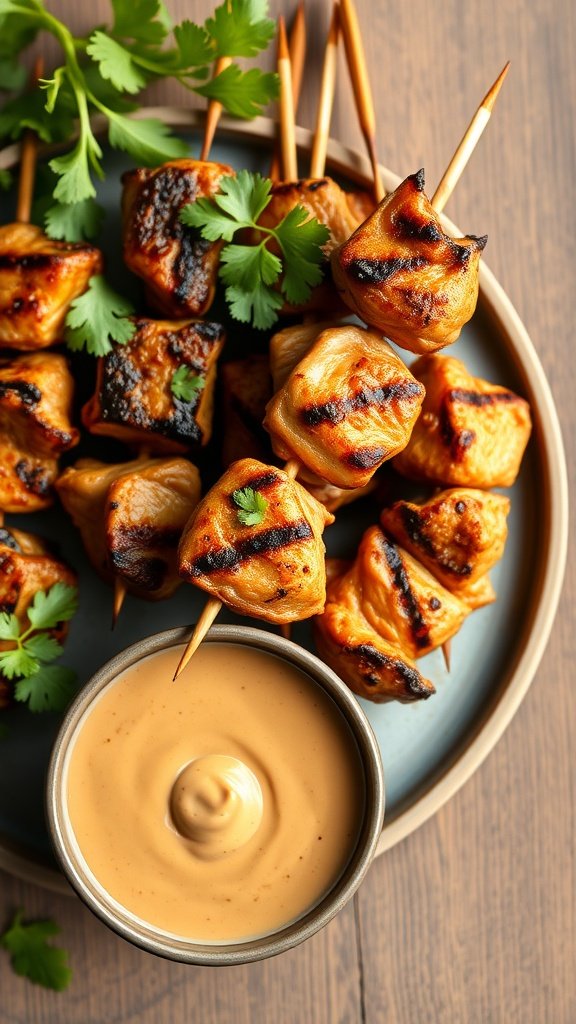
Chicken satay skewers are a delightful treat that brings a burst of flavor in every bite. These skewers are marinated in a blend of spices and grilled to perfection, giving them a smoky taste with a hint of sweetness. Paired with a creamy peanut sauce, they make for an enjoyable appetizer or snack that’s easy to prepare and even easier to devour.
This recipe is simple enough for beginners, yet flavorful enough to impress your guests. Whether you’re hosting a party or just looking for a fun weeknight meal, these bite-sized chicken satay skewers are sure to be a hit!
Ingredients
- 1 pound boneless chicken breast, cut into bite-sized pieces
- 1/4 cup soy sauce
- 2 tablespoons brown sugar
- 1 tablespoon curry powder
- 1 tablespoon vegetable oil
- 1 teaspoon garlic powder
- 1 teaspoon ground ginger
- Wooden skewers, soaked in water
- For the peanut sauce:
- 1/2 cup creamy peanut butter
- 1/4 cup coconut milk
- 2 tablespoons soy sauce
- 1 tablespoon lime juice
- 1 tablespoon honey
- 1 teaspoon red chili flakes (optional)
Instructions
- Marinate the Chicken: In a bowl, mix soy sauce, brown sugar, curry powder, vegetable oil, garlic powder, and ground ginger. Add chicken pieces, ensuring they are well-coated. Cover and marinate for at least 30 minutes.
- Prepare the Peanut Sauce: In a small saucepan over low heat, combine peanut butter, coconut milk, soy sauce, lime juice, and honey. Stir until smooth. Add red chili flakes if you prefer some heat. Remove from heat and set aside.
- Skewer the Chicken: Thread the marinated chicken pieces onto the soaked wooden skewers.
- Grill the Skewers: Preheat your grill or grill pan over medium-high heat. Place the skewers on the grill and cook for about 5-7 minutes on each side until the chicken is cooked through and has grill marks.
- Serve: Arrange the skewers on a platter and serve warm with the peanut sauce on the side for dipping.
Mini Falafel Balls with Tahini
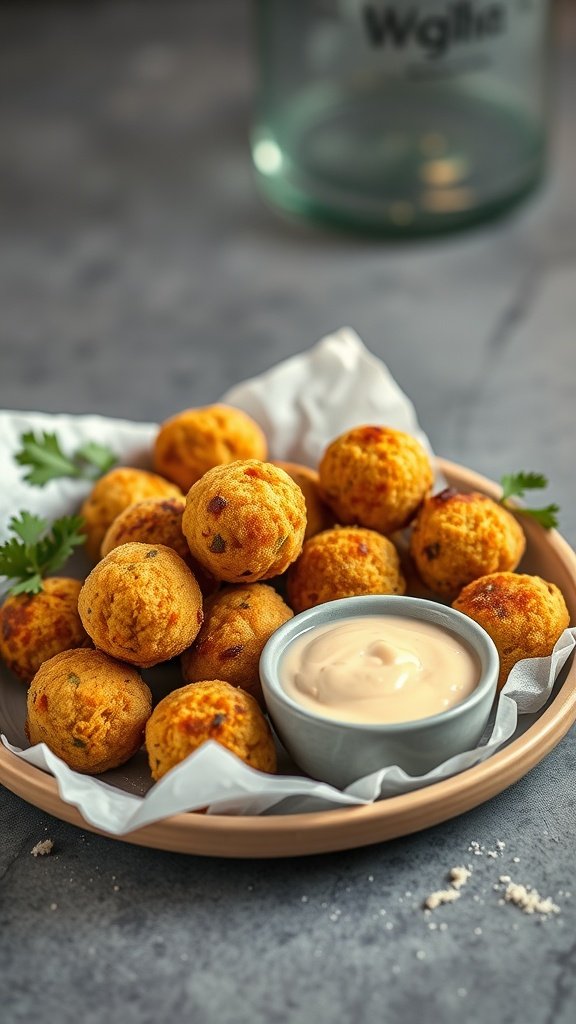
Mini falafel balls are a delightful and tasty snack that bring together the wonderful flavors of chickpeas and aromatic spices. These bite-sized treats are not only packed with flavor, but they are also simple to make, making them an excellent choice for gatherings or a casual night in.
Fried to a golden crisp on the outside while remaining tender on the inside, these falafel balls pair perfectly with a creamy tahini sauce for dipping. Whether served as an appetizer or part of a larger spread, they are sure to be a hit!
Ingredients
- 1 can (15 oz) chickpeas, drained and rinsed
- 1/4 cup chopped fresh parsley
- 1/4 cup chopped onion
- 2 cloves garlic, minced
- 1 teaspoon ground cumin
- 1 teaspoon ground coriander
- 1/2 teaspoon cayenne pepper
- 1/2 teaspoon salt
- 1/4 teaspoon black pepper
- 1 tablespoon lemon juice
- 1/4 cup all-purpose flour
- Oil for frying
Instructions
- Prepare the Mixture: In a food processor, combine chickpeas, parsley, onion, garlic, cumin, coriander, cayenne, salt, black pepper, and lemon juice. Pulse until a coarse mixture forms.
- Add Flour: Transfer the mixture to a bowl, then stir in flour until everything is well combined. If the mixture feels too wet, add a little more flour.
- Shape the Balls: With wet hands, form the mixture into small balls, about 1 inch in diameter.
- Fry the Falafel: Heat oil in a deep pan over medium heat. Fry the falafel balls in batches until golden brown, about 3-4 minutes per side. Remove and drain on paper towels.
- Serve: Enjoy the mini falafel balls warm with tahini sauce on the side for dipping!
Lemon Herb Shrimp Cups
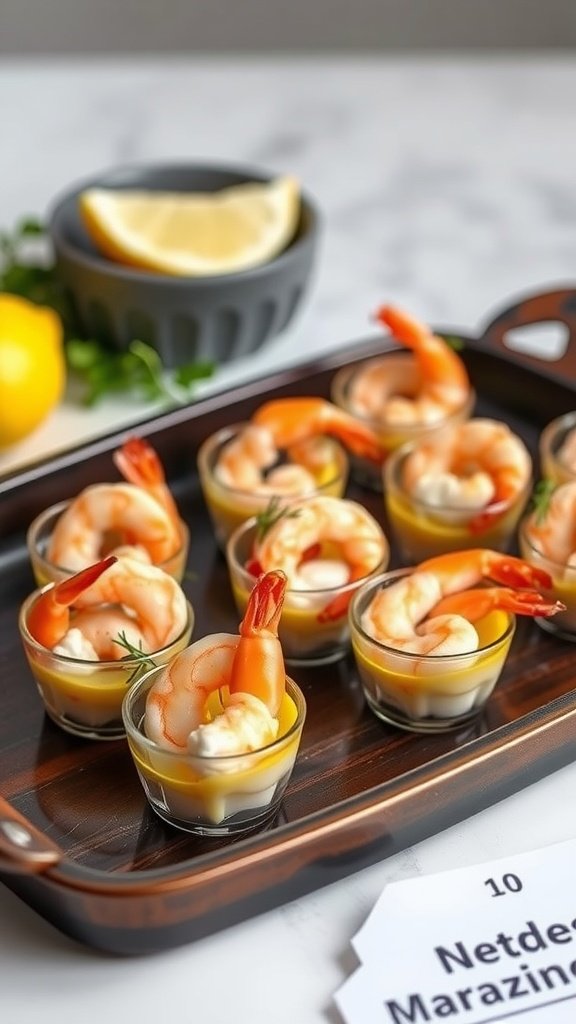
Lemon Herb Shrimp Cups are a delightful combination of fresh shrimp, zesty lemon, and fragrant herbs. These mini treats are not only eye-catching but also packed with flavor, making them perfect for any gathering. The creamy base complements the tender shrimp, creating a harmonious bite that’s both refreshing and satisfying.
Making these cups is a breeze, requiring just a few ingredients and minimal prep time. They are sure to impress your guests, and the individual servings make them easy to enjoy while mingling. Whether you’re hosting a party or looking for an elegant appetizer, these shrimp cups will certainly be a hit.
Ingredients
- 1 pound cooked shrimp, peeled and deveined
- 1/2 cup cream cheese, softened
- 1/4 cup Greek yogurt
- 1 tablespoon lemon juice
- 1 teaspoon lemon zest
- 1 tablespoon fresh dill, chopped
- 1 tablespoon fresh parsley, chopped
- Salt and pepper to taste
- Mini cups or shot glasses for serving
Instructions
- Prepare the Creamy Base: In a bowl, mix the softened cream cheese, Greek yogurt, lemon juice, lemon zest, dill, parsley, salt, and pepper until smooth.
- Assemble the Cups: Spoon a layer of the creamy mixture into each mini cup, filling them about halfway.
- Top with Shrimp: Place a shrimp on top of the creamy base in each cup, and garnish with a sprig of dill or parsley if desired.
- Chill and Serve: Refrigerate the cups for at least 30 minutes to let the flavors meld. Serve chilled at your next gathering.
Savory Cheese and Olive Skewers
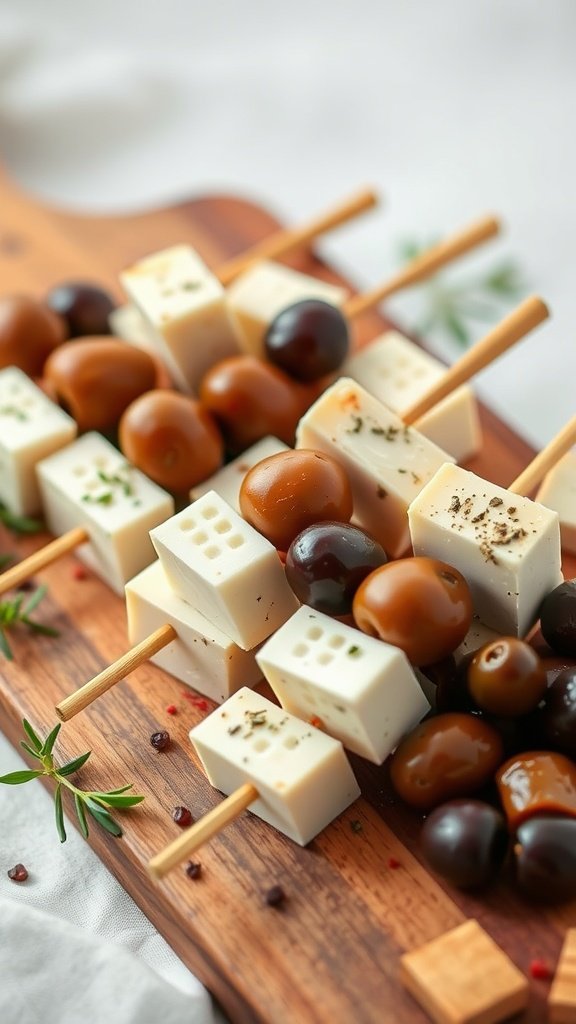
These savory cheese and olive skewers are a delightful combination of flavors that are both simple to make and visually appealing. The creamy cheese pairs perfectly with the briny olives, creating a tasty bite that’s sure to please everyone at your gathering.
Perfect for parties or as a quick snack, these skewers are easy to assemble. Just thread cubes of your favorite cheese and a mix of green and black olives onto skewers for a fun and flavorful treat. They are not only satisfying but also add a touch of elegance to your table.
Ingredients
- 1 cup cubed cheese (such as cheddar, mozzarella, or feta)
- 1 cup assorted olives (green, black, or kalamata)
- 1 tablespoon olive oil
- 1 teaspoon dried oregano
- Salt and pepper, to taste
- Skewers (wooden or metal)
Instructions
- Prep the Ingredients: Start by cutting your cheese into bite-sized cubes. If you’re using large olives, you can leave them whole.
- Assemble the Skewers: Take a skewer and alternate threading cheese cubes and olives. You can create your own pattern or mix them randomly.
- Season: Once your skewers are assembled, drizzle with olive oil and sprinkle with oregano, salt, and pepper for added flavor.
- Serve: Arrange the skewers on a platter and enjoy immediately or refrigerate until serving.
Bruschetta with Tomato and Basil

Bruschetta with tomato and basil is a classic Italian appetizer that bursts with fresh flavors. The combination of ripe tomatoes, aromatic basil, and crispy toasted bread creates a delightful bite that’s perfect for any gathering.
This recipe is not only simple to make but also allows you to showcase the freshness of your ingredients. It’s an ideal finger food that’s light, refreshing, and incredibly satisfying!
Ingredients
- 1 baguette, sliced into 1/2 inch pieces
- 2 cups ripe tomatoes, diced
- 1/4 cup fresh basil leaves, chopped
- 1 clove garlic, minced
- 2 tablespoons olive oil
- Salt and pepper to taste
- Balsamic glaze (optional, for drizzling)

Instructions
- Prepare the Topping: In a mixing bowl, combine the diced tomatoes, chopped basil, minced garlic, olive oil, salt, and pepper. Mix well and let it sit for about 10 minutes to allow the flavors to meld.
- Toast the Bread: Preheat your oven to 400°F (200°C). Arrange the baguette slices on a baking sheet and brush them lightly with olive oil. Toast in the oven for about 5-7 minutes, until they are golden and crispy.
- Assemble the Bruschetta: Once the bread is toasted, remove it from the oven. Top each slice with a generous spoonful of the tomato mixture.
- Serve: For an extra touch, drizzle with balsamic glaze before serving. Enjoy your homemade bruschetta while it’s fresh!
Mini Sliders with Various Toppings

Mini sliders are a delightful way to serve up a variety of flavors in bite-sized portions. These little sandwiches are not only fun to make, but they also let you get creative with toppings and fillings. Whether it’s juicy beef patties, crispy chicken, or even veggie options, sliders can cater to everyone’s taste buds.
What’s great about mini sliders is their simplicity. You can whip them up for casual gatherings, game days, or even a cozy family night. With various toppings like cheese, fresh vegetables, and special sauces, you can customize each slider to perfection. Here’s a tasty slider recipe you can try at home!
Ingredients
- 12 slider buns
- 1 pound ground beef (or your choice of protein)
- 1/2 teaspoon salt
- 1/2 teaspoon pepper
- 1 cup shredded cheese (cheddar or mozzarella)
- 1/2 cup lettuce, shredded
- 1/2 cup tomato, sliced
- 1/4 cup pickles, sliced
- 1/4 cup mayonnaise
- 1 tablespoon mustard
- 1 tablespoon ketchup
Instructions
- Prepare the Patties: In a bowl, combine ground beef, salt, and pepper. Form into small patties, about the size of your slider buns.
- Cook the Patties: Heat a skillet over medium heat. Cook the patties for about 3-4 minutes on each side, or until cooked through. During the last minute of cooking, place a slice of cheese on each patty to melt.
- Assemble the Sliders: Slice the slider buns in half. Spread mayonnaise, mustard, and ketchup on the bottom half of each bun. Place a cooked patty on each bun, then top with lettuce, tomato, and pickles.
- Finish Up: Place the top half of the bun on each slider, serve immediately, and enjoy your mini feast!
Bite-Sized Egg Salad Sandwiches
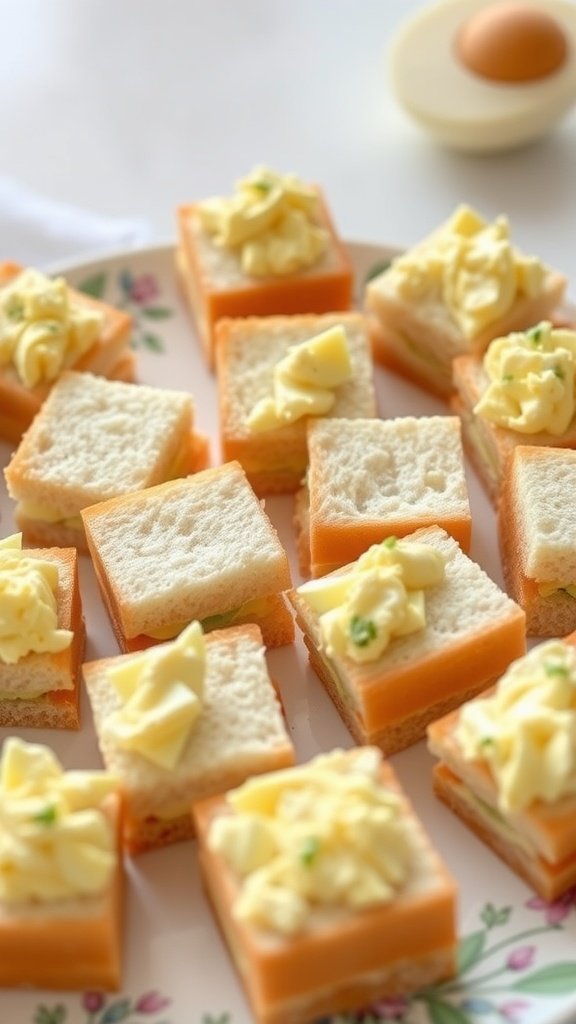
Bite-sized egg salad sandwiches are a delightful treat that perfectly balance creaminess and flavor in each little bite. With their soft bread and rich egg filling, they are not only tasty but also incredibly easy to make, making them a go-to option for any gathering.
These mini sandwiches are ideal for parties, picnics, or even a casual afternoon snack. Their light and fresh taste is sure to please everyone, and the best part is you can whip them up in no time!
Ingredients
- 4 hard-boiled eggs, chopped
- 1/4 cup mayonnaise
- 1 teaspoon Dijon mustard
- 1 tablespoon fresh chives, chopped
- Salt and pepper to taste
- 8 slices of soft white or whole grain bread
- Butter, for spreading
Instructions
- Prepare the Egg Salad: In a medium bowl, mix the chopped eggs, mayonnaise, Dijon mustard, and chives. Season with salt and pepper to taste.
- Assemble the Sandwiches: Take two slices of bread and spread a thin layer of butter on one side of each. Spread a generous amount of the egg salad on the unbuttered side of one slice, then top with another slice, buttered side up.
- Cut into Bites: Using a sharp knife, cut the sandwiches into quarters or small squares for easy serving. Arrange on a platter and enjoy!
Mini Pancakes with Maple Syrup

Mini pancakes are a delightful treat that combines fluffy texture with a touch of sweetness. Perfect for a casual gathering or a fun breakfast, these bite-sized pancakes are easy to whip up and sure to please everyone. With a drizzle of maple syrup and perhaps a sprinkle of powdered sugar, they become irresistible.
These mini pancakes are not just tasty; they are also simple to make! You can have them on the table in no time, making them a great option for last-minute gatherings or brunch plans. Plus, they’re perfect for stacking and serving, adding a fun element to any meal.
Ingredients
- 1 cup all-purpose flour
- 2 tablespoons granulated sugar
- 1 teaspoon baking powder
- 1/2 teaspoon baking soda
- 1/4 teaspoon salt
- 1 cup buttermilk
- 1 large egg
- 2 tablespoons unsalted butter, melted
- Maple syrup, for serving
Instructions
- Mix the Dry Ingredients: In a bowl, whisk together the flour, sugar, baking powder, baking soda, and salt until well combined.
- Combine Wet Ingredients: In another bowl, mix the buttermilk, egg, and melted butter until smooth.
- Combine Mixtures: Pour the wet ingredients into the dry ingredients and gently stir until just combined. Be careful not to over-mix; a few lumps are okay.
- Cook the Pancakes: Heat a non-stick skillet or griddle over medium heat. Pour small amounts of batter onto the skillet (about 2 tablespoons each). Cook until bubbles form on the surface, then flip and cook until golden brown.
- Serve: Stack the mini pancakes on a plate and drizzle with maple syrup before serving.
Savory Spinach and Feta Puff Pastry Bites
If you’re looking for a delightful bite-sized treat, savory spinach and feta puff pastry bites are a lovely choice. The flaky pastry is perfectly complemented by the rich, creamy flavor of feta cheese and the fresh taste of spinach. These little pockets are simple to make, making them a fantastic option for parties or a cozy night in.
The combination of textures and flavors will surely please your taste buds. Plus, they’re quick to whip up, so you can spend more time enjoying them with your friends and family rather than being stuck in the kitchen!
Ingredients
- 1 sheet of puff pastry, thawed
- 2 cups fresh spinach, chopped
- 1 cup feta cheese, crumbled
- 1 egg, beaten (for egg wash)
- 1 tablespoon olive oil
- Salt and pepper, to taste
- Fresh herbs (like dill or parsley), chopped, for garnish
Instructions
- Preheat the oven to 400°F (200°C).
- In a pan, heat olive oil over medium heat. Add the chopped spinach and cook until wilted. Season with salt and pepper, then remove from heat.
- Roll out the puff pastry and cut it into squares, about 3 inches in size. Place them on a baking sheet lined with parchment paper.
- In a bowl, mix the sautéed spinach with crumbled feta cheese. Spoon the mixture into the center of each pastry square.
- Fold the corners of the pastry over the filling to create a little pocket. Brush the tops with the beaten egg.
- Bake for 15-20 minutes or until golden brown. Remove from the oven and let cool slightly before serving. Garnish with fresh herbs.
Mini Herb and Cheese Scones

Mini herb and cheese scones are delightful little bites that pack a flavorful punch! These tender scones are savory, featuring a mix of fresh herbs and gooey cheese, making them a perfect companion for any gathering or tea party.
They’re surprisingly simple to whip up, requiring just a few basic ingredients. The combination of herbs adds a fresh taste, while the cheese brings that satisfying richness. Whether served warm or at room temperature, these scones are bound to impress and are a lovely addition to any bite-sized feast.
Ingredients
- 2 cups all-purpose flour
- 1 tablespoon baking powder
- 1/2 teaspoon salt
- 1/4 cup cold butter, cubed
- 1 cup shredded cheese (cheddar or your choice)
- 1/4 cup fresh herbs (such as chives, parsley, or thyme), chopped
- 3/4 cup milk
- 1 egg, beaten (for egg wash)
Instructions
- Preheat the oven to 400°F (200°C). Line a baking sheet with parchment paper.
- In a large bowl, mix the flour, baking powder, and salt. Add the cold butter and rub it into the dry ingredients until the mixture resembles coarse crumbs.
- Stir in the shredded cheese and chopped herbs until evenly distributed.
- Make a well in the center and pour in the milk. Mix gently until just combined; be careful not to overwork the dough.
- Turn the dough onto a floured surface and pat it into a circle about 1-inch thick. Cut into wedges or use a round cutter to make mini scones.
- Place the scones on the prepared baking sheet and brush the tops with the beaten egg.
- Bake for 15-20 minutes or until golden brown. Let cool slightly before serving.
Chocolate-Dipped Fruit Kabobs

Chocolate-dipped fruit kabobs are a delightful way to enjoy fresh fruit with a touch of indulgence. These bite-sized treats are perfect for parties, gatherings, or even a sweet snack at home. The combination of juicy fruits and rich chocolate creates a satisfying contrast that everyone loves.
Making these kabobs is simple and fun! You can customize them by choosing your favorite fruits, like strawberries, pineapple, and bananas. Just skewer the fruit, dip them in melted chocolate, and let them set. They are not only visually appealing but also a delightful way to satisfy your sweet tooth without overdoing it.
Ingredients
- 1 cup strawberries, hulled
- 1 cup pineapple, cut into cubes
- 1 cup banana, sliced
- 1 cup dark chocolate chips
- 1 tablespoon coconut oil
- Wooden skewers
Instructions
- Prepare the Fruit: Wash and cut the fruits into bite-sized pieces. Thread them onto the wooden skewers, alternating between the different fruits for a colorful presentation.
- Melt the Chocolate: In a microwave-safe bowl, combine dark chocolate chips and coconut oil. Microwave in 30-second intervals, stirring in between, until fully melted and smooth.
- Dip the Kabobs: Hold each skewer by the end and dip the fruit into the melted chocolate, coating it to your liking. Allow excess chocolate to drip off.
- Let Set: Place the dipped kabobs on a parchment-lined baking sheet. Refrigerate for about 15-20 minutes until the chocolate is firm.
- Serve: Enjoy your chocolate-dipped fruit kabobs as a refreshing snack or dessert!