Looking to host without the hassle? These 15 no-bake finger foods are just what you need. They’re simple, delicious, and perfect for keeping your guests satisfied while you enjoy the gathering. Dive in and discover easy recipes that require minimal prep, making hosting a total breeze!
Caprese Skewers with Balsamic Glaze
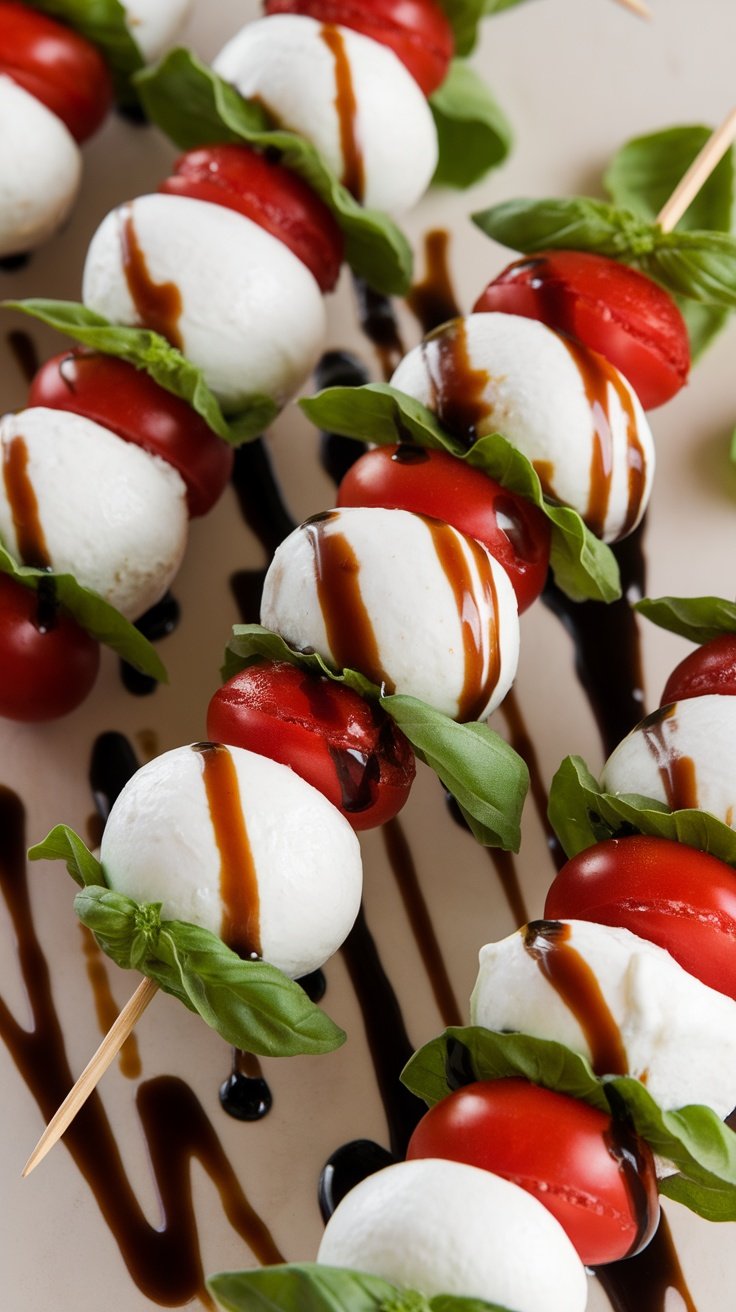
If you’re looking for a simple yet delightful appetizer, Caprese skewers are a fantastic choice. These bite-sized treats combine the fresh flavors of ripe tomatoes, creamy mozzarella, and fragrant basil, all drizzled with a tangy balsamic glaze. They are not only easy to assemble but also visually appealing, making them perfect for any gathering.
The contrast of sweet tomatoes and rich mozzarella, paired with the herby note of basil, creates a refreshing taste that everyone will love. Plus, since these are no-bake finger foods, you can whip them up in no time, allowing you to spend more time enjoying your event.
Ingredients
- 1 pint cherry tomatoes
- 8 ounces fresh mozzarella balls
- 1 bunch fresh basil leaves
- 1/4 cup balsamic glaze
- Salt and pepper to taste
- Skewers (6-inch or 8-inch)
Instructions
- Prepare the Skewers: Take a skewer and thread a cherry tomato onto it, followed by a basil leaf, then a mozzarella ball. Repeat this process until the skewer is filled, leaving some space at the end for easy handling.
- Season: Once you’ve assembled the skewers, drizzle them with balsamic glaze and sprinkle a little salt and pepper on top for added flavor.
- Serve: Arrange the skewers on a platter and serve immediately, or refrigerate them for a short time before your event to keep them fresh.
Fruit and Cheese Platter
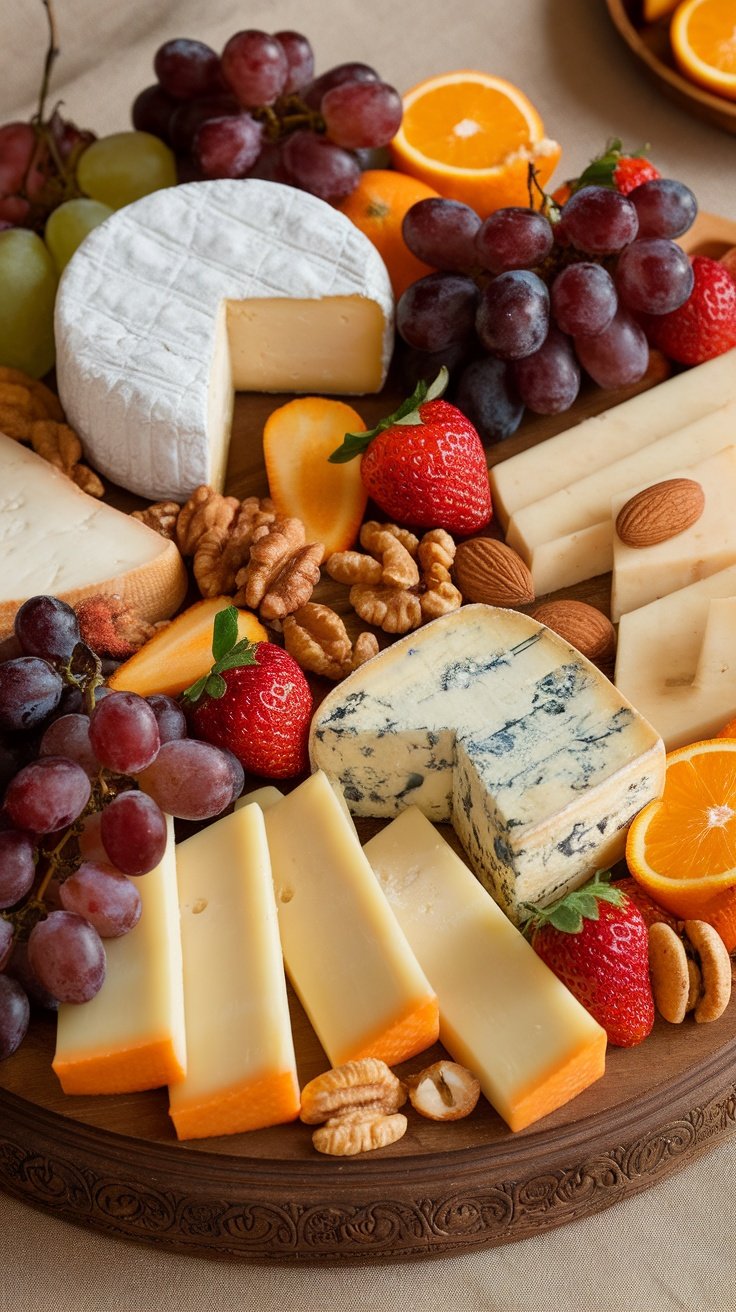
A fruit and cheese platter is a delightful way to blend savory and sweet flavors, making it a satisfying option for any gathering. It’s incredibly simple to assemble and requires no cooking, allowing you to impress your guests without the hassle of lengthy preparations.
The combination of creamy cheeses with fresh fruits creates a refreshing and balanced taste experience. Whether you’re hosting a casual get-together or a more formal event, this platter can be tailored to suit any occasion and personal preferences.
Ingredients
- 1 cup assorted cheeses (such as cheddar, brie, and blue cheese)
- 1 cup assorted fresh fruits (like grapes, strawberries, and orange slices)
- 1/2 cup nuts (such as walnuts and almonds)
- 1 tablespoon honey (optional)
- Crackers or bread (optional)
Instructions
- Select your cheeses and arrange them on a large serving platter. Cut some into bite-sized pieces for easy serving.
- Wash and prepare the fruits, placing them around the cheeses for a colorful display.
- Add the nuts in small clusters around the platter for texture and flavor contrast.
- If desired, drizzle honey over the cheese or serve it on the side for dipping.
- Include crackers or bread alongside the platter to enhance the tasting experience.
Savory Stuffed Mini Peppers
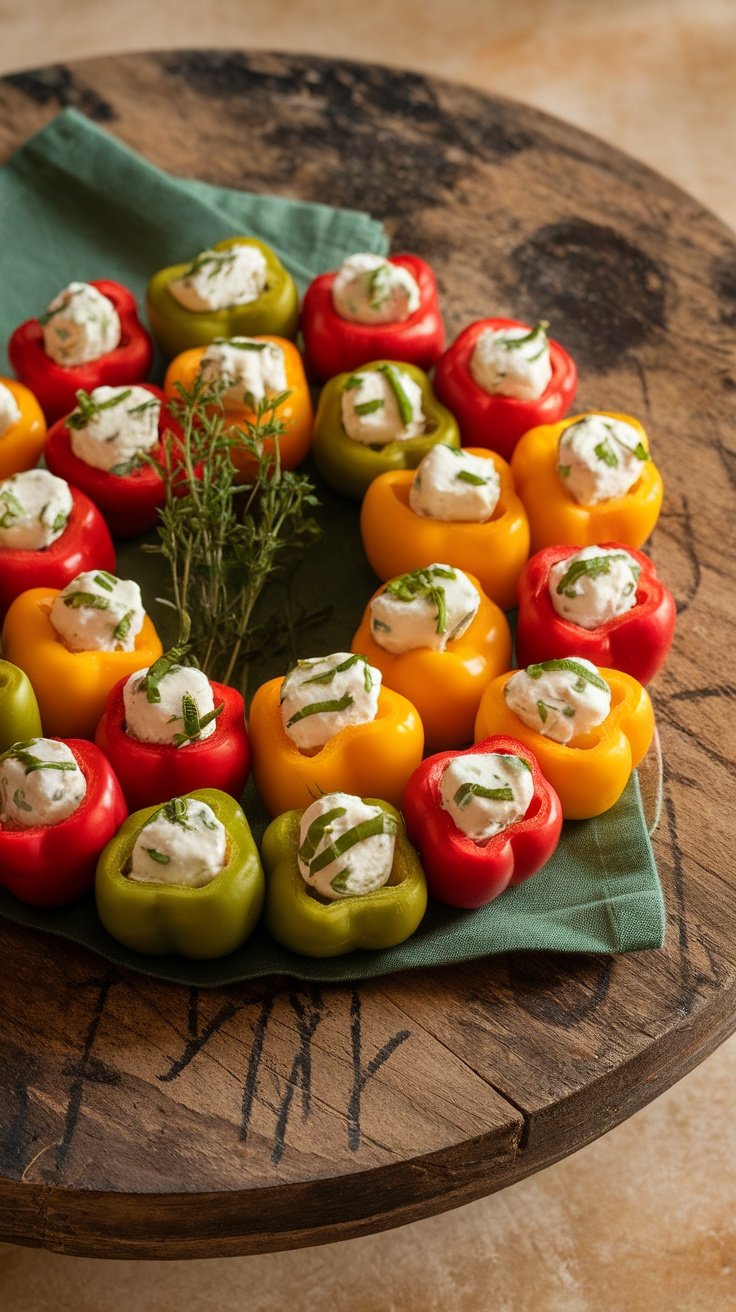
Savory stuffed mini peppers are a delightful addition to any gathering. These bite-sized treats are filled with a creamy cheese mixture that perfectly balances the sweetness of the peppers. The combination of fresh herbs adds a burst of flavor, making each bite a tasty experience.
Not only are these mini peppers simple to prepare, but they also require no baking, making them a quick solution for effortless hosting. You’ll love how easy they are to assemble, and your guests will appreciate their vibrant colors and flavor.
Ingredients
- 12 mini sweet peppers (mixed colors)
- 1 cup cream cheese, softened
- 1/2 cup feta cheese, crumbled
- 1/4 cup fresh herbs (such as basil, parsley, or chives), chopped
- 1 teaspoon garlic powder
- Salt and pepper to taste
Instructions
- Prepare the Peppers: Slice the mini peppers in half lengthwise and remove the seeds.
- Make the Filling: In a bowl, mix the softened cream cheese, feta cheese, chopped herbs, garlic powder, salt, and pepper until well combined.
- Stuff the Peppers: Using a spoon or a piping bag, fill each pepper half with the cheese mixture.
- Chill and Serve: Refrigerate the stuffed peppers for at least 30 minutes to let the flavors meld. Arrange them on a platter and enjoy!
Greek Yogurt Dip with Veggies
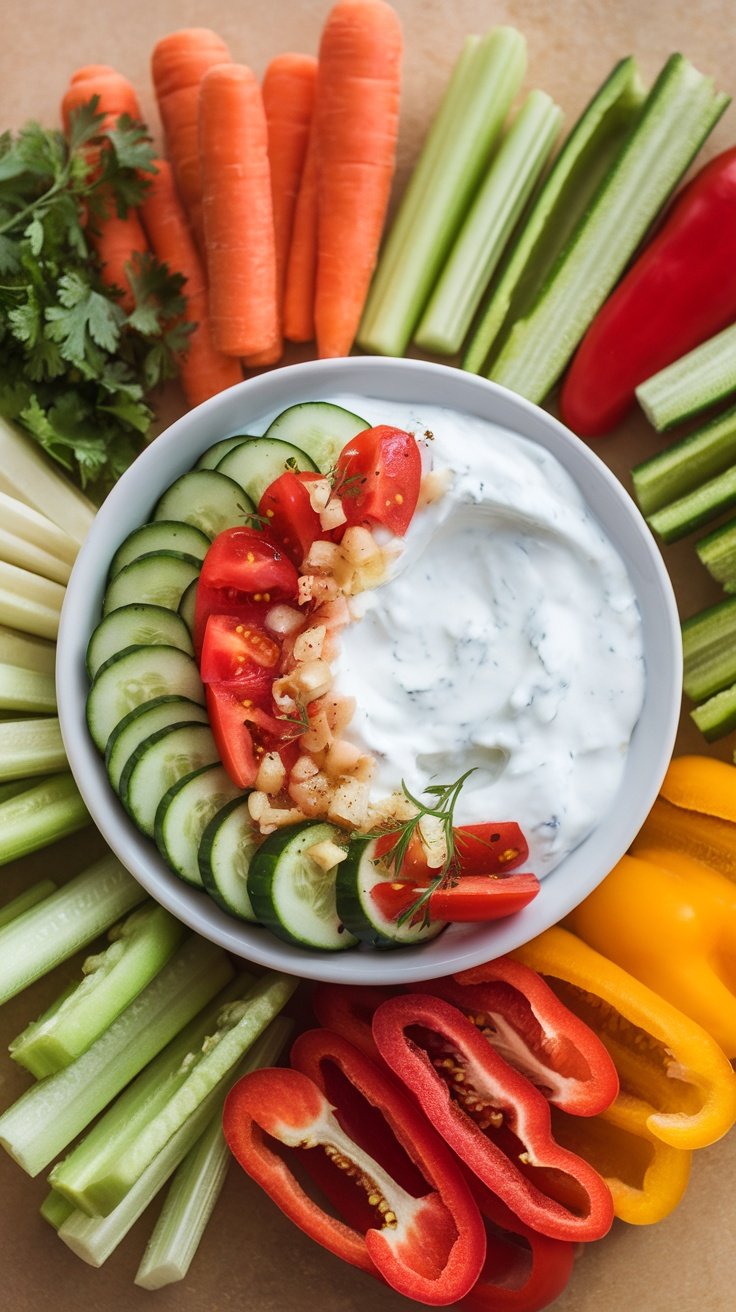
This Greek Yogurt Dip is a light and creamy addition to any gathering, making it an ideal choice for effortless hosting. It’s tangy, refreshing, and pairs perfectly with a colorful array of fresh vegetables, creating a delightful crunch with every bite.
The best part? It’s incredibly simple to whip up. With just a few ingredients, you can have a delicious dip that’s not only healthy but also adds vibrant flavors to your spread of 15 no-bake finger foods recipes. Your guests will love it!
Ingredients
- 1 cup plain Greek yogurt
- 1 tablespoon olive oil
- 1 tablespoon lemon juice
- 1 clove garlic, minced
- 1 teaspoon dried dill
- Salt and pepper to taste
- Assorted fresh veggies (carrots, celery, cucumber, bell peppers)
Instructions
- In a mixing bowl, combine Greek yogurt, olive oil, lemon juice, minced garlic, and dried dill. Mix until smooth and well combined.
- Season with salt and pepper to taste.
- Transfer the dip to a serving bowl and arrange fresh veggies around it.
- Serve immediately or chill in the refrigerator for about 30 minutes for enhanced flavor.
Mini Avocado Toasts with Radish
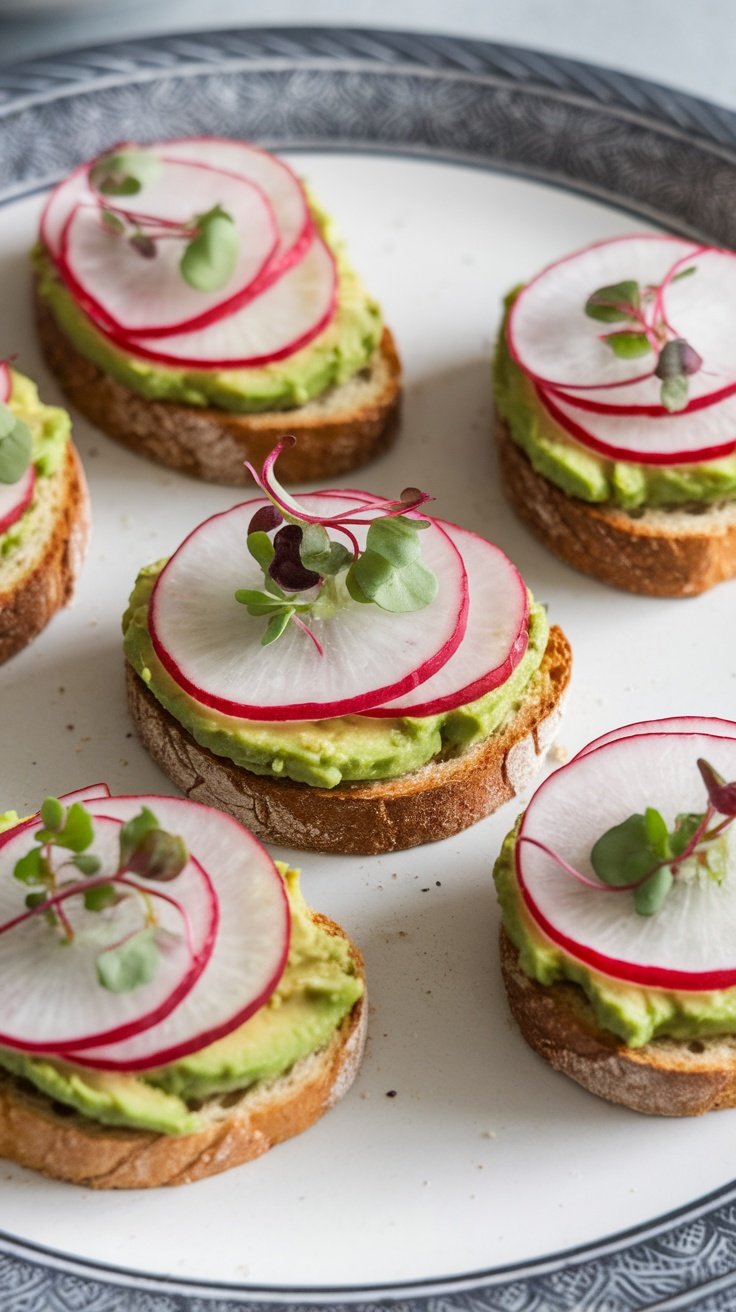
These mini avocado toasts with radish are a fresh and vibrant addition to your no-bake finger foods lineup. The creamy avocado pairs beautifully with the crispness of the radish, creating a delightful contrast in texture and flavor. Plus, they are incredibly easy to whip up, making them a go-to choice for effortless hosting.
Not only do these bites look stunning on a platter, but they also pack a punch when it comes to taste. The combination of ripe avocado, fresh radish, and a hint of seasoning keeps things light and refreshing. Perfect for gatherings, these toasts are sure to impress your guests without all the fuss of cooking.
Ingredients
- 1 ripe avocado
- 1 tablespoon lemon juice
- Salt and pepper, to taste
- 6 slices of whole-grain bread
- 1-2 radishes, thinly sliced
- Microgreens or sprouts, for garnish
Instructions
- In a bowl, mash the avocado with lemon juice, salt, and pepper until creamy.
- Toast the slices of bread lightly until golden.
- Spread a generous layer of mashed avocado onto each slice of bread.
- Top with thin slices of radish and a few microgreens or sprouts.
- Serve immediately for a delicious and colorful finger food option.
Antipasto Skewers with Olives and Cheese
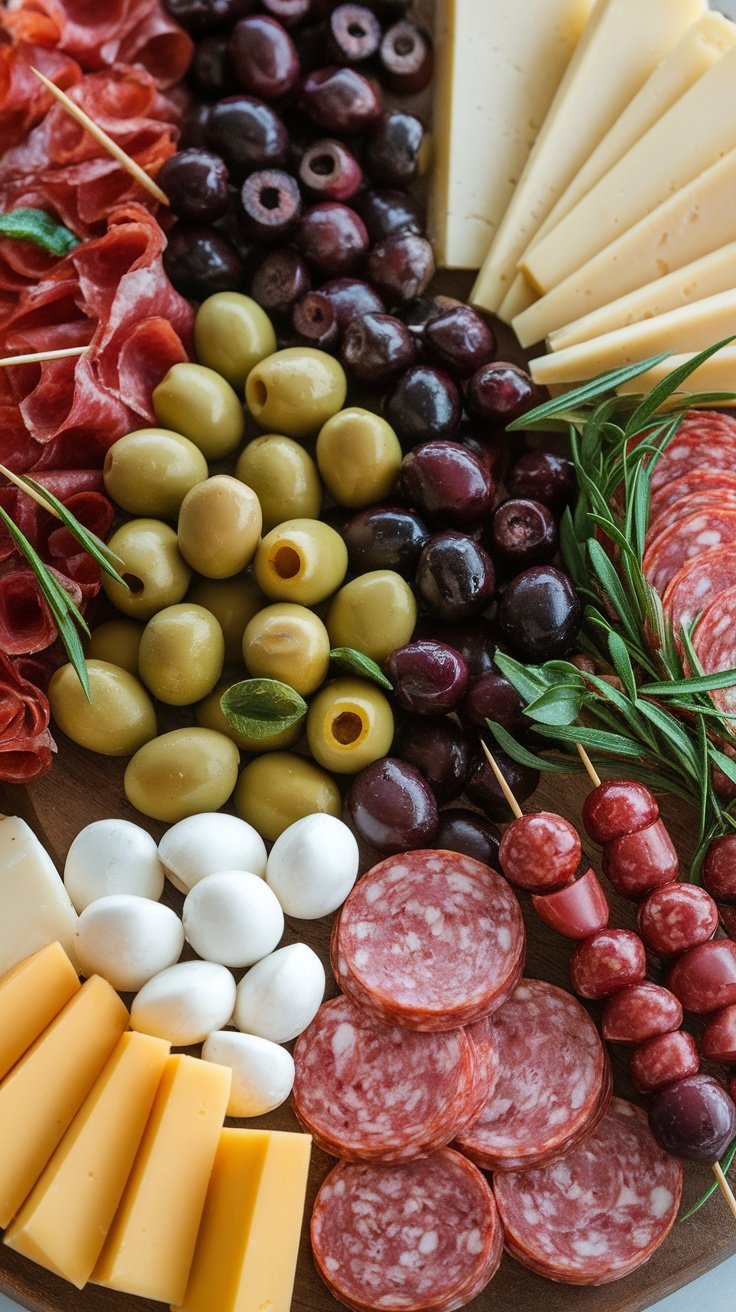
Antipasto skewers are a delightful way to bring the flavors of Italy to your gathering without the fuss of cooking. These skewers combine a variety of savory ingredients like olives, cheeses, and cured meats, making them a crowd-pleaser for any occasion. Not only are they visually appealing, but they also pack a punch of flavor with every bite.
Simple to assemble, these no-bake finger foods can be prepped in just a few minutes. They are perfect for effortless hosting, allowing you to enjoy time with your guests rather than spending hours in the kitchen. So grab some skewers and let’s get started on this delicious appetizer!
Ingredients
- 1 cup green olives
- 1 cup black olives
- 1 cup cherry tomatoes
- 1 cup mozzarella balls
- 1 cup salami slices
- 1 cup provolone cheese, cubed
- Fresh basil leaves
- Wooden skewers
Instructions
- Prep the Ingredients: Start by preparing all your ingredients. Drain the olives and mozzarella, and cut the provolone into bite-sized cubes.
- Assemble the Skewers: Take a wooden skewer and begin threading the ingredients. Alternate between olives, mozzarella balls, salami, cherry tomatoes, and provolone cheese. You can also add a fresh basil leaf for an extra burst of flavor.
- Chill and Serve: Once all ingredients are assembled on the skewers, place them in the refrigerator for about 30 minutes to chill. This enhances the flavors and makes them refreshing to eat. Serve cold and enjoy!
Savory Cucumber Canapés
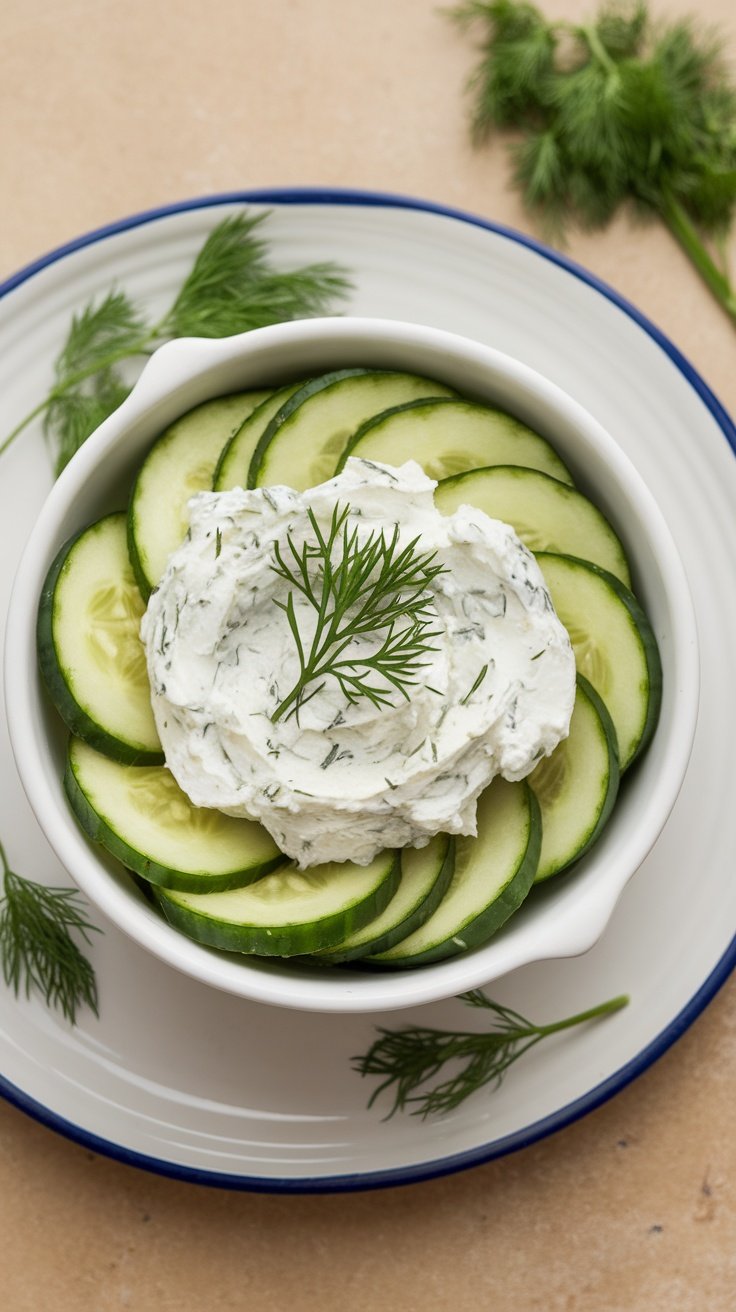
Savory cucumber canapés are a delightful addition to any gathering, providing a refreshing bite that’s both light and flavorful. These no-bake treats combine crisp cucumber slices with a creamy, herb-infused spread, making them a hit for any occasion. Easy to assemble, they offer a perfect blend of taste and texture, ensuring your guests will come back for more.
The cool crunch of cucumber pairs beautifully with the smoothness of the spread, which is often enhanced with herbs like dill or chives. Not only are these canapés tasty, but they also fit seamlessly into your spread of 15 no-bake finger foods recipes, allowing for effortless hosting without the fuss of cooking.
Ingredients
- 2 large cucumbers
- 8 oz cream cheese, softened
- 1/4 cup sour cream
- 2 tablespoons fresh dill, chopped
- 1 tablespoon chives, chopped
- 1 teaspoon garlic powder
- Salt and pepper to taste
Instructions
- Prepare the Spread: In a mixing bowl, combine the softened cream cheese, sour cream, fresh dill, chives, garlic powder, salt, and pepper. Mix until smooth and well combined.
- Slice the Cucumbers: Wash and slice the cucumbers into 1/4-inch thick rounds.
- Assemble the Canapés: Spread a generous amount of the cream cheese mixture onto each cucumber slice.
- Garnish: Optionally, top with extra dill or a sprinkle of paprika for added flair.
- Serve: Arrange the canapés on a platter and enjoy immediately, or chill until ready to serve.
Crispy Chickpea Hummus Bites
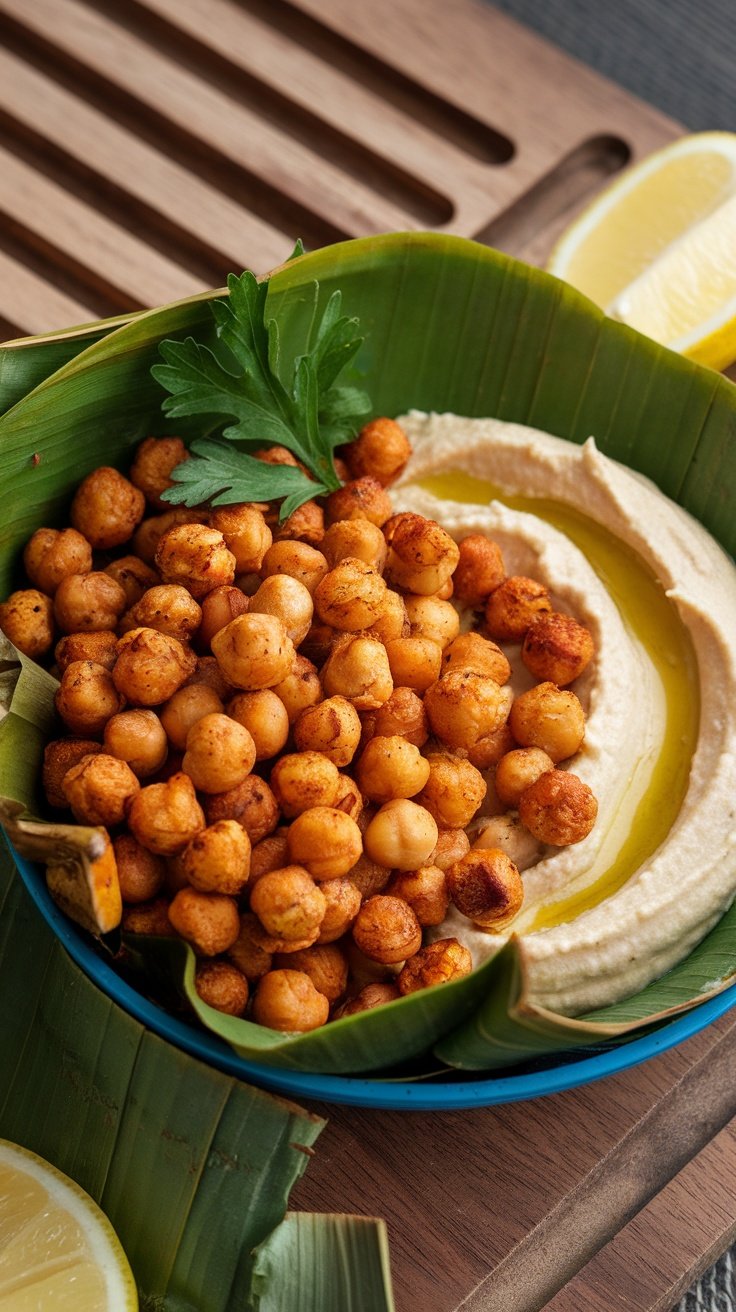
Crispy Chickpea Hummus Bites are a delightful addition to your no-bake finger food lineup. They combine the creamy goodness of hummus with the satisfying crunch of roasted chickpeas. This recipe is not just easy to whip up but also packs a punch of flavor that will impress your guests.
The blend of spices and the crispy texture makes these bites a fun and healthy snack. Serve them as a light appetizer or a savory snack during gatherings; they fit right into the vibe of effortless hosting. Plus, you can customize the seasoning to suit your taste!
Ingredients
- 1 can (15 oz) chickpeas, drained and rinsed
- 1 tablespoon olive oil
- 1 teaspoon garlic powder
- 1 teaspoon smoked paprika
- 1/2 teaspoon ground cumin
- Salt and pepper to taste
- 1 cup hummus
- Fresh parsley for garnish
Instructions
- Preheat your oven to 400°F (200°C).
- Spread the drained chickpeas on a baking sheet and pat them dry with a paper towel.
- Drizzle olive oil over the chickpeas and sprinkle the garlic powder, smoked paprika, cumin, salt, and pepper. Toss to coat evenly.
- Bake for 20-25 minutes or until the chickpeas are golden and crispy. Stir halfway through for even cooking.
- Once baked, let them cool slightly. Serve the crispy chickpeas on top of a generous scoop of hummus, garnished with fresh parsley.
Sweet Potato and Black Bean Bites
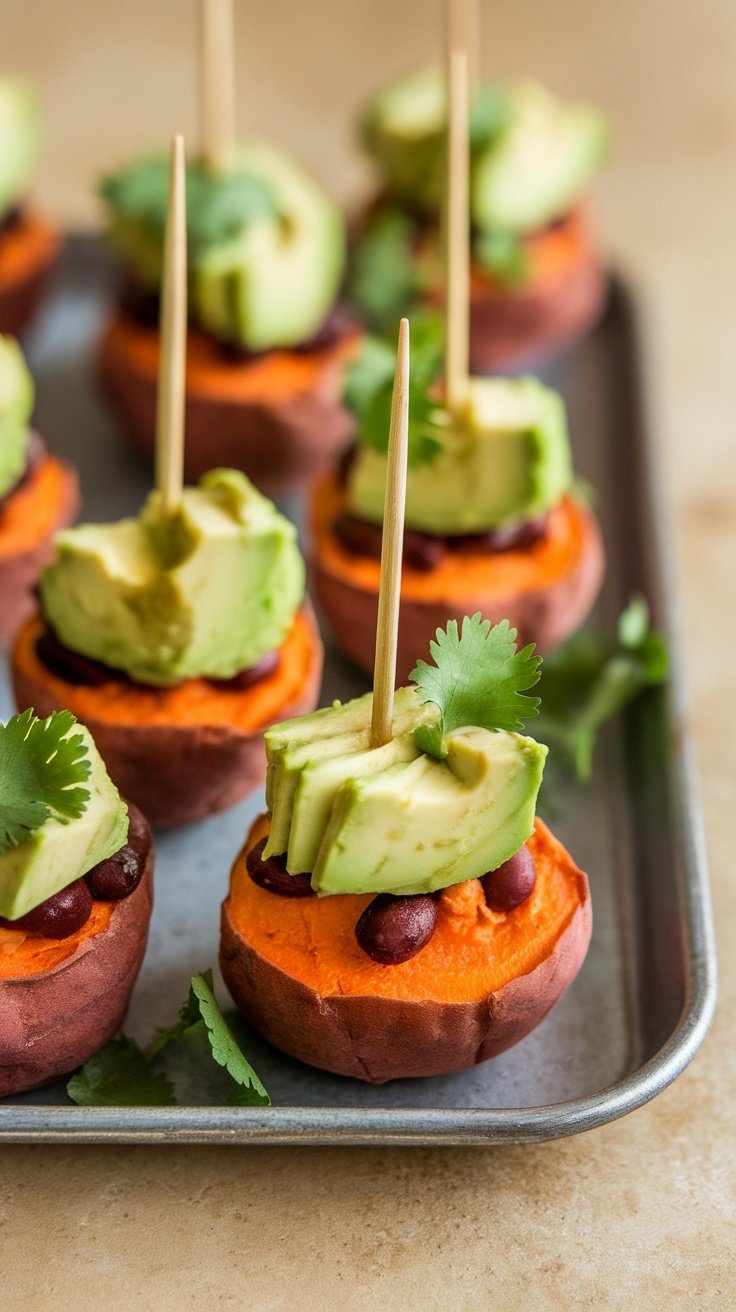
These Sweet Potato and Black Bean Bites are a delightful mix of flavors and textures, perfect for your next gathering. The natural sweetness of the roasted sweet potato pairs beautifully with the savory black beans, creating a satisfying bite that everyone will love.
They’re also super simple to prepare, making them a go-to option in our collection of 15 No-Bake Finger Foods Recipes. Just assemble your ingredients, and you’ve got a delicious snack that’s both healthy and flavorful!
Ingredients
- 2 medium sweet potatoes
- 1 can black beans, drained and rinsed
- 1 ripe avocado
- Fresh cilantro for garnish
- 1 lime, juiced
- Salt and pepper to taste
Instructions
- Prepare the Sweet Potatoes: Preheat your oven to 400°F (200°C). Slice sweet potatoes into rounds about 1/2 inch thick. Place them on a baking sheet, sprinkle with salt, and bake for 25-30 minutes until tender.
- Assemble the Bites: Once the sweet potato rounds have cooled slightly, top each with a spoonful of black beans and a slice of avocado. Drizzle lime juice over the top and season with salt and pepper to taste.
- Add Finishing Touches: Garnish with fresh cilantro for a pop of flavor and color. Insert toothpicks for easy serving, and enjoy your tasty bites!
Spicy Shrimp Cocktail Cups
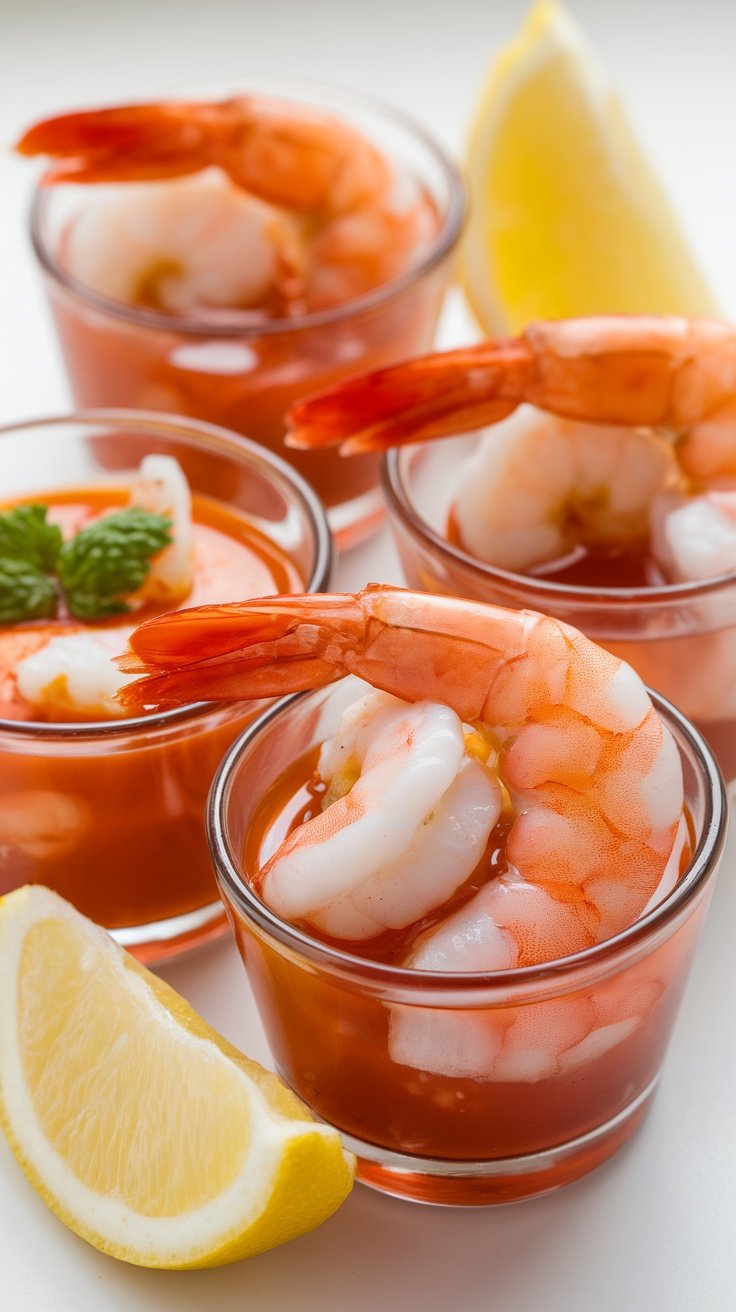
Spicy Shrimp Cocktail Cups are a delightful way to serve seafood at your next gathering. They combine tender shrimp with a zesty cocktail sauce, creating a burst of flavor with every bite. The best part? They’re a breeze to prepare and require no cooking, making them a fantastic addition to our list of 15 No-Bake Finger Foods Recipes.
These shrimp cups are not only tasty but also visually appealing. The bright colors of the shrimp and cocktail sauce, paired with a squeeze of fresh lemon, make them a striking appetizer. Serve them chilled for a refreshing treat that will impress your guests!
Ingredients
- 1 pound cooked shrimp, peeled and deveined
- 1/2 cup cocktail sauce
- 1 tablespoon horseradish (adjust to taste)
- Juice of 1 lemon
- 1/4 teaspoon hot sauce (optional)
- Fresh parsley leaves for garnish
- 4 small cups or shot glasses
Instructions
- In a mixing bowl, combine the cocktail sauce, horseradish, lemon juice, and hot sauce (if using). Stir until well mixed.
- Divide the cocktail sauce mixture evenly among the cups or shot glasses.
- Top each cup with a handful of cooked shrimp, arranging them neatly.
- Garnish with fresh parsley leaves and a lemon wedge on the side.
- Chill in the refrigerator for at least 30 minutes before serving to enhance the flavors.
Cheese-Stuffed Dates Wrapped in Bacon

Cheese-stuffed dates wrapped in bacon are a delightful blend of sweet and savory flavors. The natural sweetness of the dates pairs wonderfully with the salty, crispy bacon, creating a snack that is simply irresistible. This no-bake recipe is not only easy to prepare but also requires minimal cooking, making it a perfect addition to any gathering.
With just a few ingredients and simple steps, these finger foods come together quickly, allowing you to spend more time enjoying the company of your guests. Whether you’re hosting a party or just looking for a fun snack, these cheese-stuffed dates are sure to impress everyone at the table.
Ingredients
- 12 large Medjool dates
- 6 ounces cream cheese, softened
- 6 slices of bacon, halved
- 1 tablespoon fresh rosemary, chopped
- Salt and pepper to taste
Instructions
- Preheat the oven to 400°F (200°C).
- Make a lengthwise slit in each date and remove the pit. Stuff each date with a small amount of cream cheese and sprinkle with chopped rosemary, salt, and pepper.
- Wrap each stuffed date with a half slice of bacon, securing it with a toothpick if necessary.
- Place the wrapped dates on a baking sheet lined with parchment paper.
- Bake for 15-20 minutes, or until the bacon is crispy and golden brown.
- Remove from the oven and let cool slightly before serving. Enjoy!
Dark Chocolate-Dipped Pretzels

Dark chocolate-dipped pretzels combine sweet and salty in the easiest way possible. These treats are not only delightful to munch on but also look elegant, making them perfect for any gathering. The satisfying crunch of the pretzel paired with the rich, velvety chocolate will keep your guests coming back for more.
Plus, this recipe is super simple to whip up, requiring no baking at all! With just a few ingredients, you can create a tasty finger food that will impress your friends and family without any fuss.

Ingredients
- 2 cups pretzels (mini or regular)
- 1 cup dark chocolate chips
- 1 teaspoon coconut oil (optional, for a smoother chocolate)
- Sea salt (for topping)
Instructions
- Melt the Chocolate: In a microwave-safe bowl, combine the dark chocolate chips and coconut oil (if using). Heat in the microwave for 30 seconds at a time, stirring in between, until the chocolate is completely melted and smooth.
- Dip the Pretzels: Hold each pretzel by one end and dip it into the melted chocolate, allowing the excess to drip off. Place the dipped pretzel on a baking sheet lined with parchment paper.
- Add Sea Salt: Before the chocolate sets, sprinkle a pinch of sea salt on the chocolate-covered pretzels for that perfect sweet-salty balance.
- Set and Serve: Let the pretzels cool until the chocolate hardens. You can speed this up by placing them in the refrigerator for about 15 minutes. Serve and enjoy your delicious dark chocolate-dipped pretzels!
Nutty Granola Bars
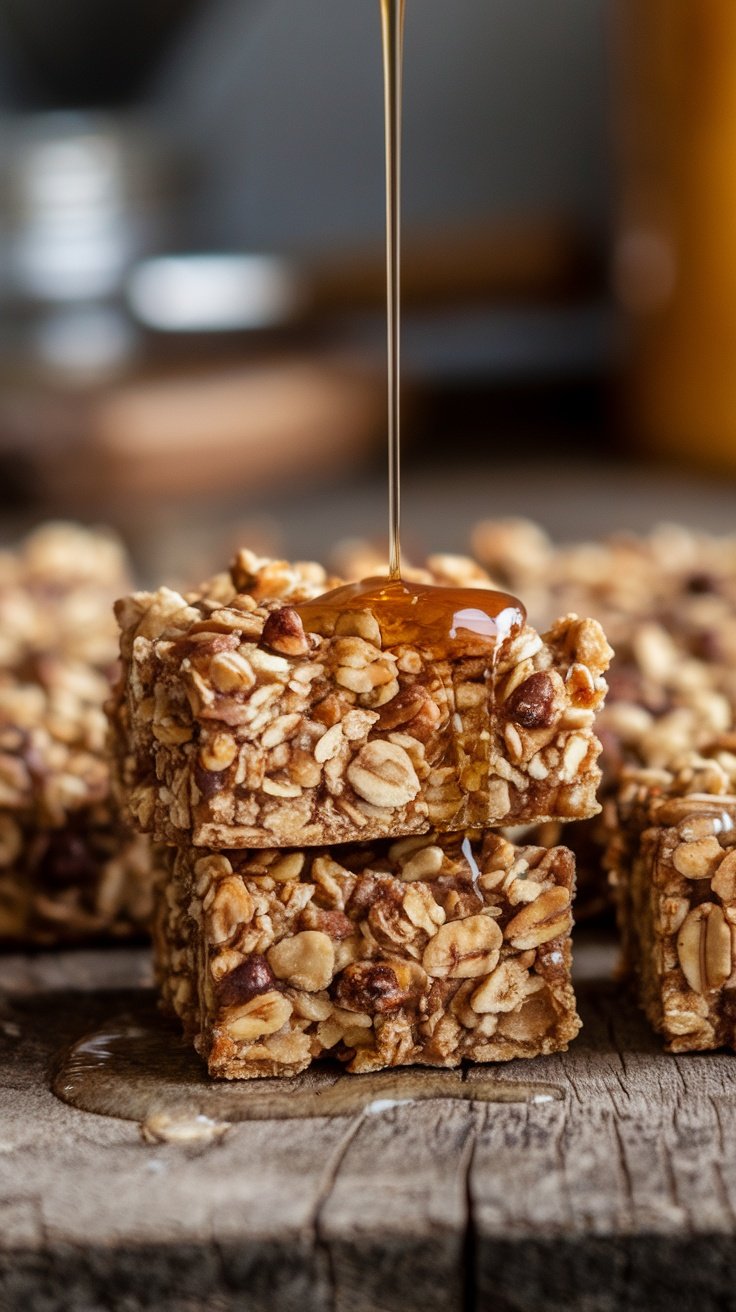
Nutty granola bars are a satisfying and nutritious snack that are both crunchy and chewy. These bars are easy to whip up and can be customized with your favorite nuts, seeds, and dried fruits, allowing for a fun twist every time you make them. Perfect for a quick bite between meals or as a grab-and-go treat, they bring a delightful blend of flavors and textures.
Making these bars is simple and doesn’t require any baking, making them a perfect addition to our list of 15 No-Bake Finger Foods Recipes. With just a few ingredients, you’ll have a wholesome snack ready in no time!
Ingredients
- 2 cups rolled oats
- 1 cup mixed nuts (chopped)
- 1/2 cup honey or maple syrup
- 1/2 cup nut butter (peanut, almond, or cashew)
- 1/2 cup dried fruit (raisins, cranberries, or apricots)
- 1/2 teaspoon vanilla extract
- 1/4 teaspoon salt
Instructions
- Prepare the Mixture: In a large mixing bowl, combine the rolled oats, chopped nuts, dried fruit, and salt. In a small saucepan over low heat, melt the nut butter and honey (or maple syrup) together until well combined. Stir in the vanilla extract.
- Combine: Pour the nut butter mixture over the dry ingredients and mix until everything is evenly coated.
- Press and Chill: Line an 8×8 inch baking dish with parchment paper. Press the mixture firmly into the pan using a spatula or your hands. Cover and refrigerate for at least 2 hours to set.
- Cut: Once set, lift the bars out of the dish and cut into squares or rectangles as desired. Store in an airtight container in the refrigerator for up to a week.
No-Bake Energy Bites
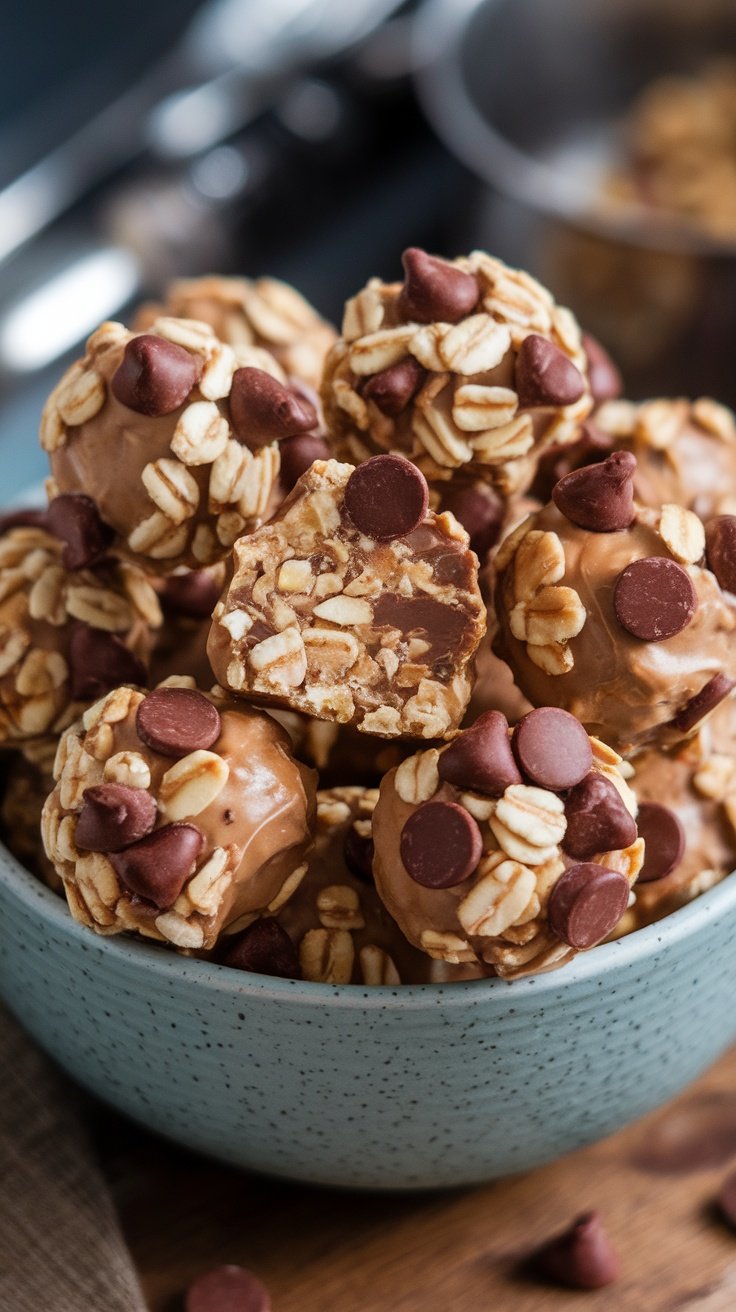
No-bake energy bites are the ultimate snack for those who want a quick, healthy treat without the hassle of baking. These little bites pack a punch of flavor with a delightful mix of nut butter, oats, and optional add-ins like chocolate chips or dried fruits. They have a sweet yet hearty taste that makes them perfect for satisfying your cravings.
What’s even better? They are super easy to make! Just mix the ingredients in a bowl, roll them into balls, and they’re ready to munch on. These energy bites are not only tasty but also provide a great energy boost, making them ideal for busy days or a post-workout snack. Here’s how to whip up a batch.
Ingredients
- 1 cup old-fashioned oats
- 1/2 cup nut butter (peanut, almond, or sunflower)
- 1/3 cup honey or maple syrup
- 1/2 cup mini chocolate chips
- 1/4 cup ground flaxseed (optional)
- 1/2 teaspoon vanilla extract
Instructions
- Combine Ingredients: In a mixing bowl, combine oats, nut butter, honey, chocolate chips, and flaxseed (if using). Add vanilla extract and mix until all ingredients are well combined.
- Form Bites: Using your hands, scoop out small portions of the mixture and roll them into bite-sized balls.
- Chill: Place the energy bites on a baking sheet lined with parchment paper and refrigerate for about 30 minutes to set.
- Store: Once firm, transfer them to an airtight container and store in the fridge for up to a week.
Mediterranean Chickpea Salad Cups
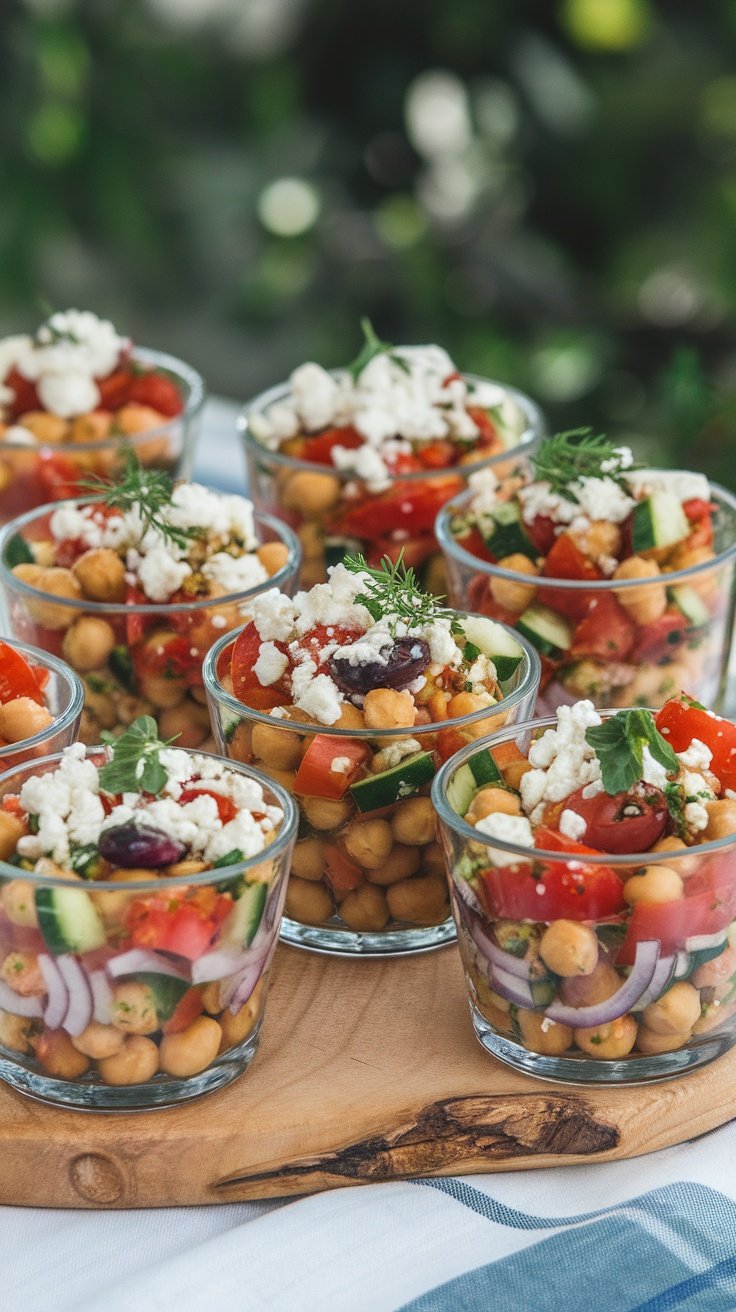
Mediterranean Chickpea Salad Cups are a delightful and refreshing choice for your next gathering. Packed with vibrant flavors and textures, this recipe is both easy to prepare and enjoyable to eat. The combination of fresh vegetables, protein-rich chickpeas, and tangy feta cheese makes these cups a guilt-free snack that everyone will love.
These salad cups are versatile and can be customized based on your preferences. The bright colors and appealing presentation make them a perfect finger food for effortless hosting. Plus, the no-bake aspect means you can whip them up in no time, leaving you free to enjoy the company of your guests. Let’s dive into the recipe!
Ingredients
- 1 can (15 oz) chickpeas, drained and rinsed
- 1 cup cherry tomatoes, halved
- 1/2 cucumber, diced
- 1/4 red onion, finely chopped
- 1/2 cup black olives, sliced
- 1/2 cup feta cheese, crumbled
- 1/4 cup fresh parsley, chopped
- 2 tablespoons olive oil
- 1 tablespoon lemon juice
- Salt and pepper to taste
Instructions
- In a large bowl, combine the chickpeas, cherry tomatoes, cucumber, red onion, black olives, and parsley.
- In a small bowl, whisk together the olive oil, lemon juice, salt, and pepper.
- Pour the dressing over the salad mixture and toss to combine gently.
- Divide the salad into individual serving cups and top each with crumbled feta cheese.
- Serve immediately or chill in the fridge for about 20 minutes before serving to let the flavors meld.